MAKE••• A Crochet Scarf!
Scarves are cozy; handmade scarves are even cozier. No pattern, no problem!
Crochet is a very forgiving process, and a scarf is a great beginner project — essentially a loooong rectangle made up of two stitches. That’s it. The DIY below has step-by-step instructions in illustrated images; endlessly repeating gifs to show the repeated movements; and videos you can start, stop, and scrub through to find — and work through — any spots you’re stuck on. Give yourself grace as you figure out how everything fits together, and enjoy seeing your scarf take shape.
Let’s go!!
COLLECT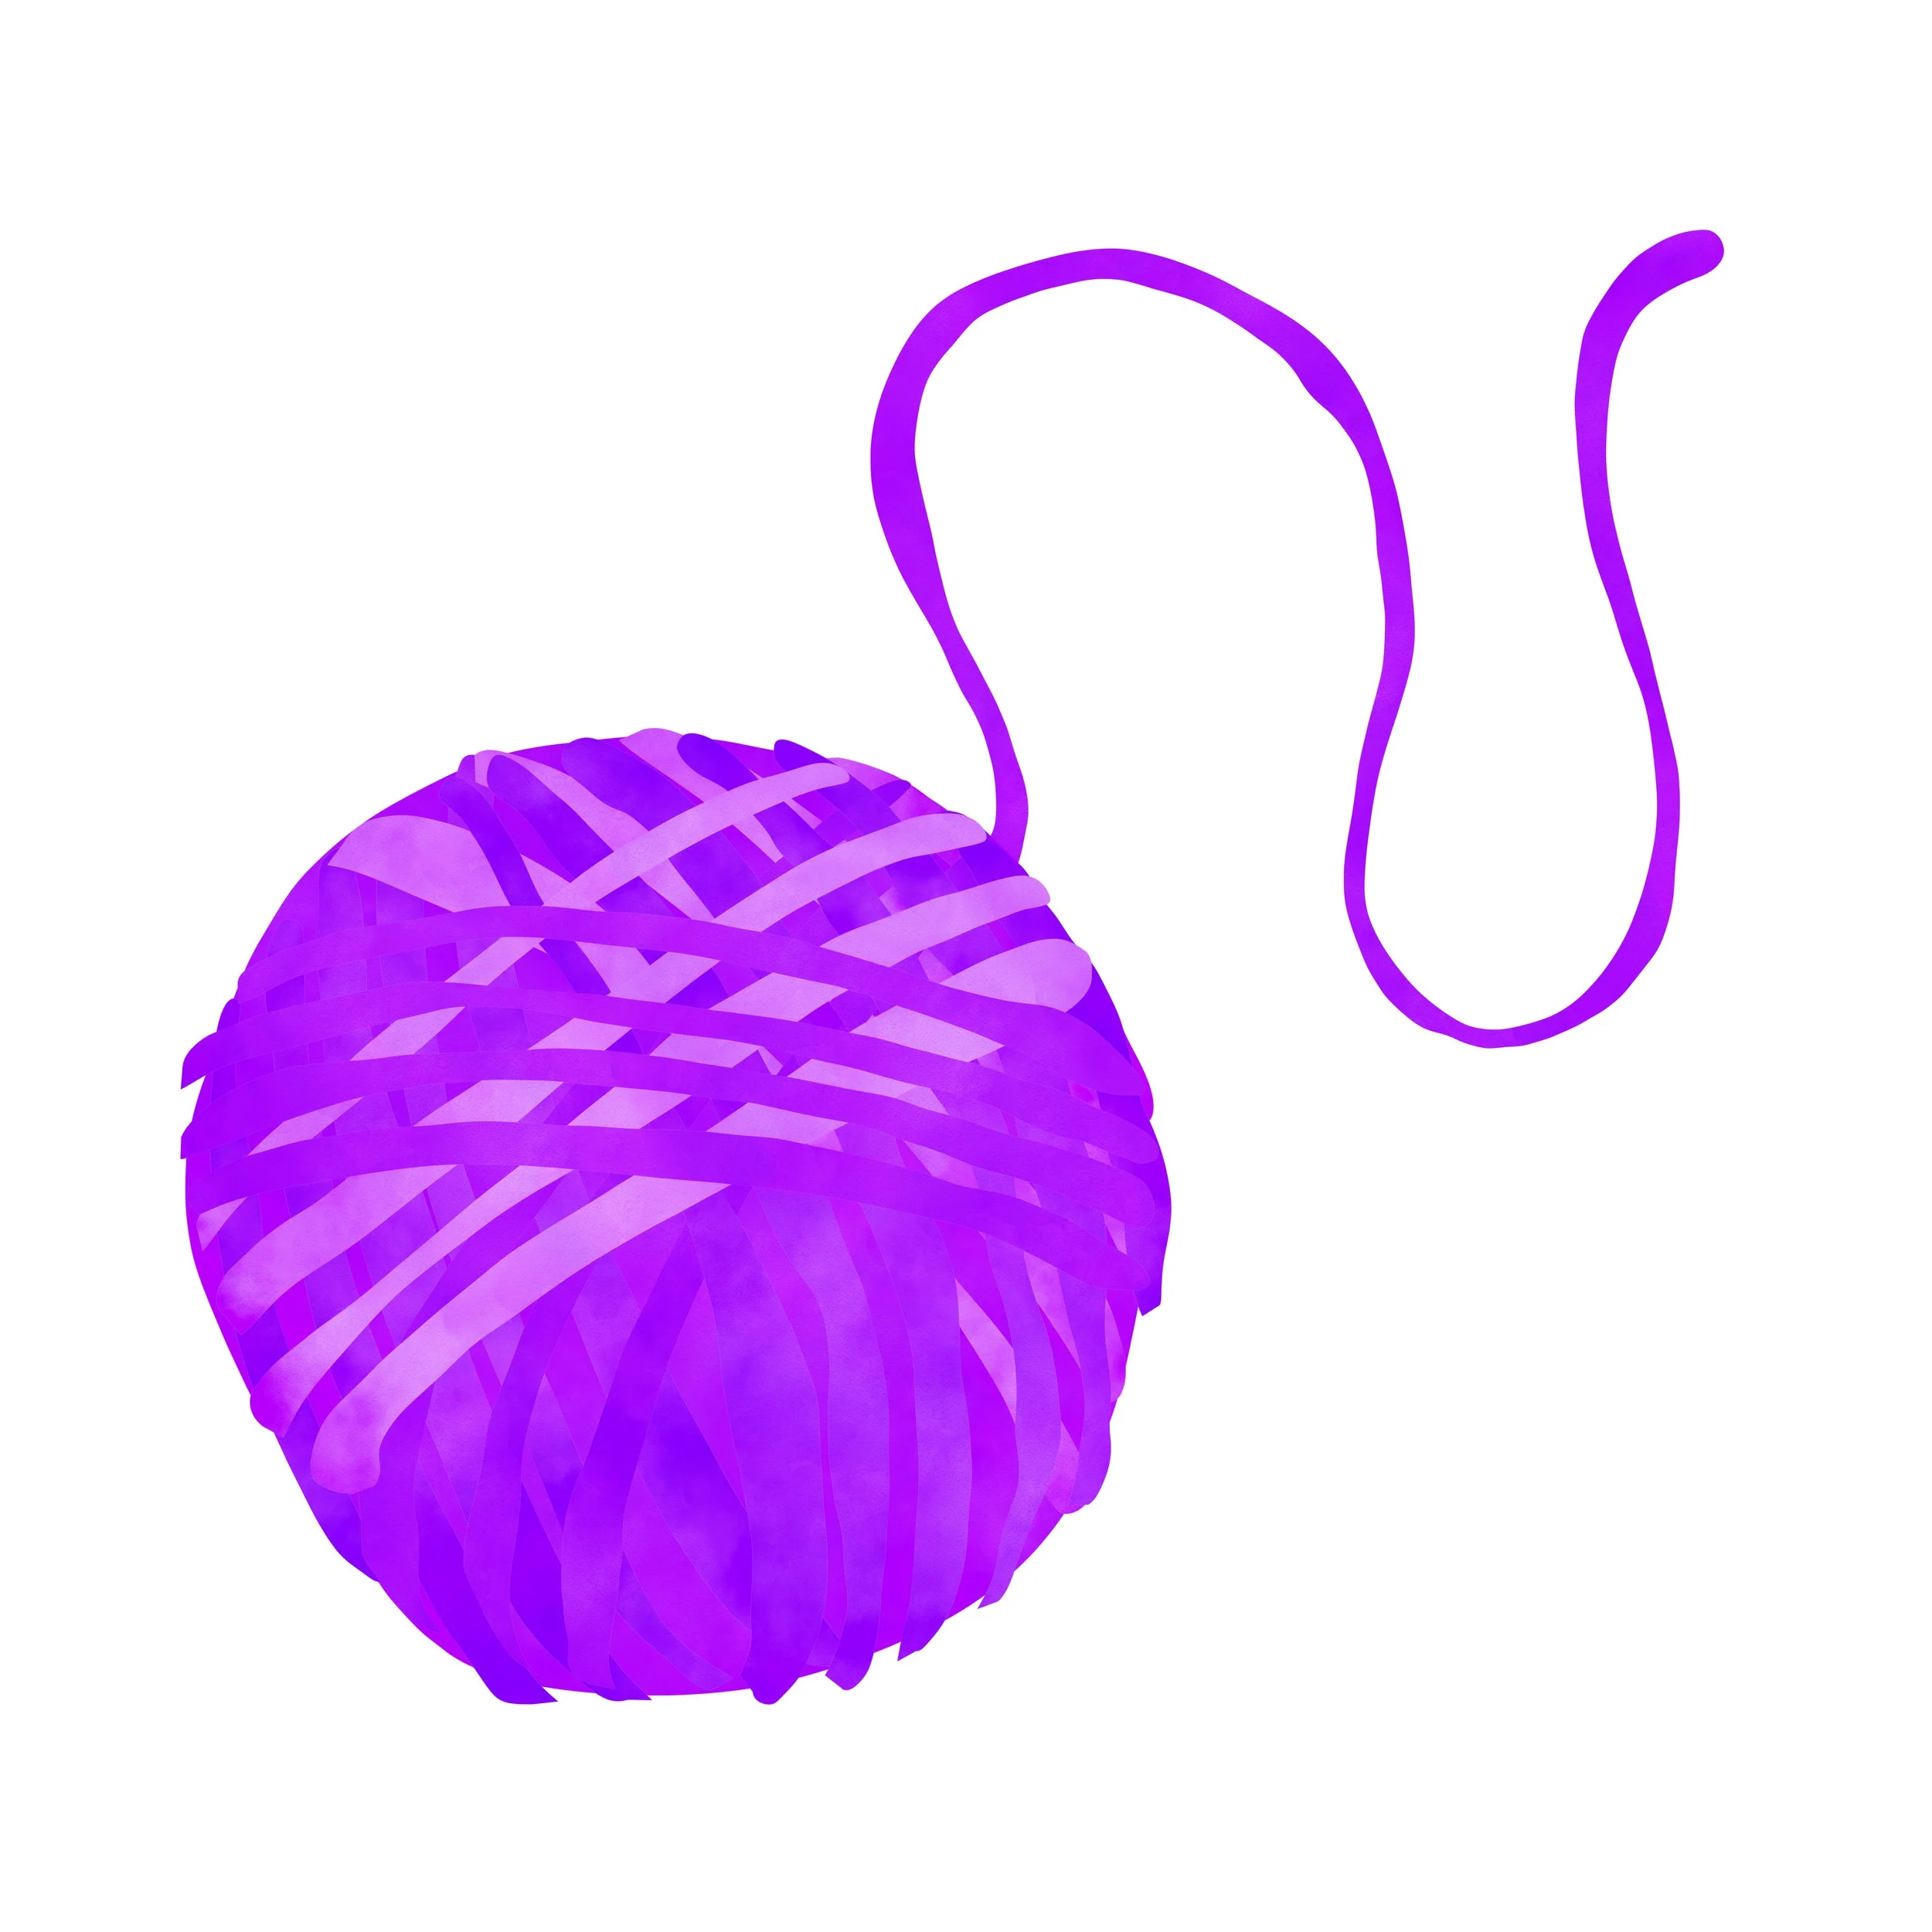
••• yarn

••• crochet hook
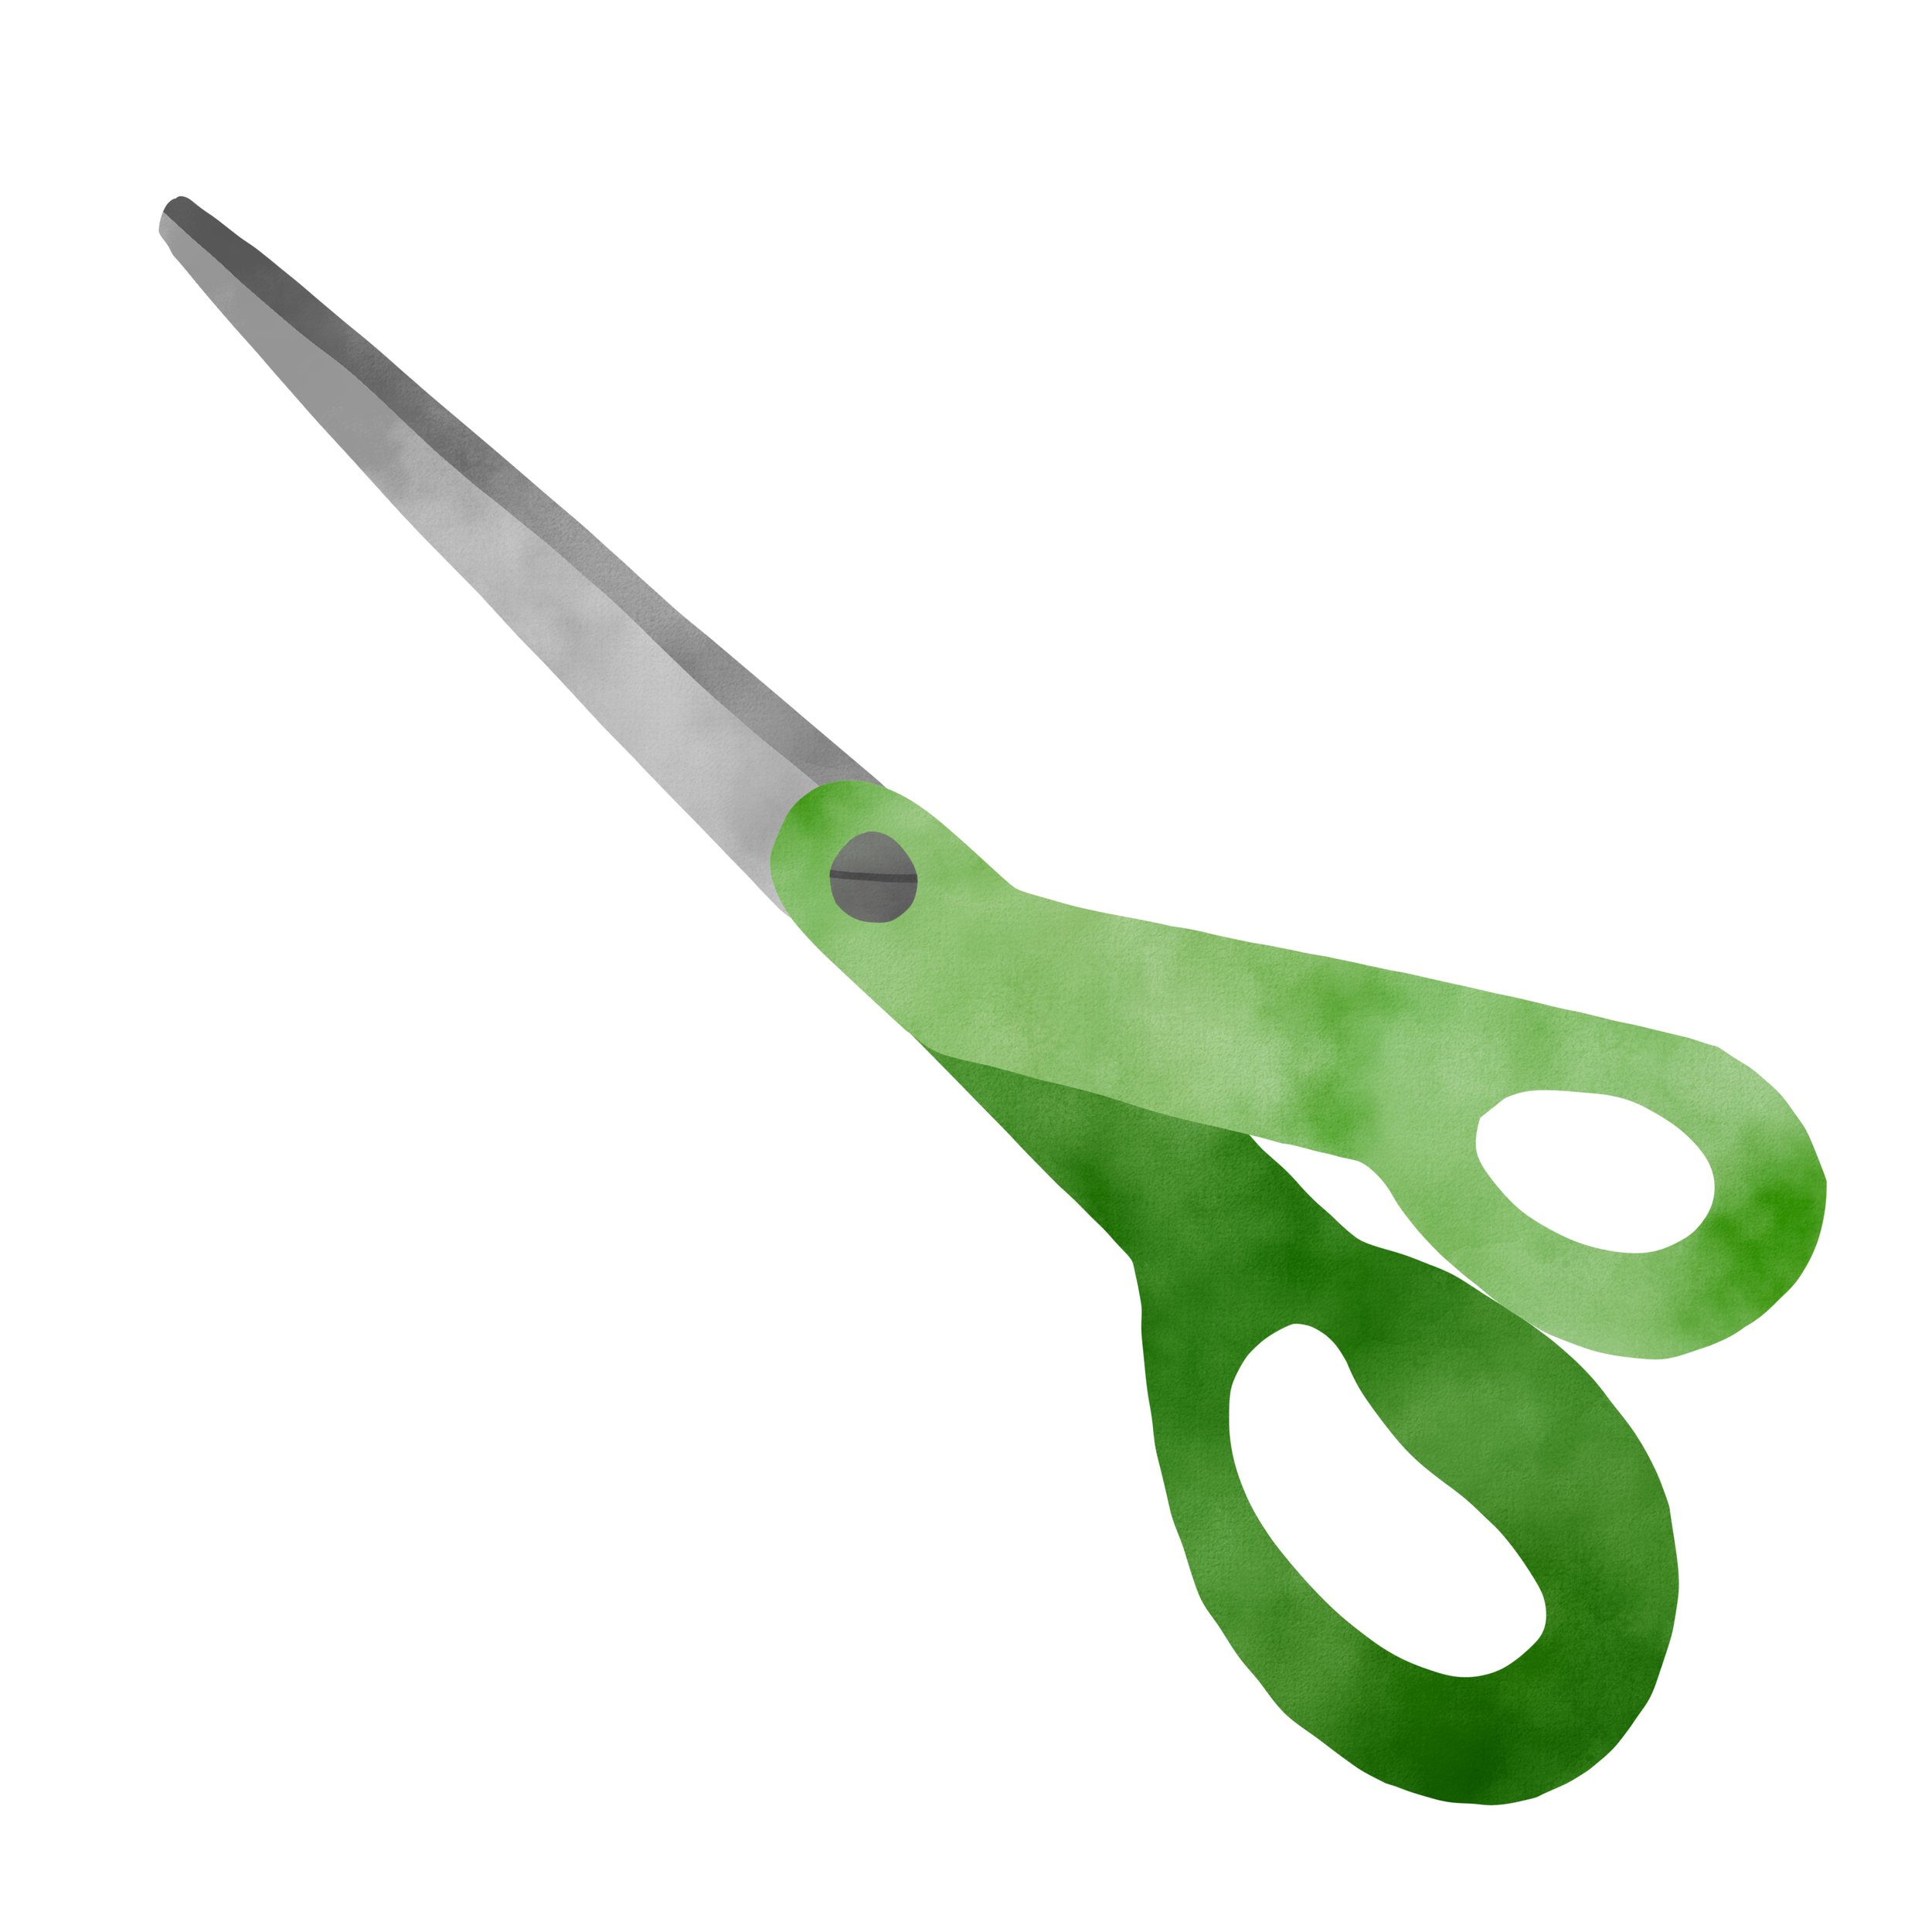
••• scissors
Bigger crochet hook + thicker yarn = looser, chunkier scarf that’s quicker to make.
Try a J (6mm), K (6.5mm), L (8mm), or M (9mm) crochet hook with bulky or super bulky yarn.*
* If you have (or have access to) any yarn, or any crochet hook, start there! There are no magic material(s) that you must use — the most important part is getting hands on; getting started; getting comfortable; and not getting caught up in whether you’ve sourced the “right” things.
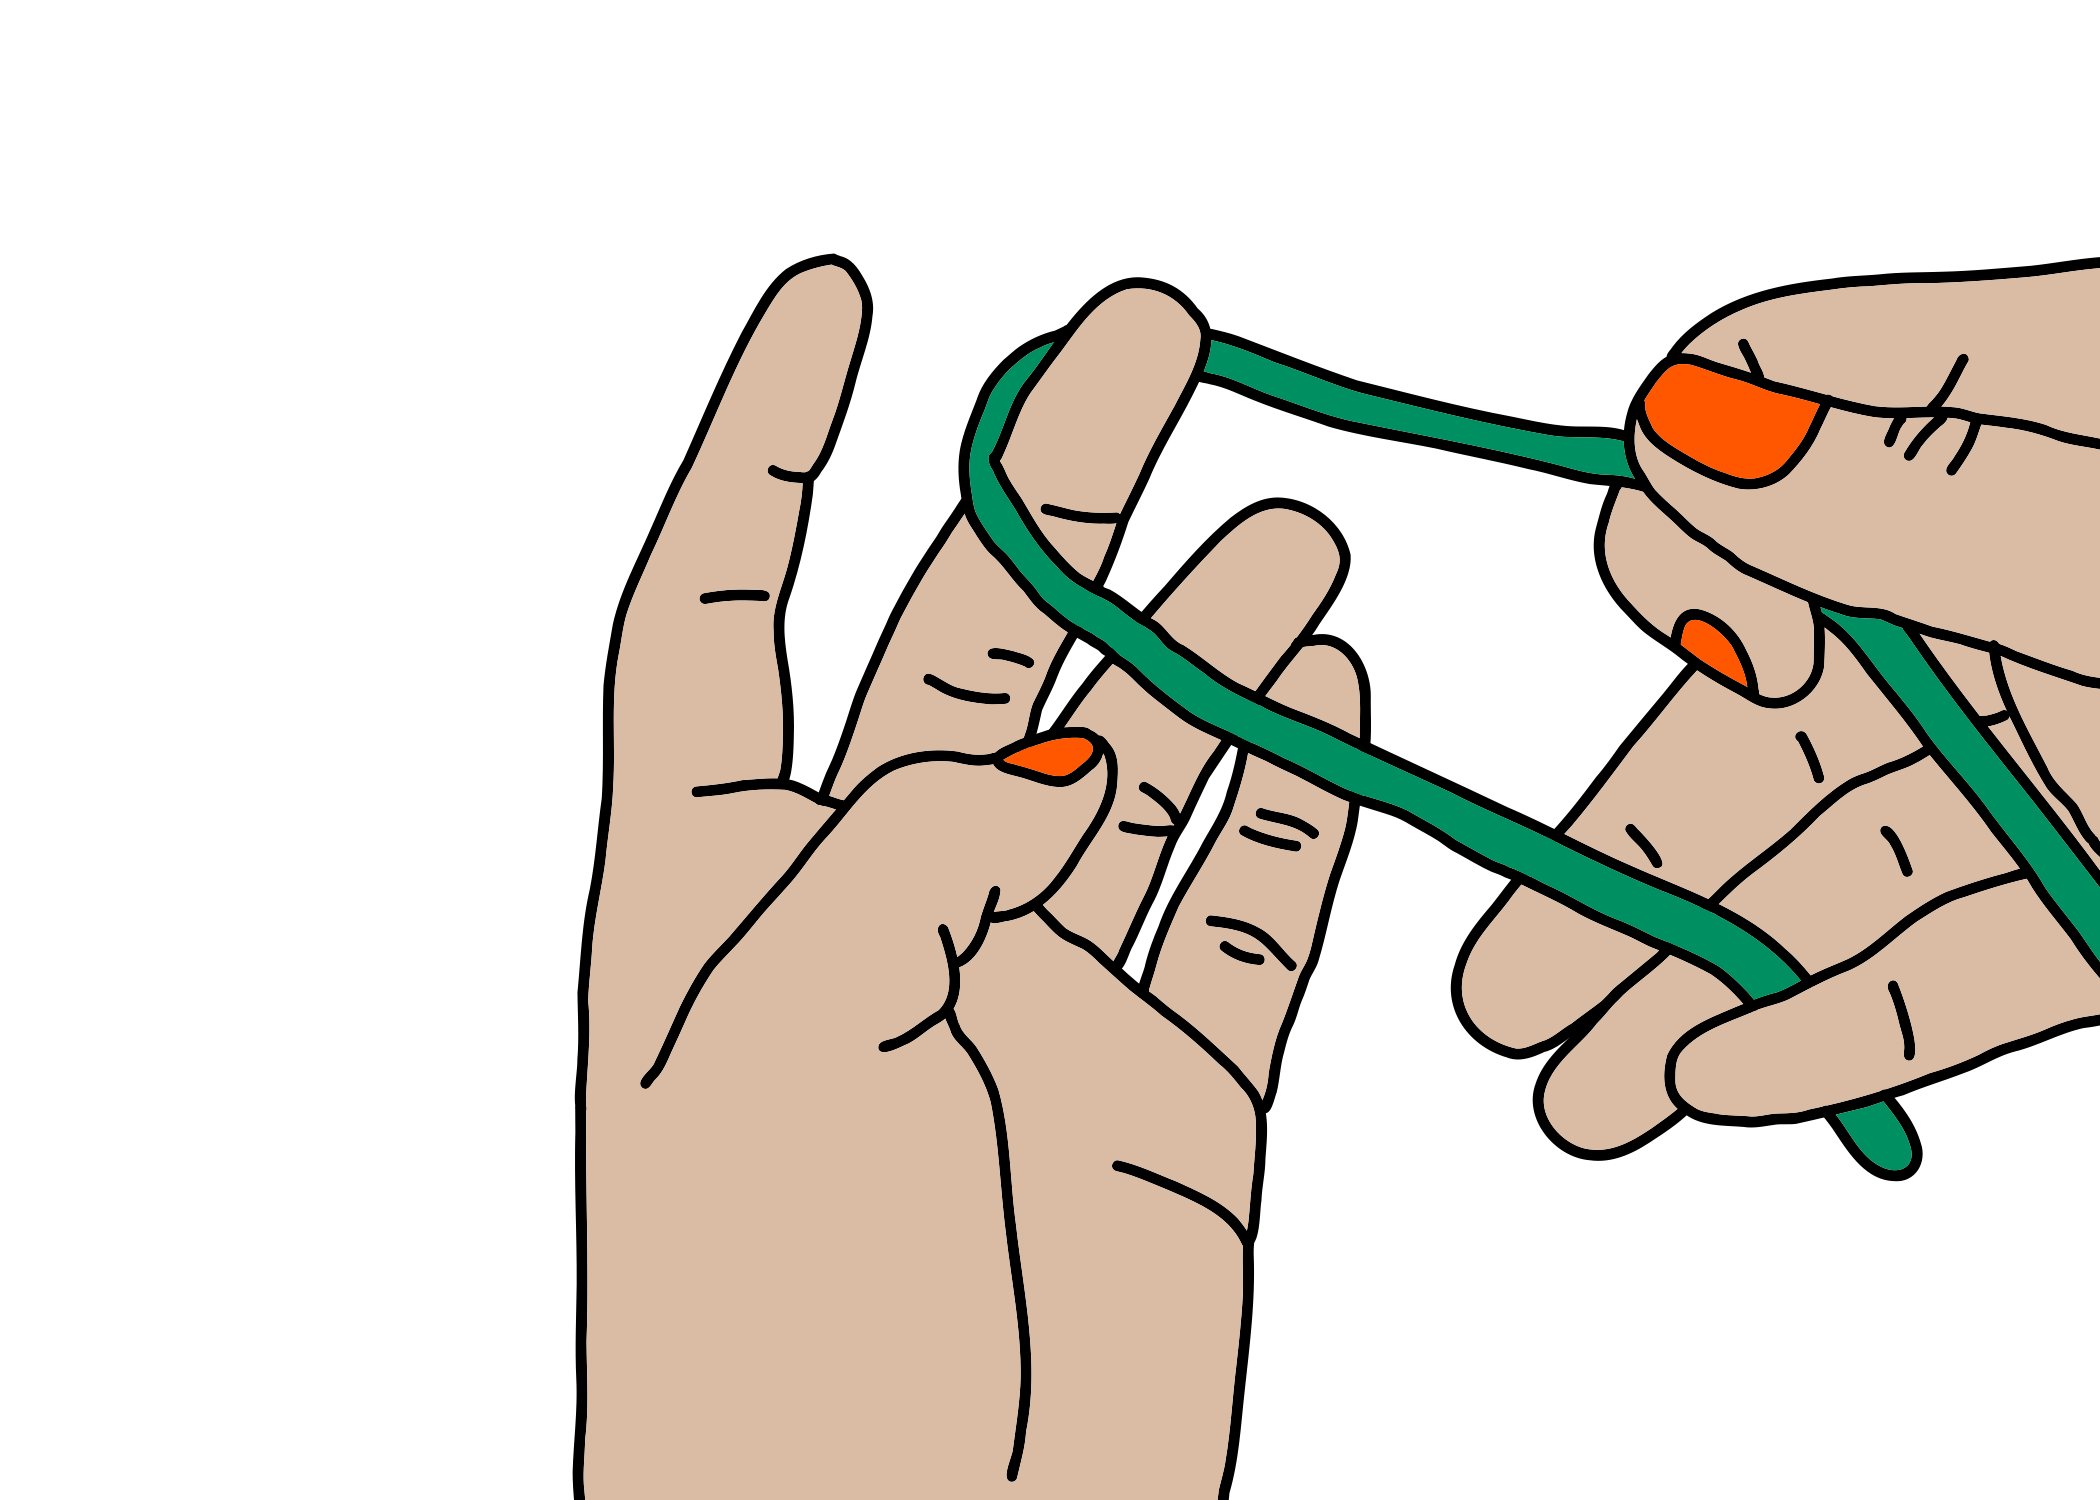
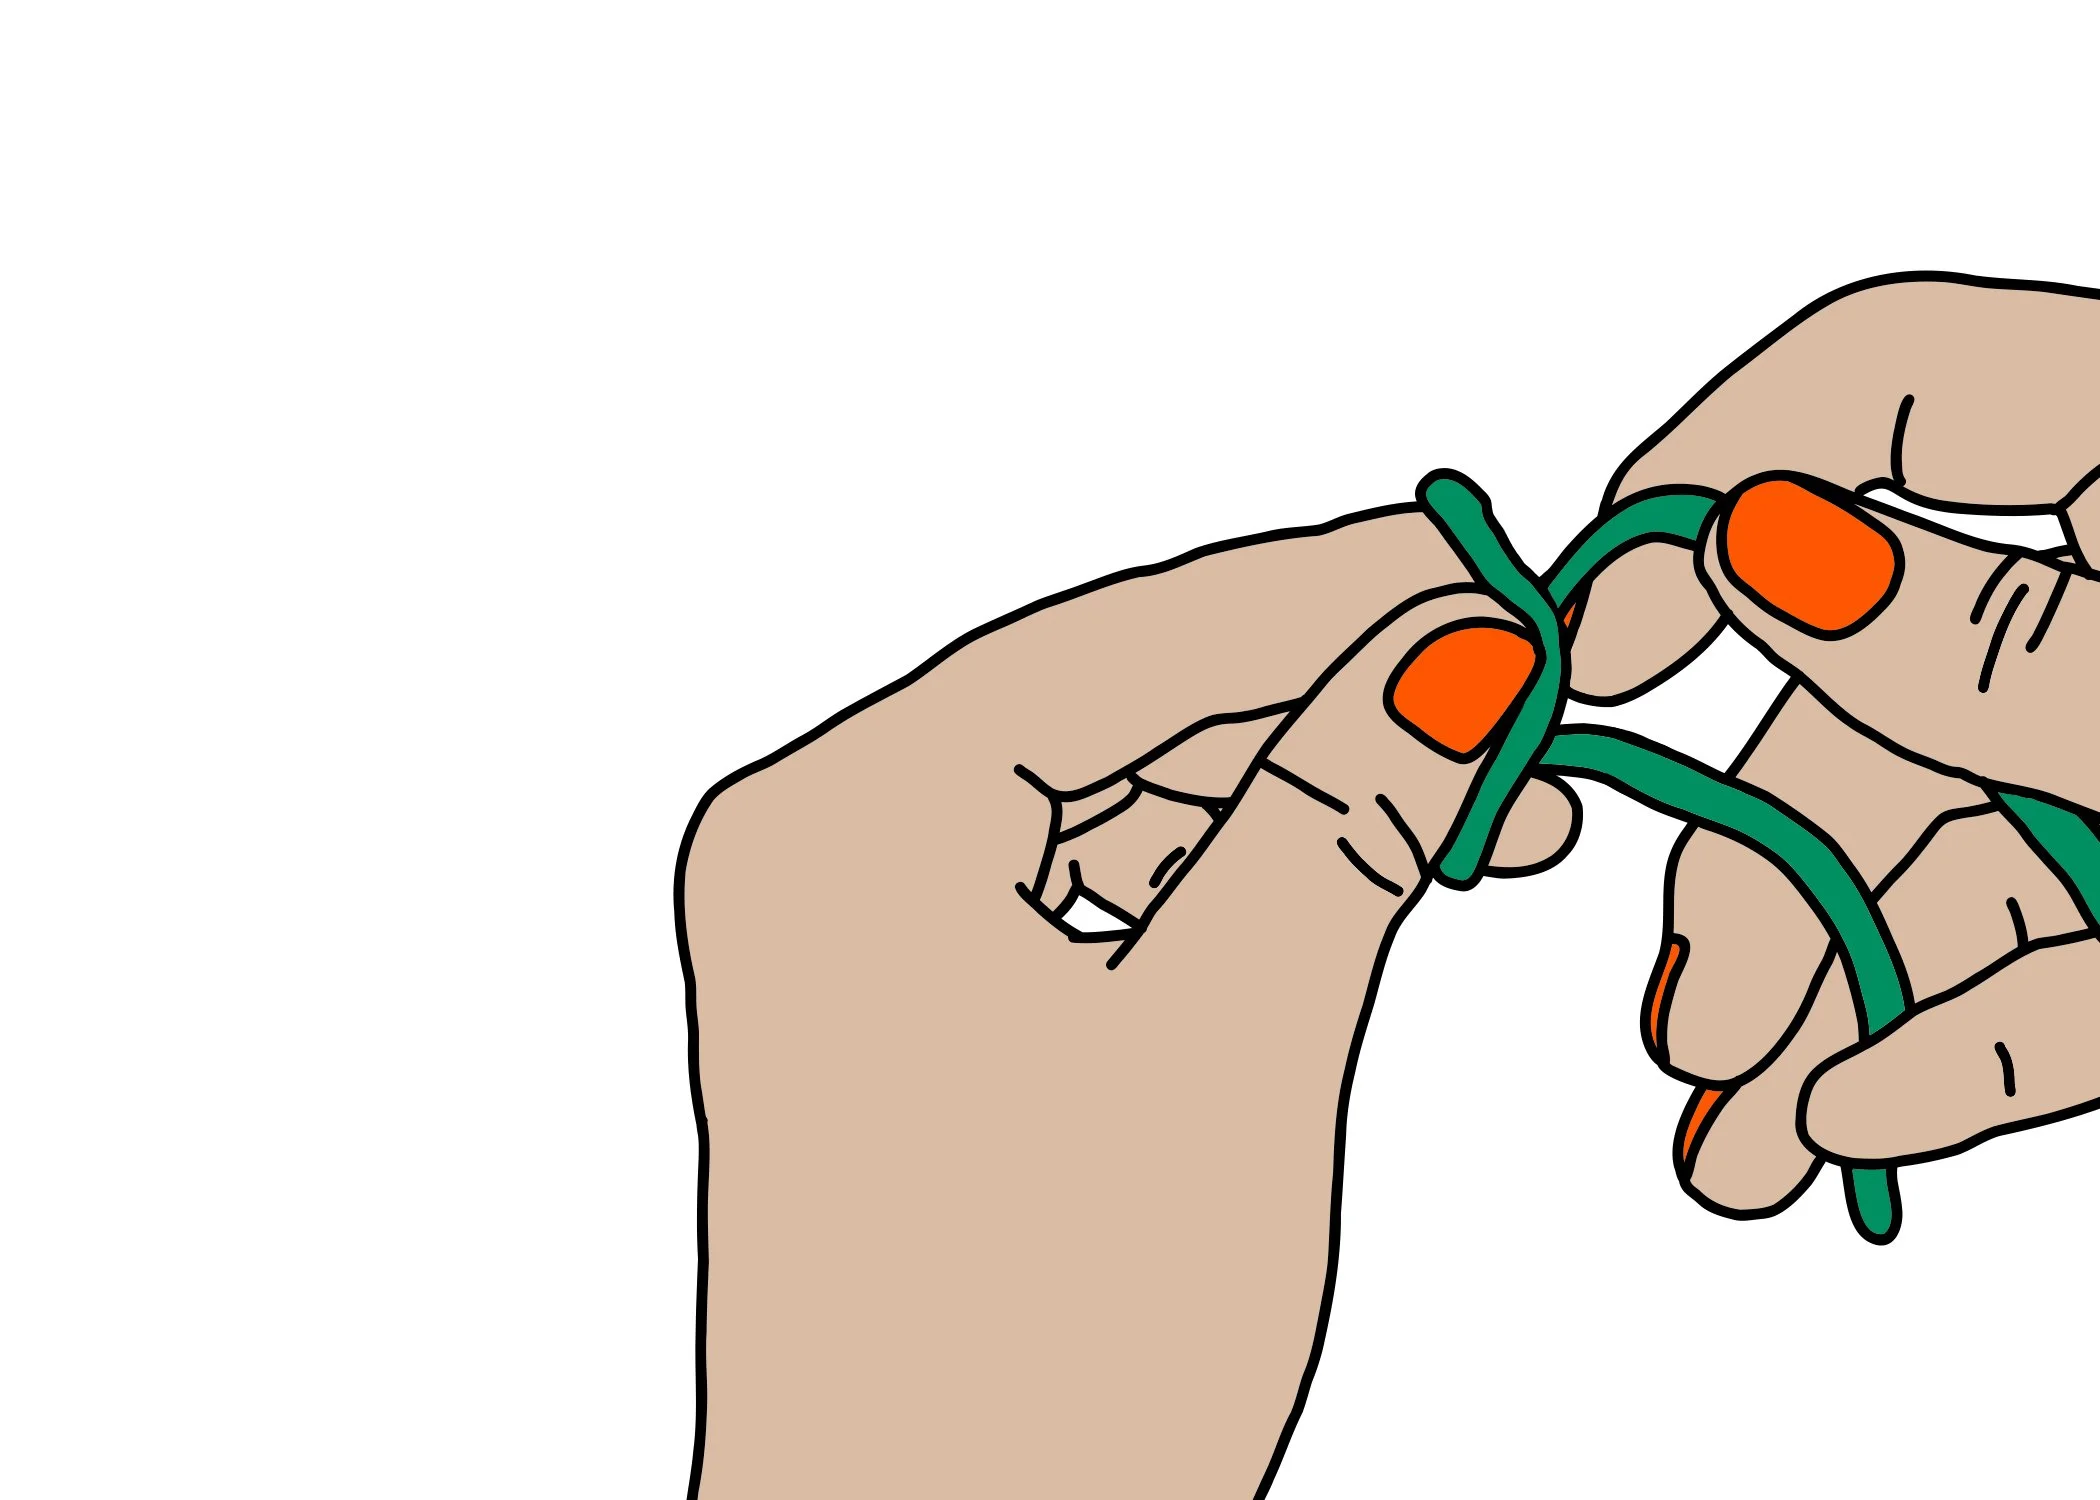
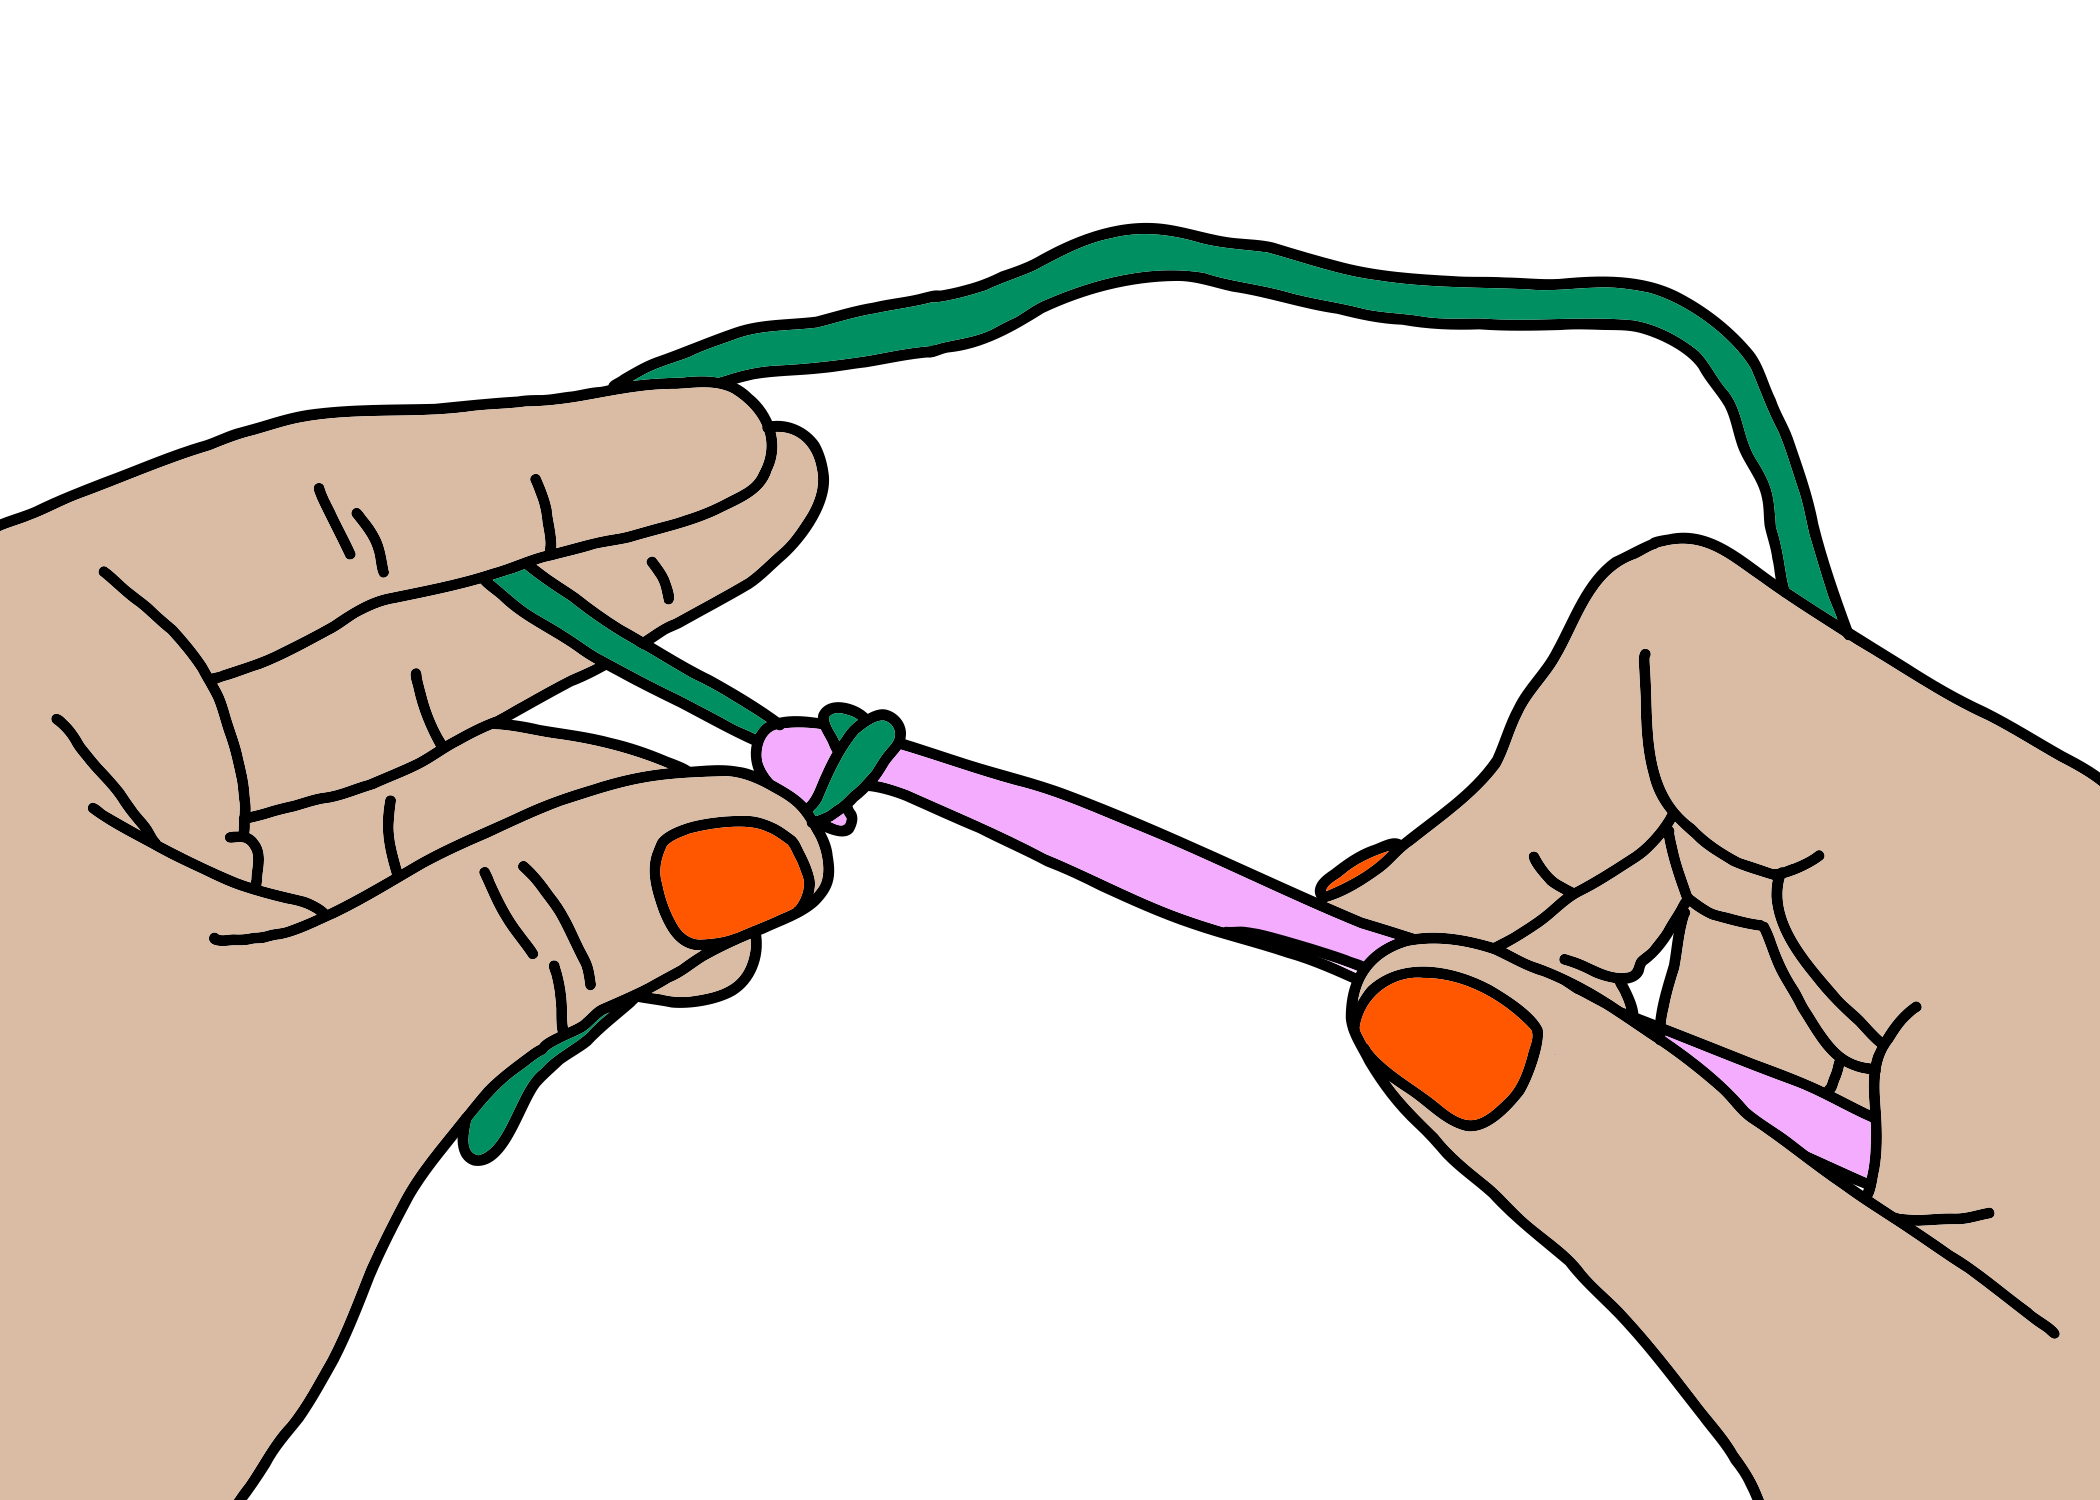
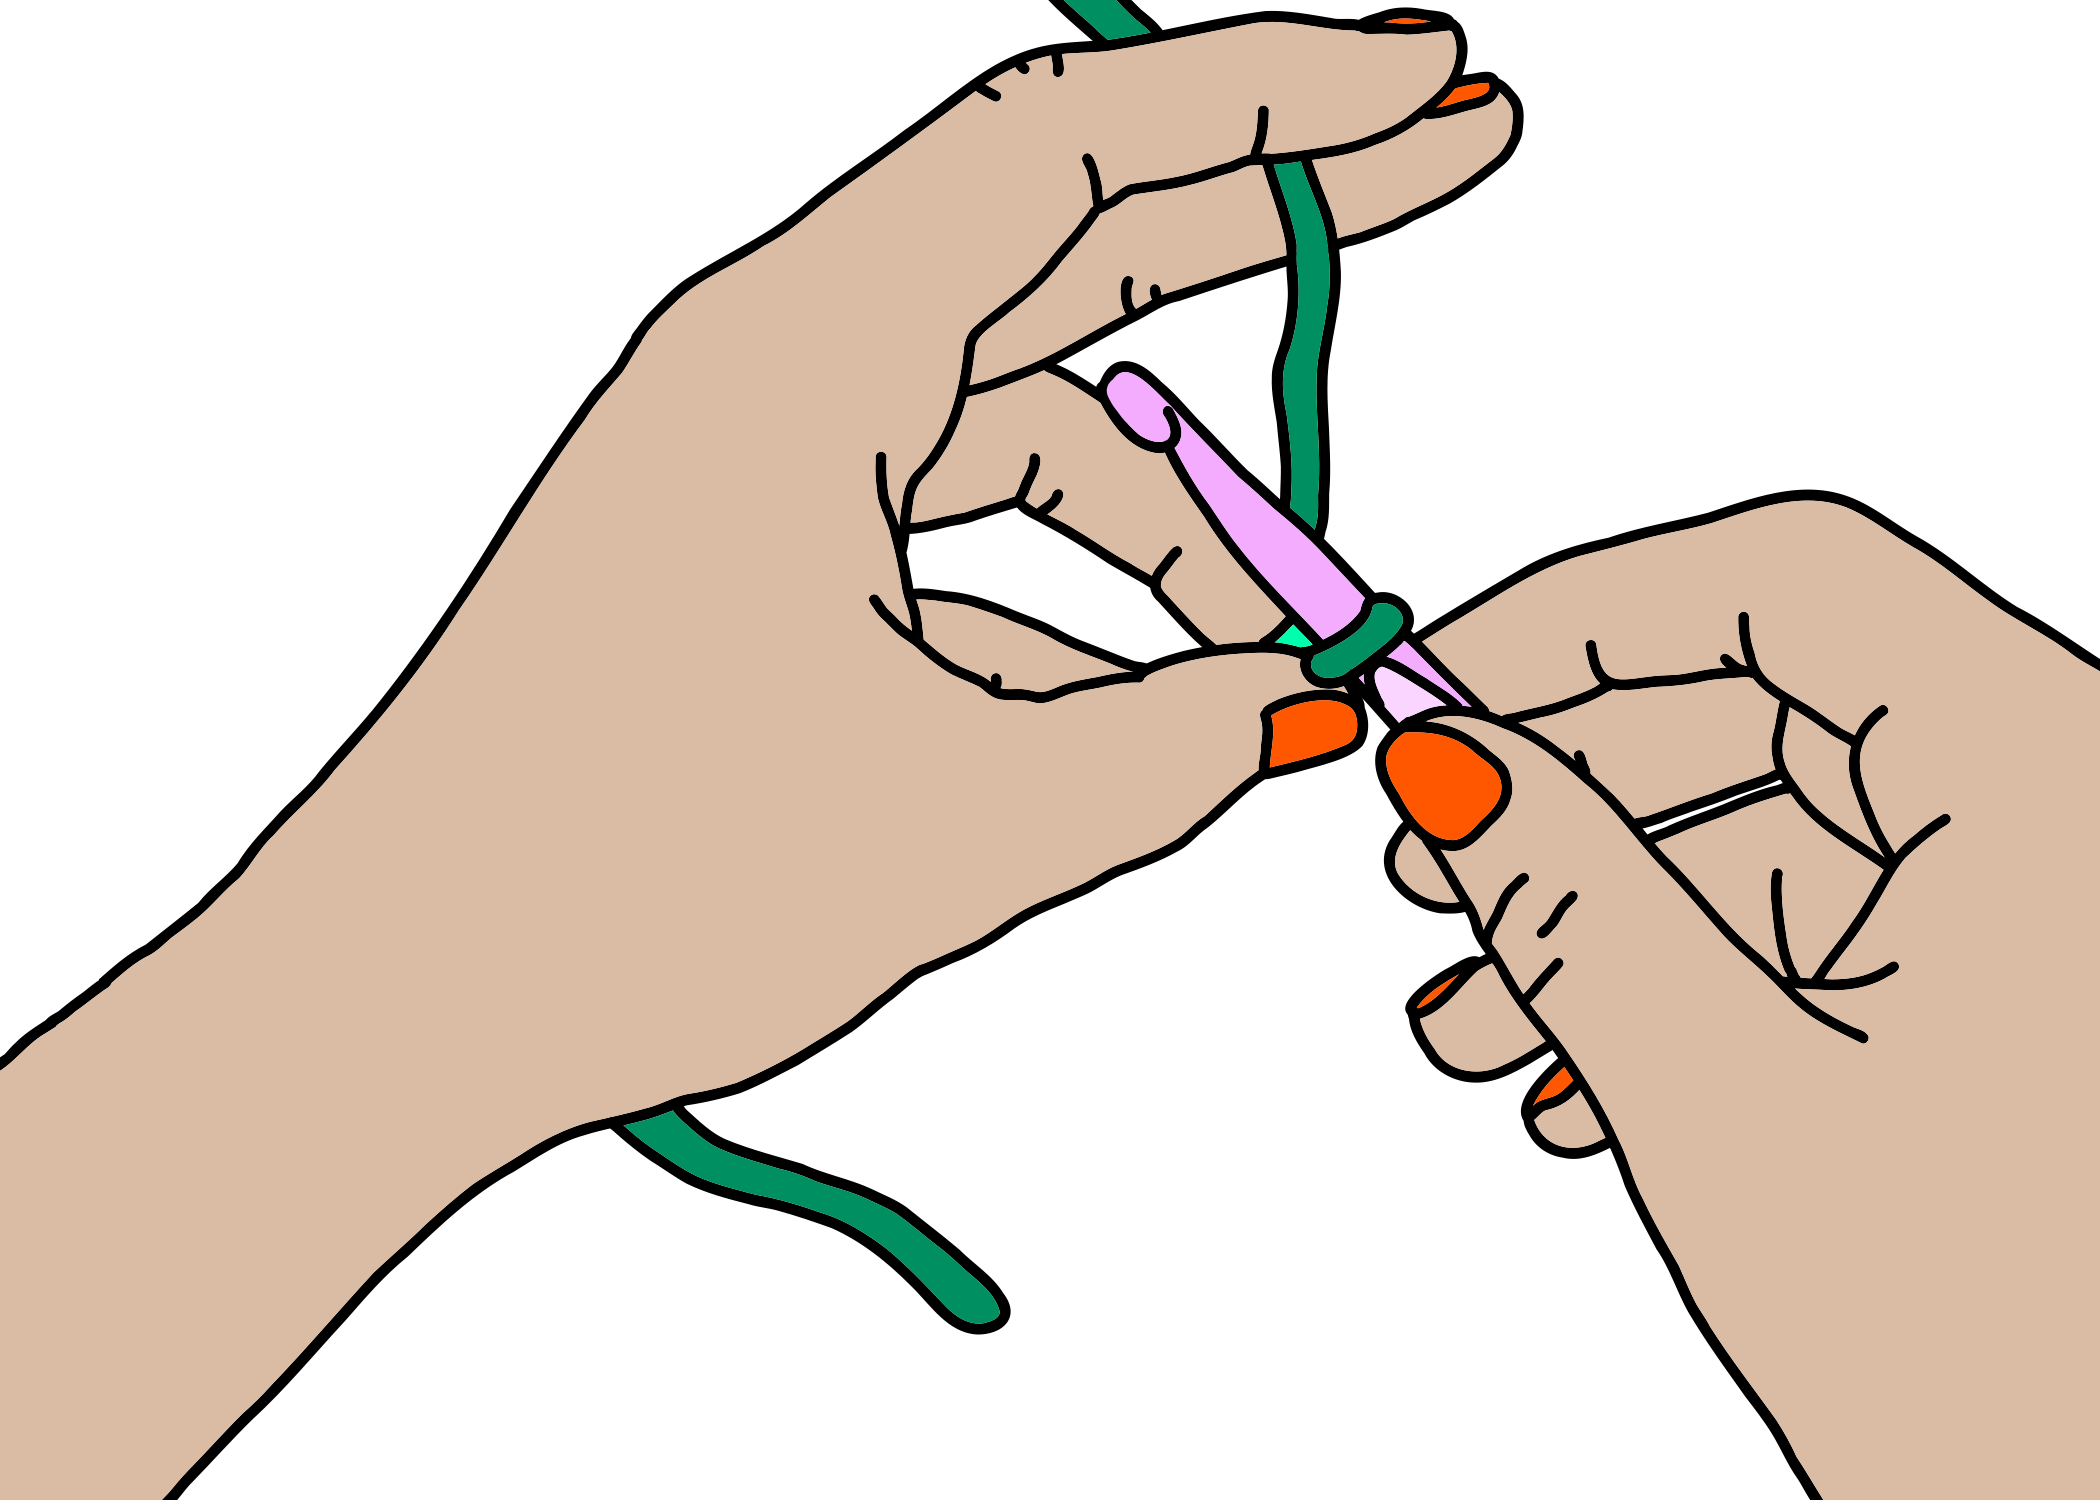
Step one: A single slip knot
Your scarf begins with a basic slip knot, which creates a secure loop for your crochet hook. Leave a few inches of a extra yarn at the end — that’s called the yarn tail. The yarn attached to the skein or ball is called the working yarn.
1:
Make a sideways U with your yarn;
notice how the strands are parallel;
1
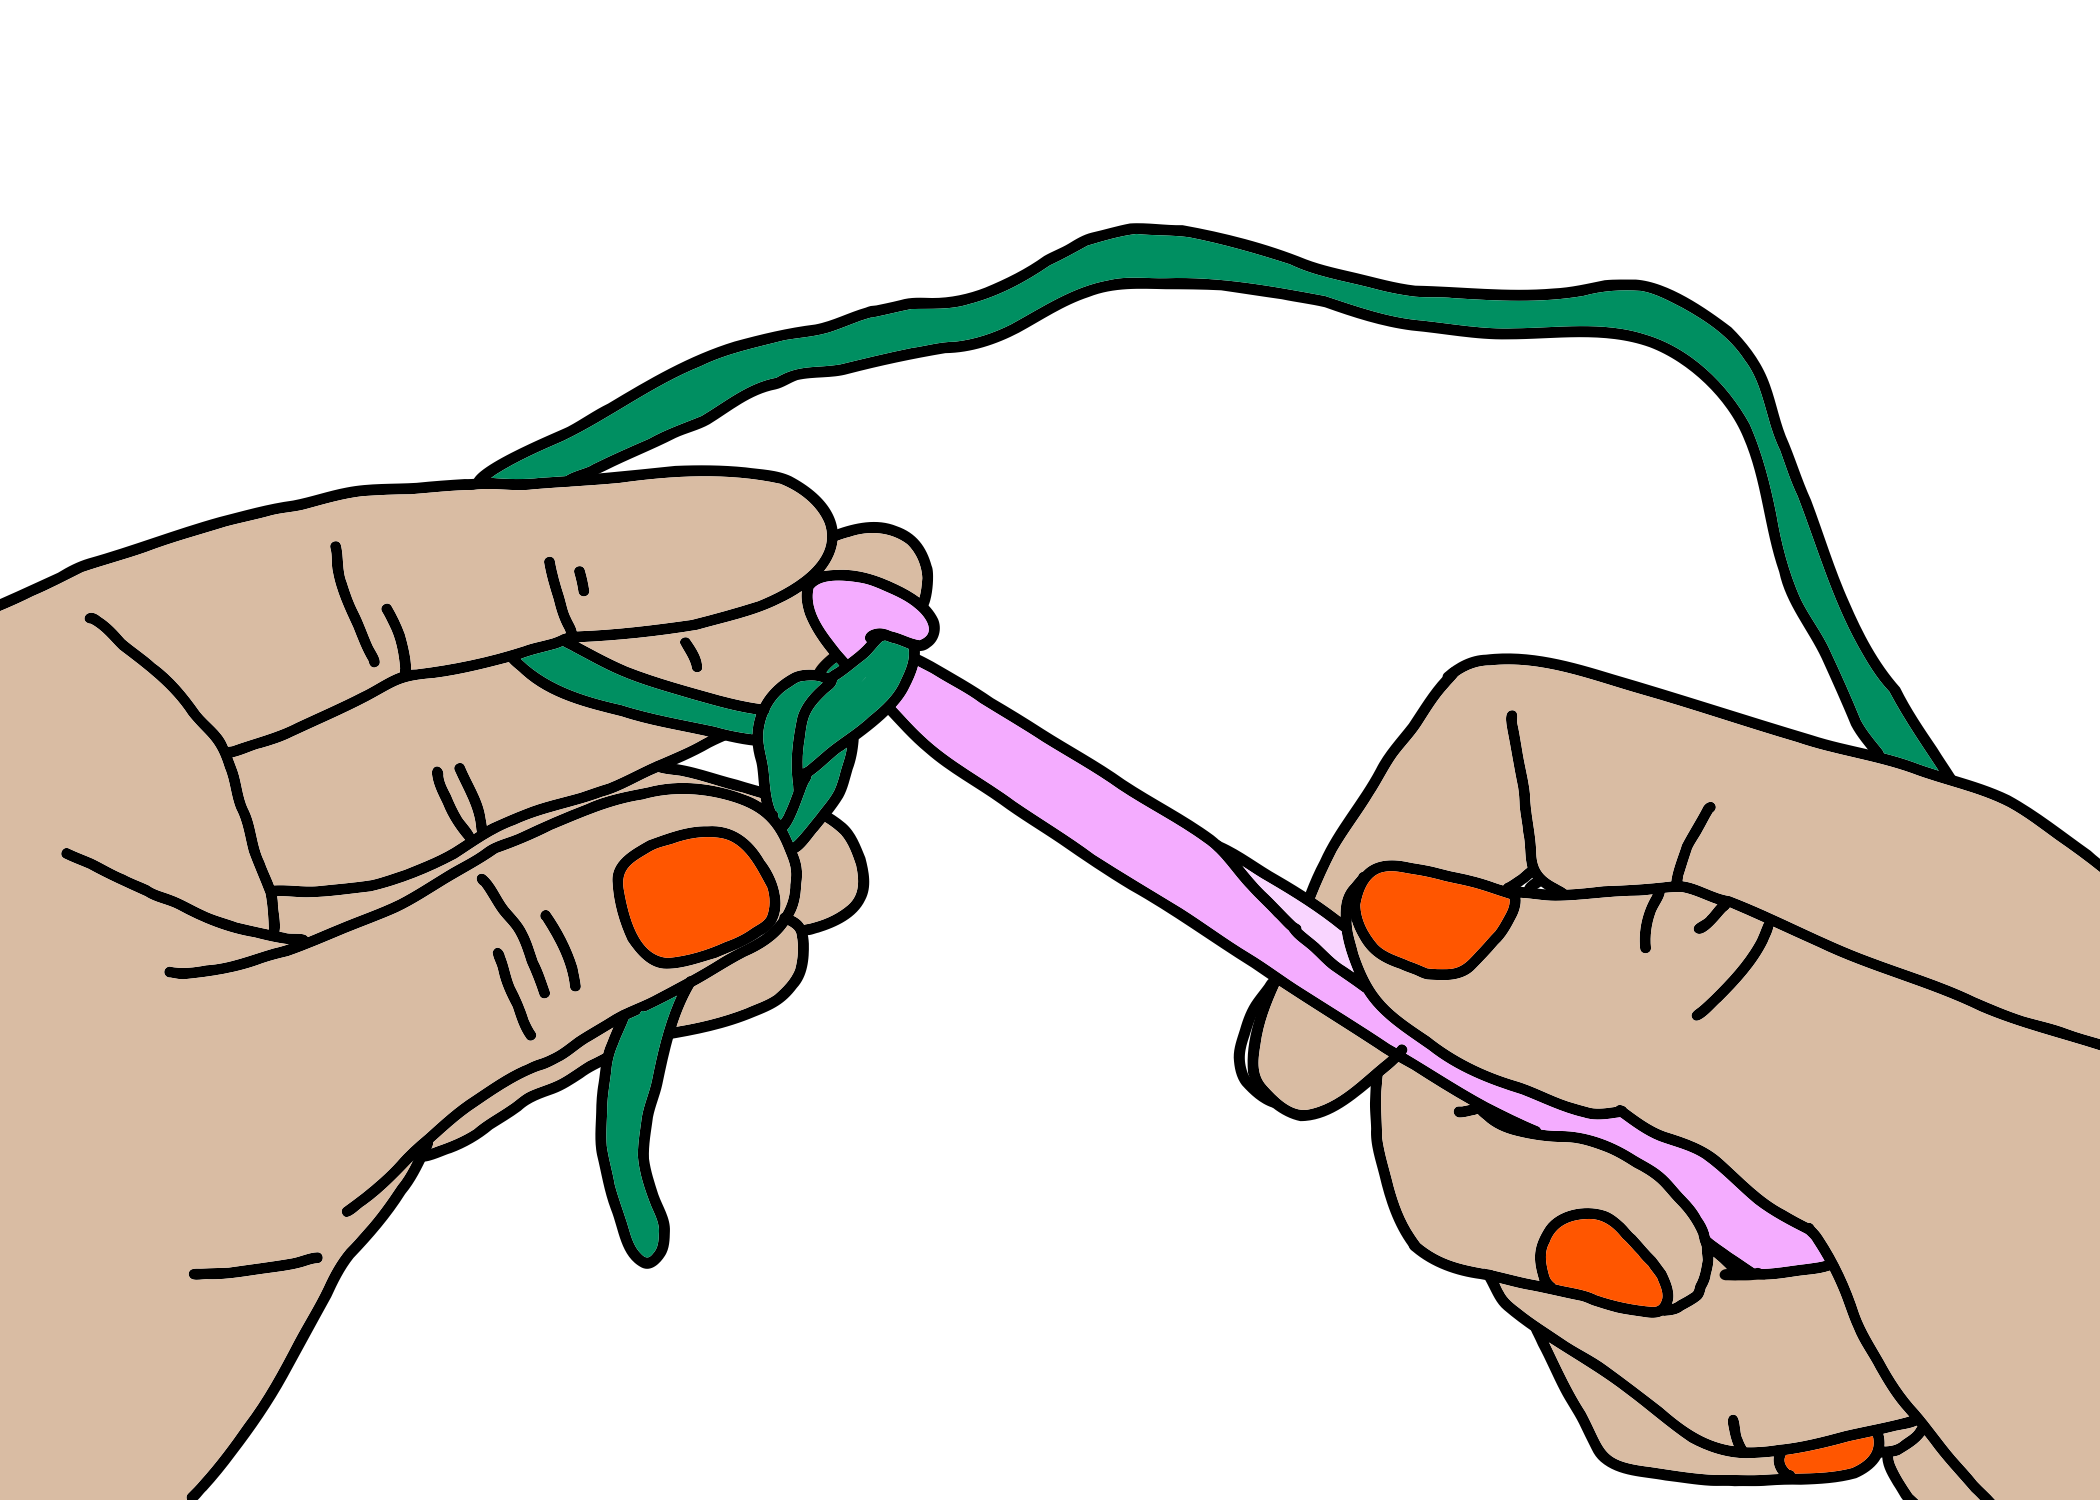
2:
flip the end of the U so it becomes an X;
see how one you’ve created a loop in your left hand, and one strand (the yarn tail) now sits on top of the other (the working yarn);

2
3:
reach your thumb, middle-, and forefinger through the loop to grab the working yarn;
3
4:
pull the working yarn through the loop and tighten.

4
Here’s how it looks in action: gif, then vid.
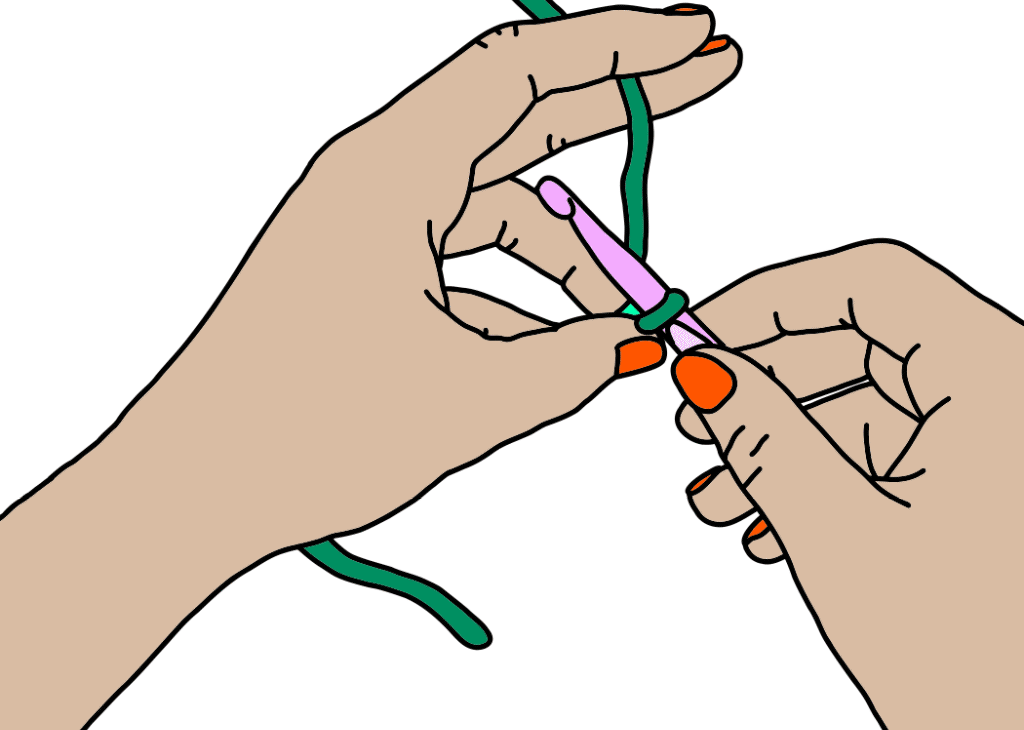
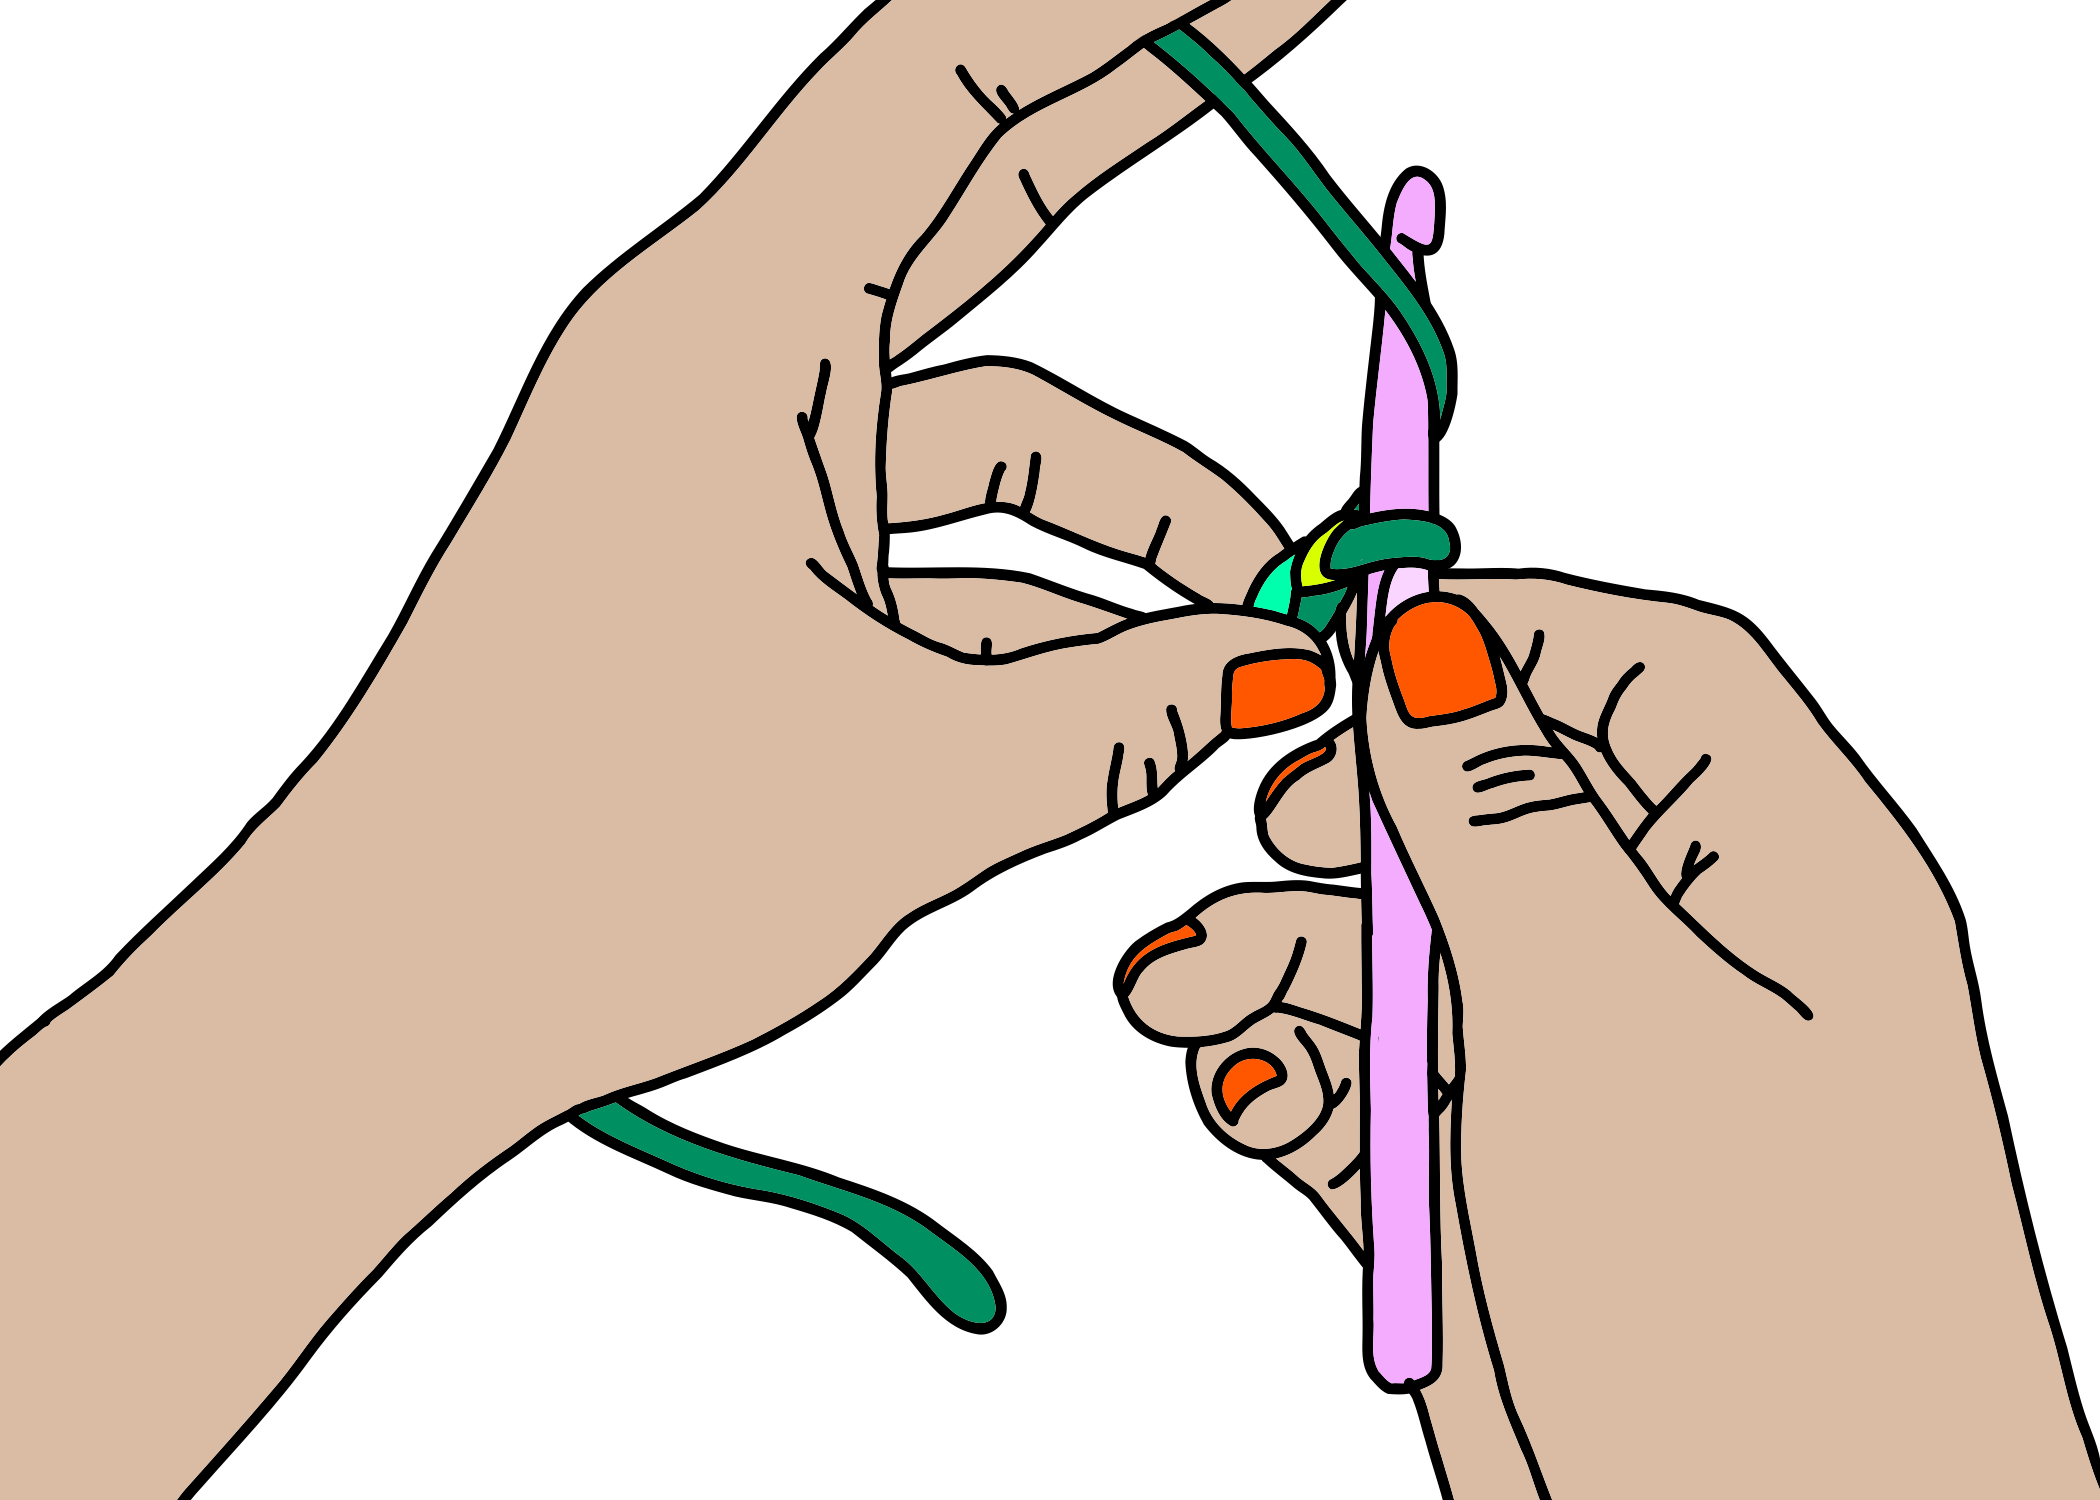
Step two: How to hold the yarn and crochet hook
Insert your crochet hook through the loop and pull to tighten — but not too-too tight!
The loop should have a bit of give, and the hook should be able to slide freely.
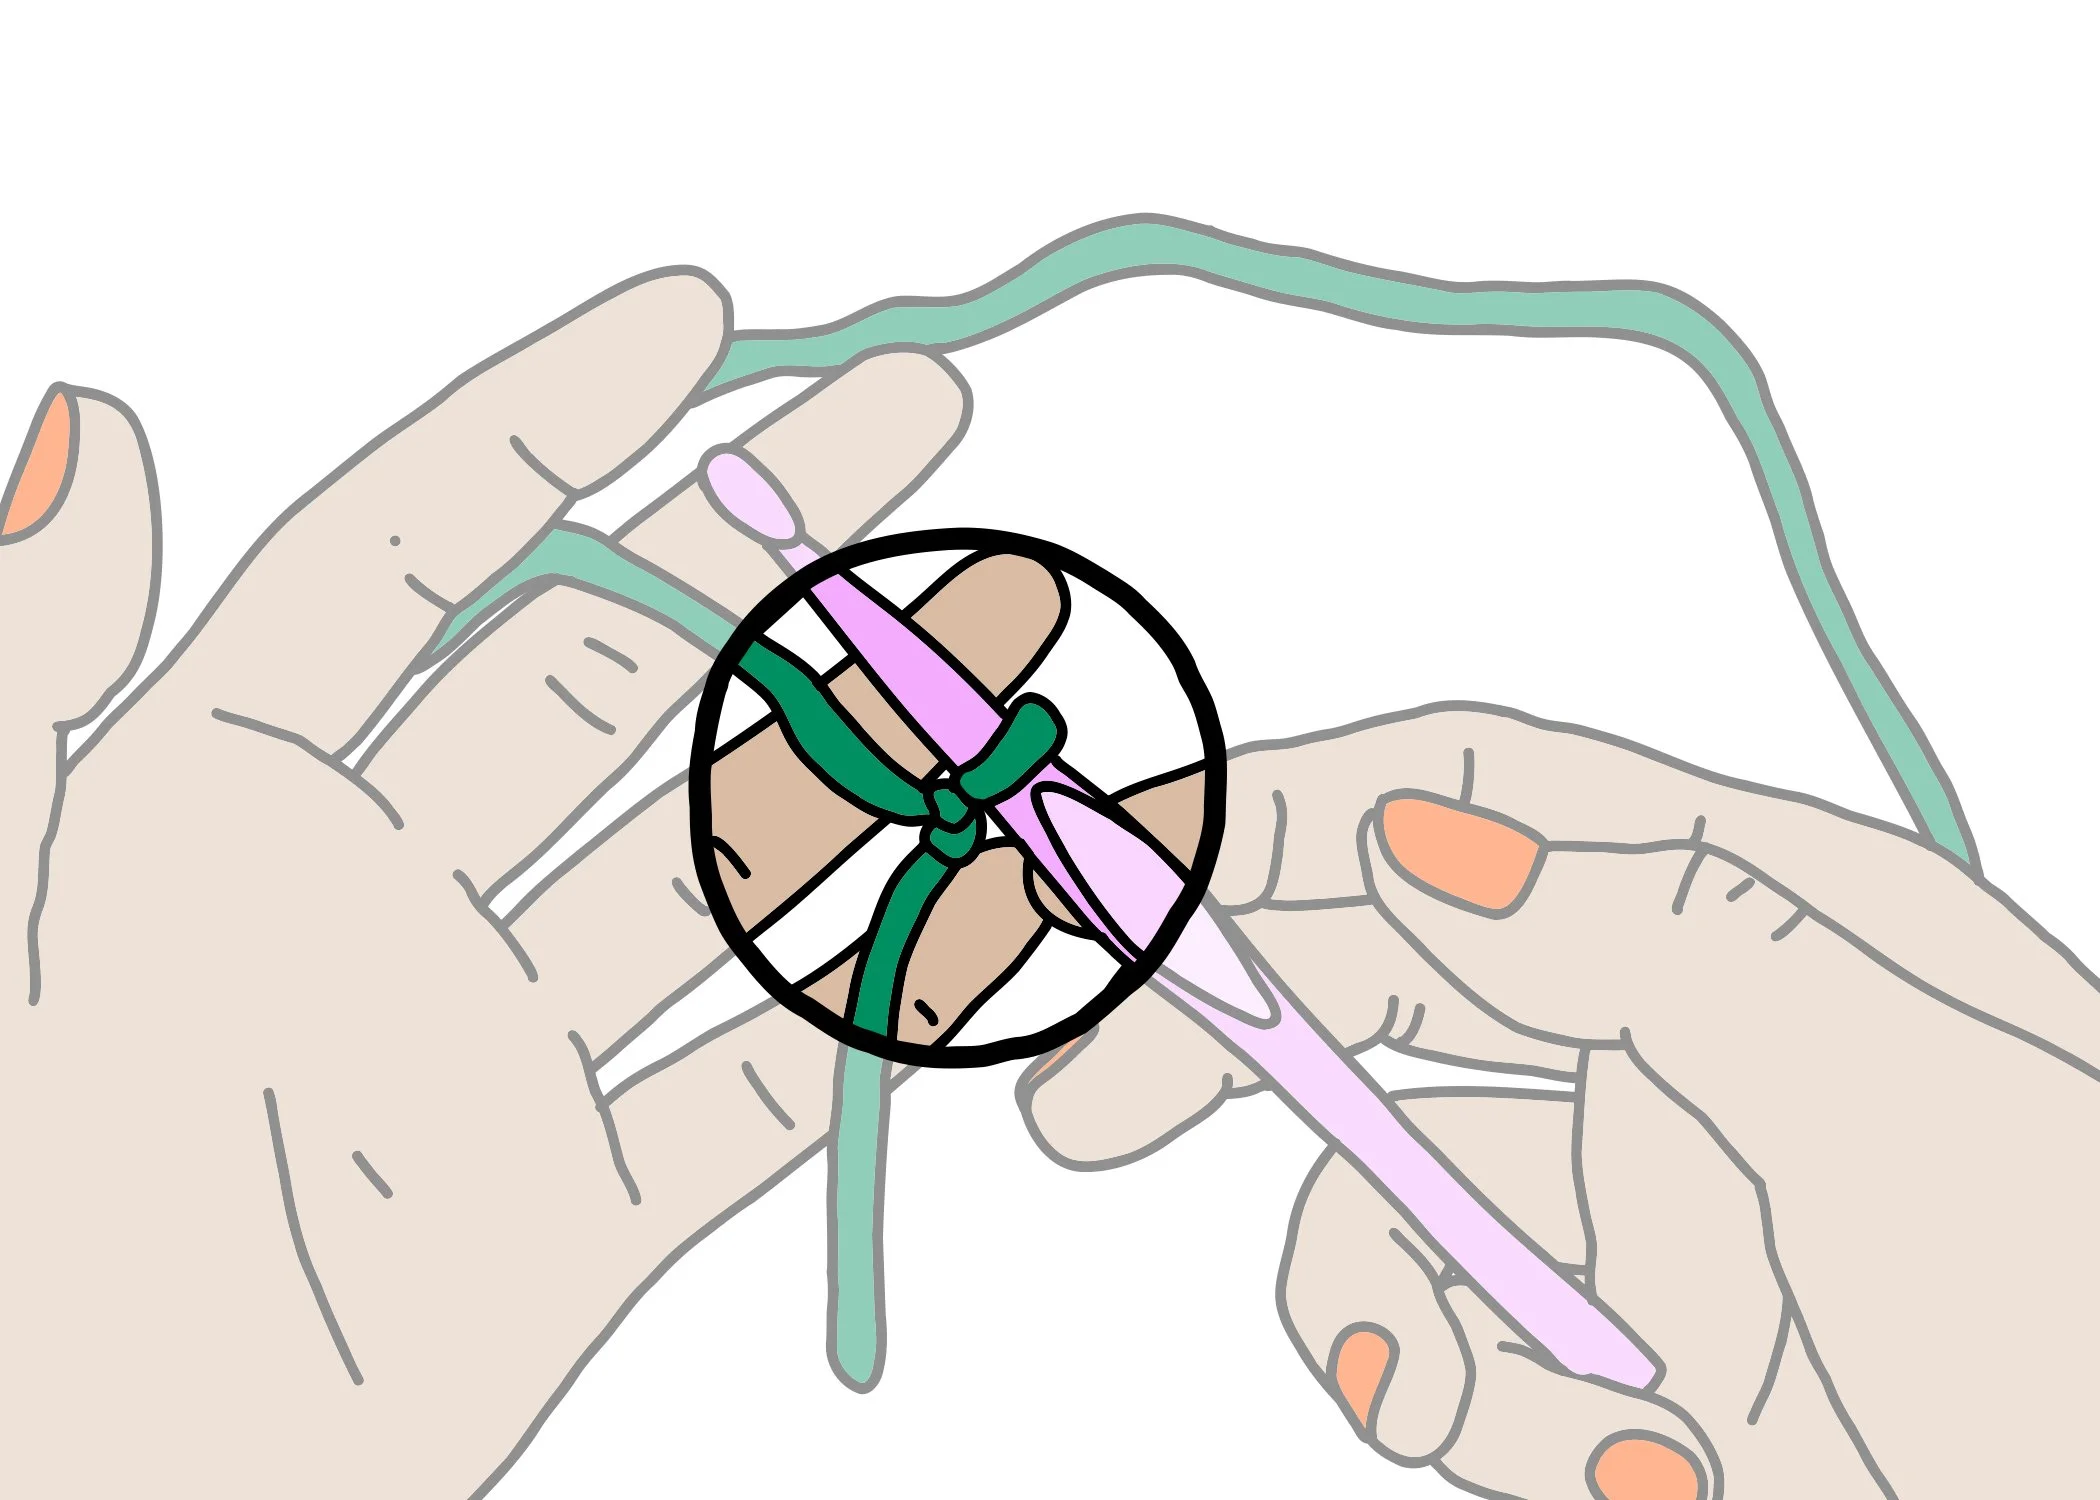
Figuring out how to get comfy with the yarn, the hook, and your hands, takes time. Be patient! Give this a try:
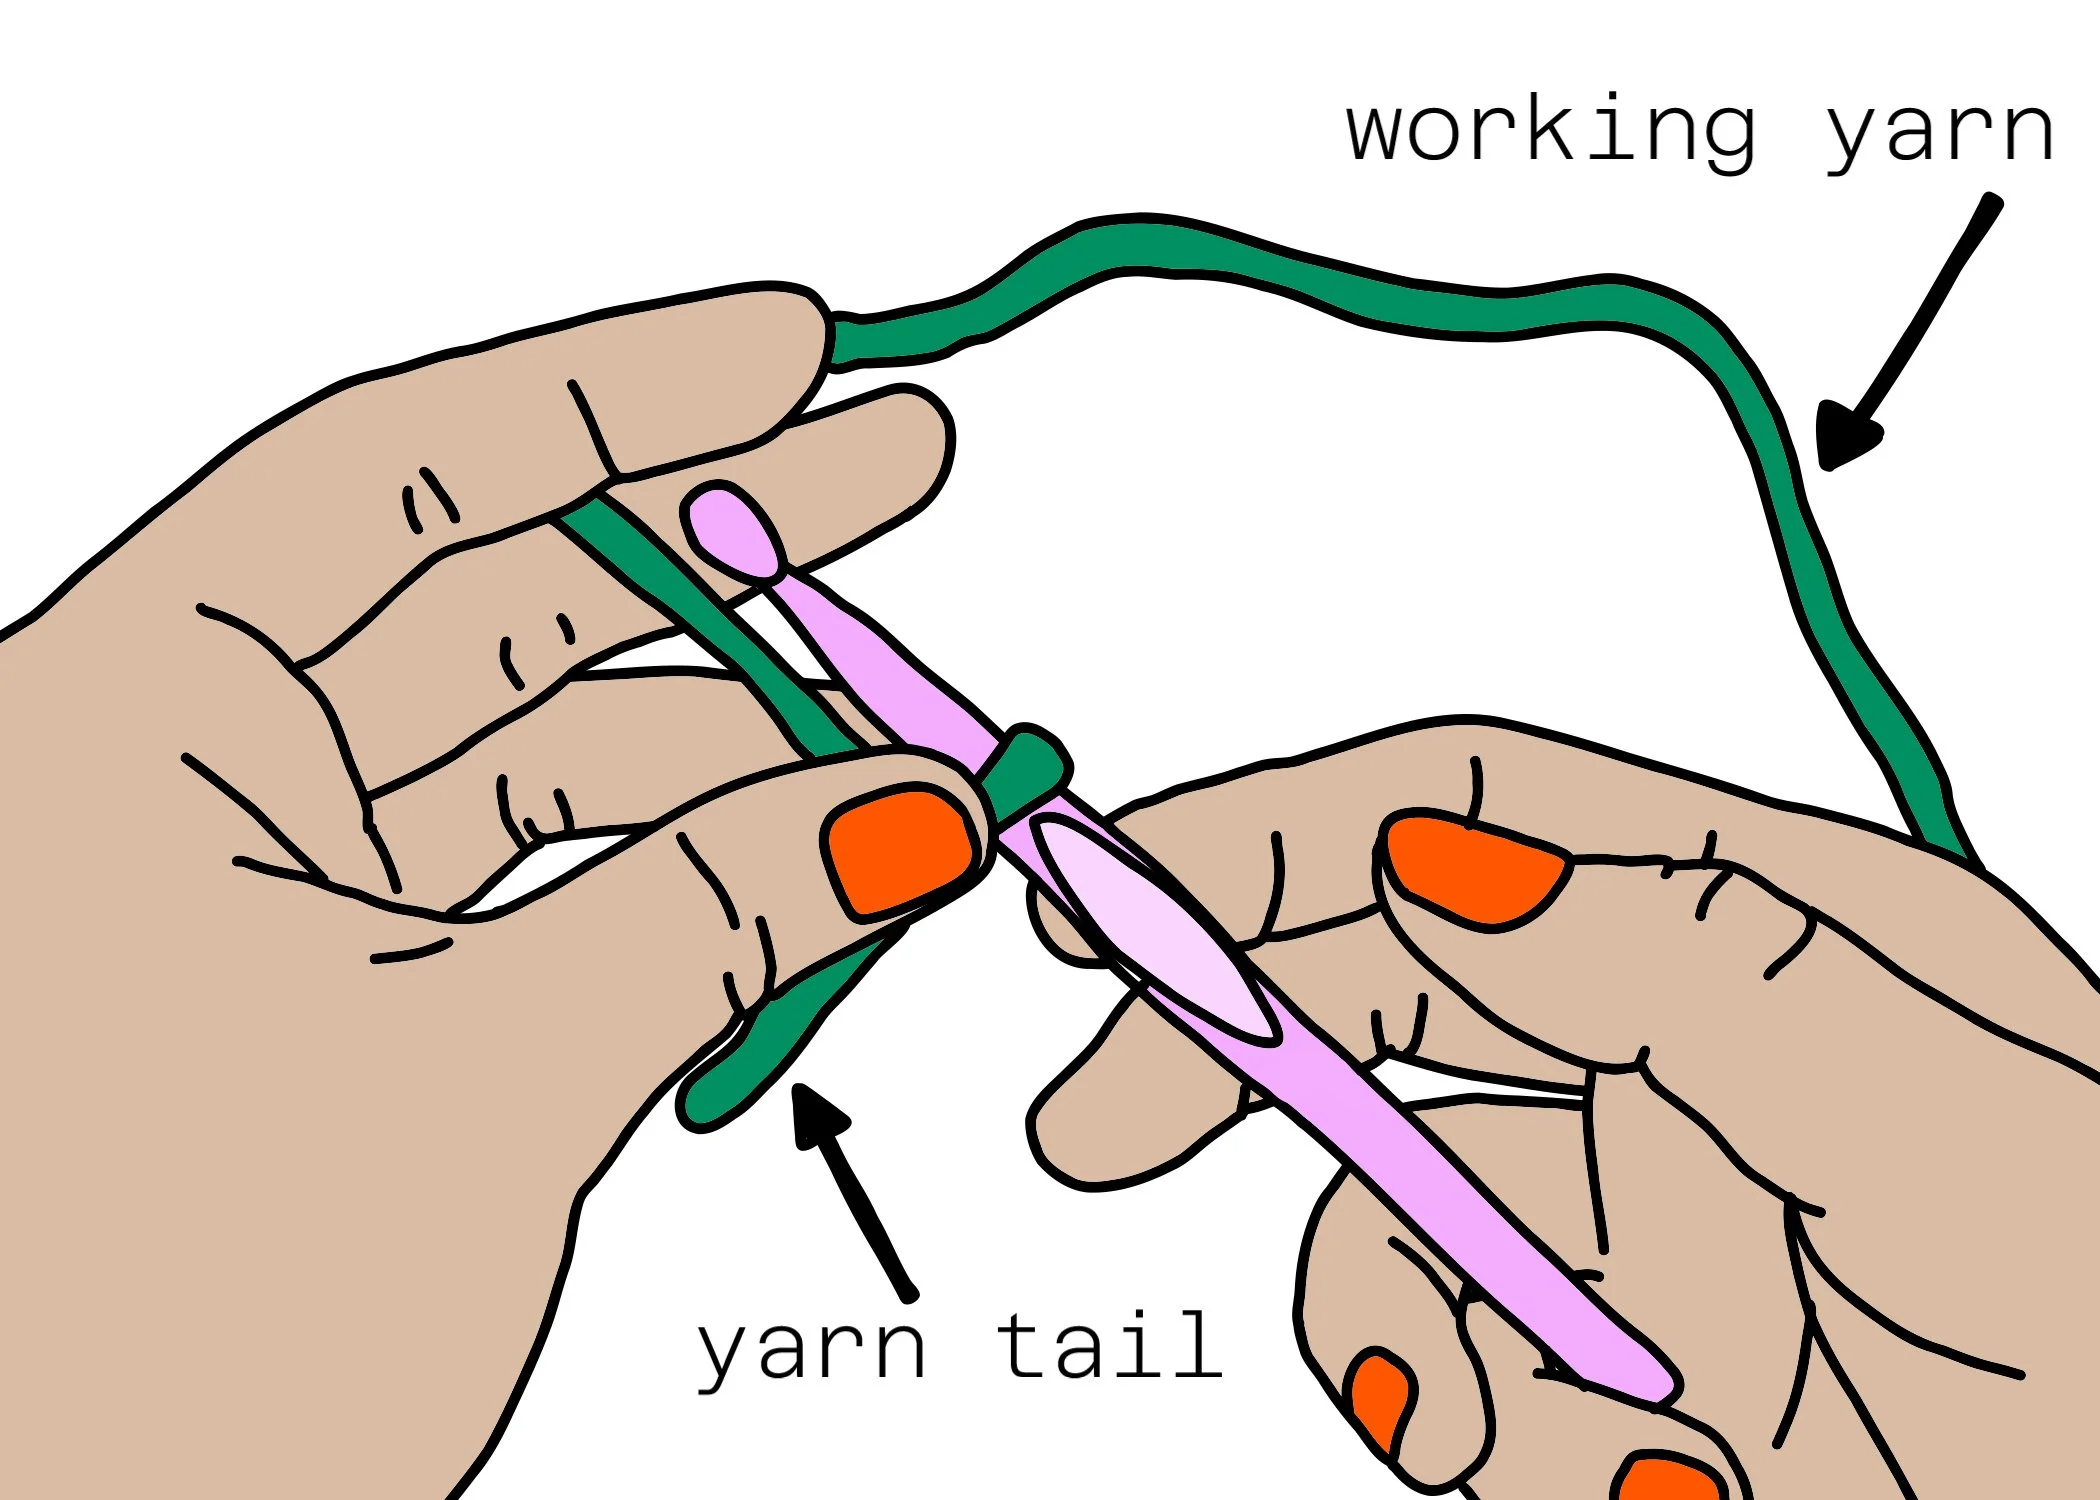
Keep the yarn tail towards you (always!).
Hold the knot between your ring finger and thumb.
Run the long end of the yarn (the working yarn) loosely through your middle and pointer fingers.
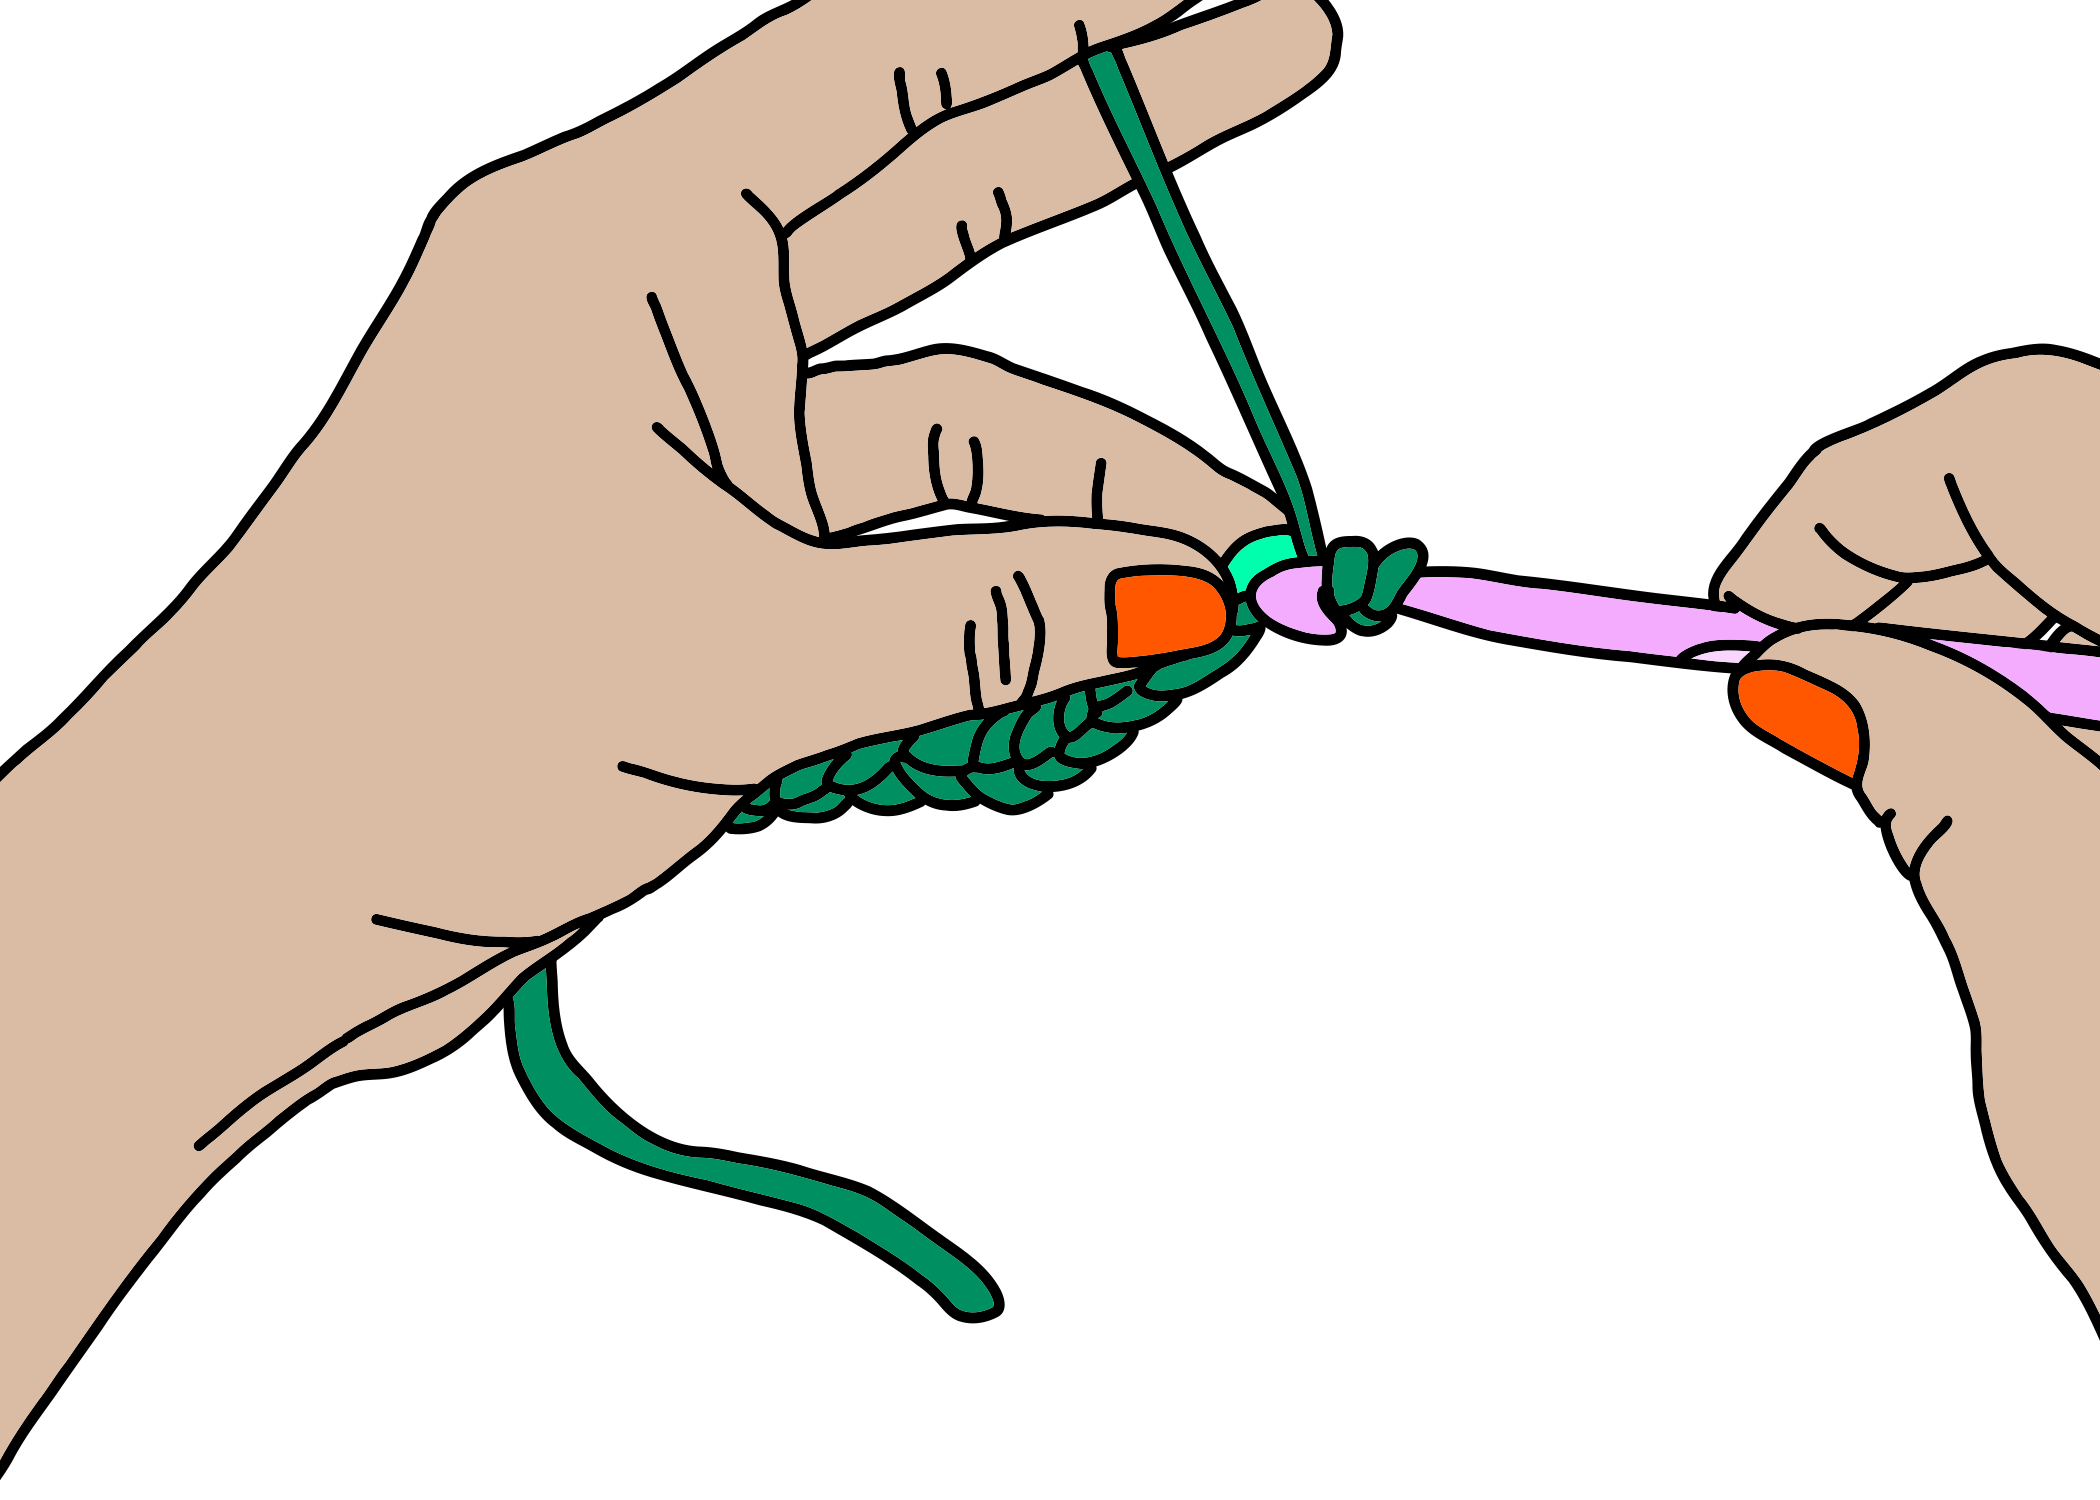
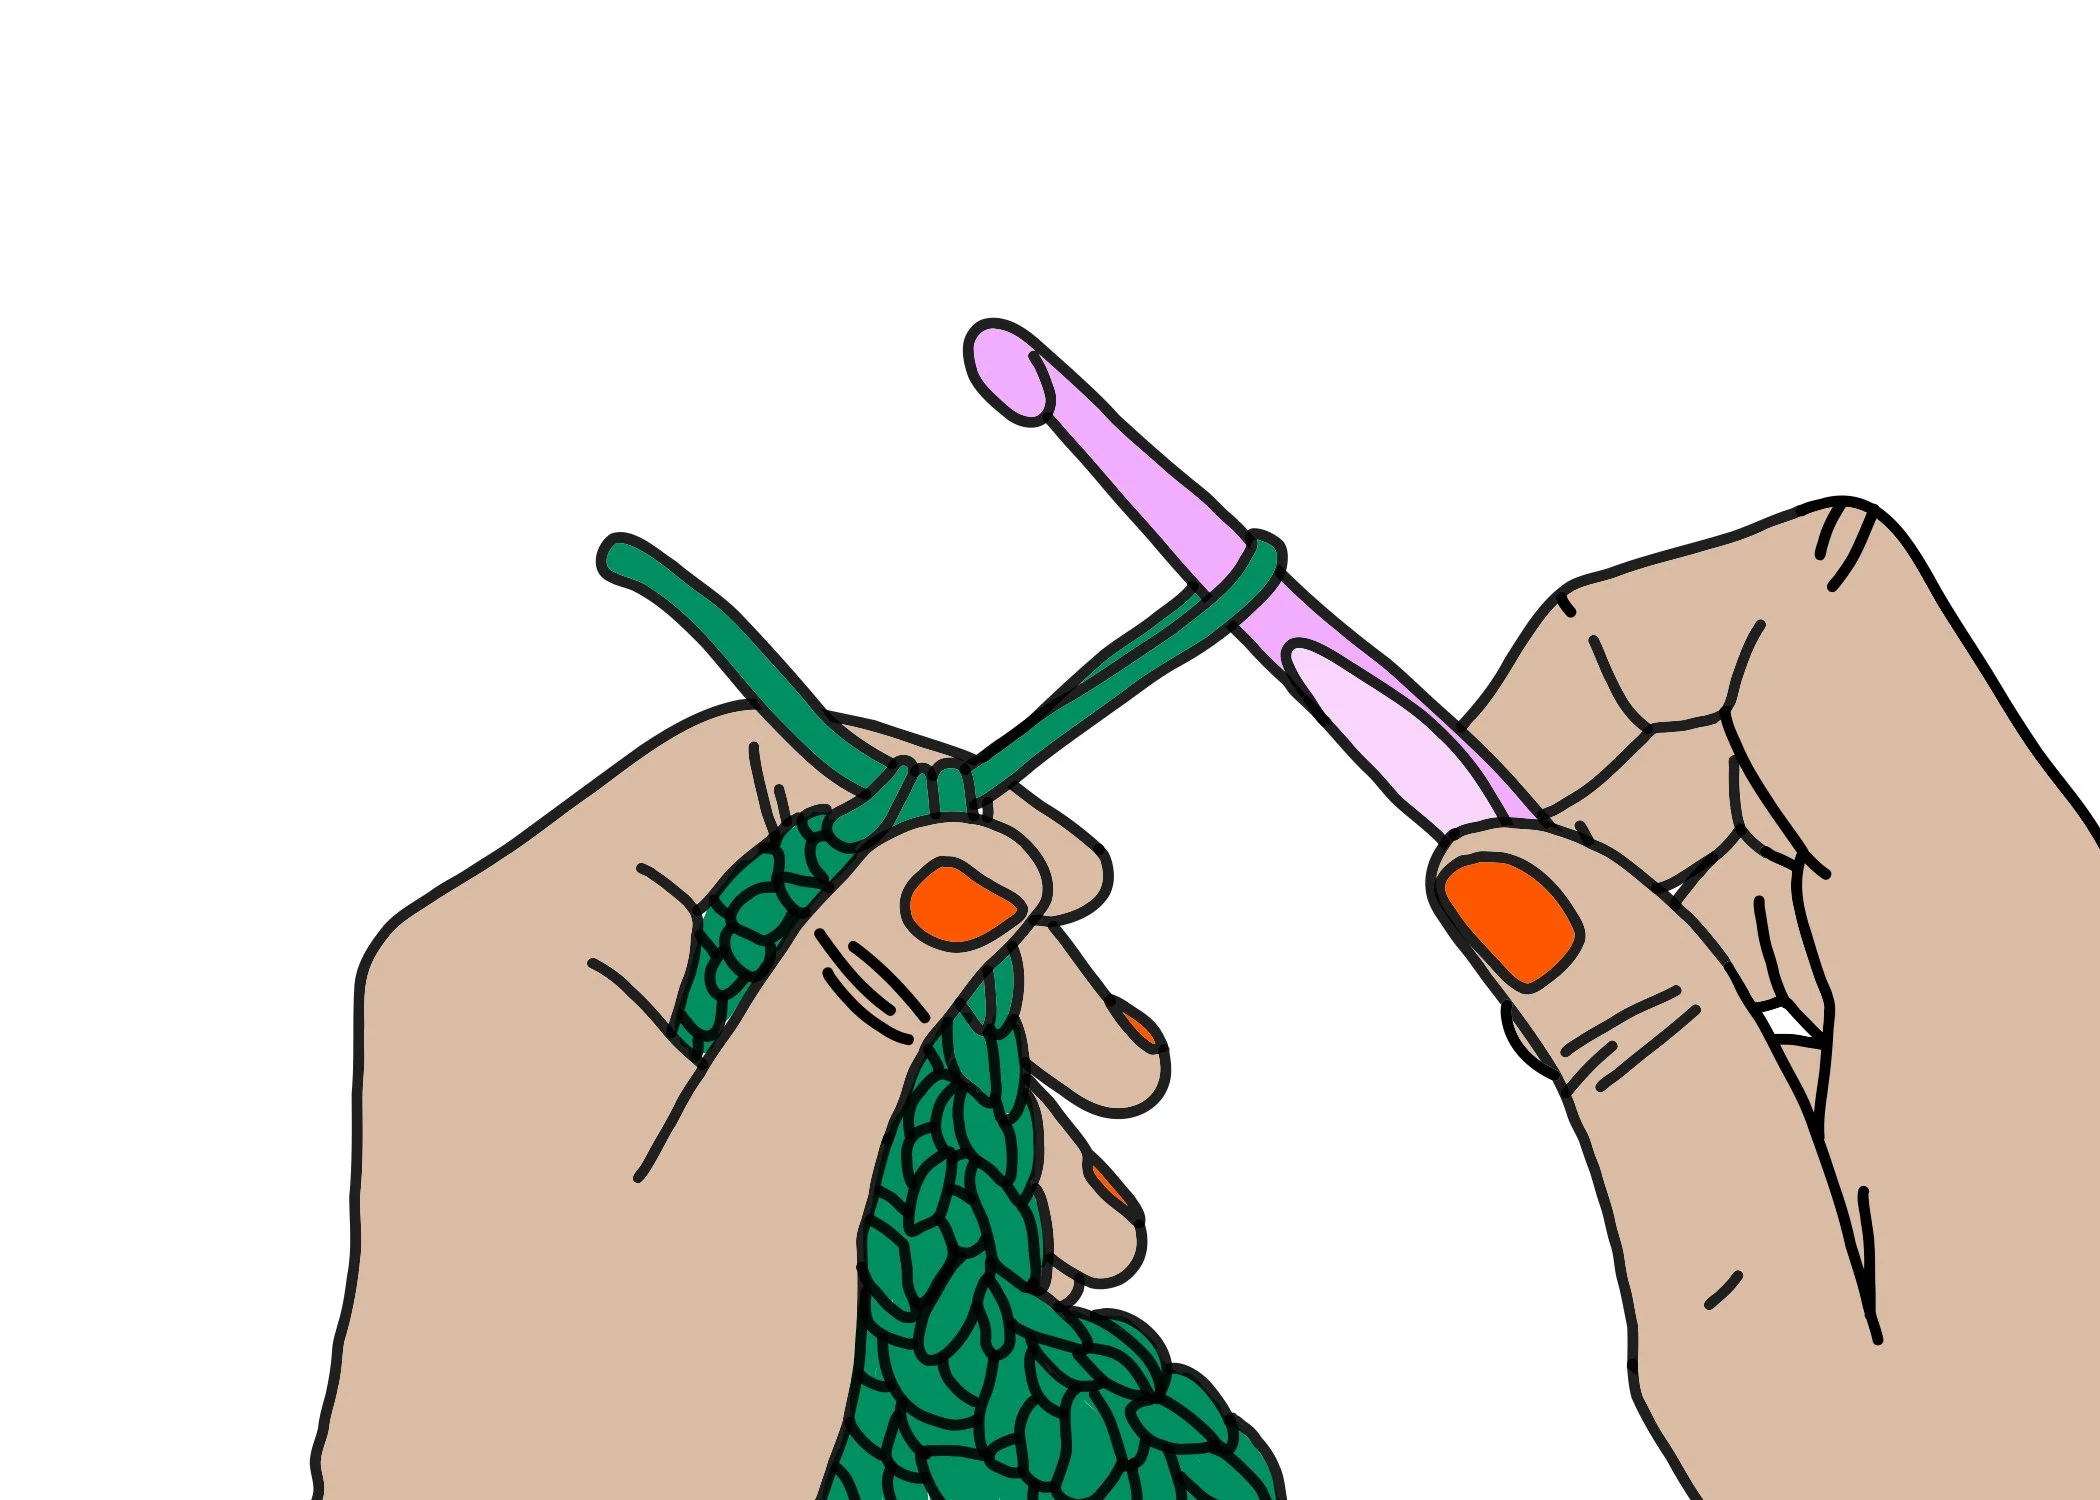
Step three: A chain stitch (ch)
The chain stitch is fundamental for crochet projects!
1 - 2:
Swoop the hook to the left, in front of the working yarn;
1
2
3 - 4:
spin it back and to the right, behind the working yarn, which you’ll catch it with the hook;
3
4
5:
pull the working yarn all the way through the loop;
6:
and that’s a chain stitch — you crocheted! You are crocheting!
5
6
Here’s how it looks in action: gif, then vid.

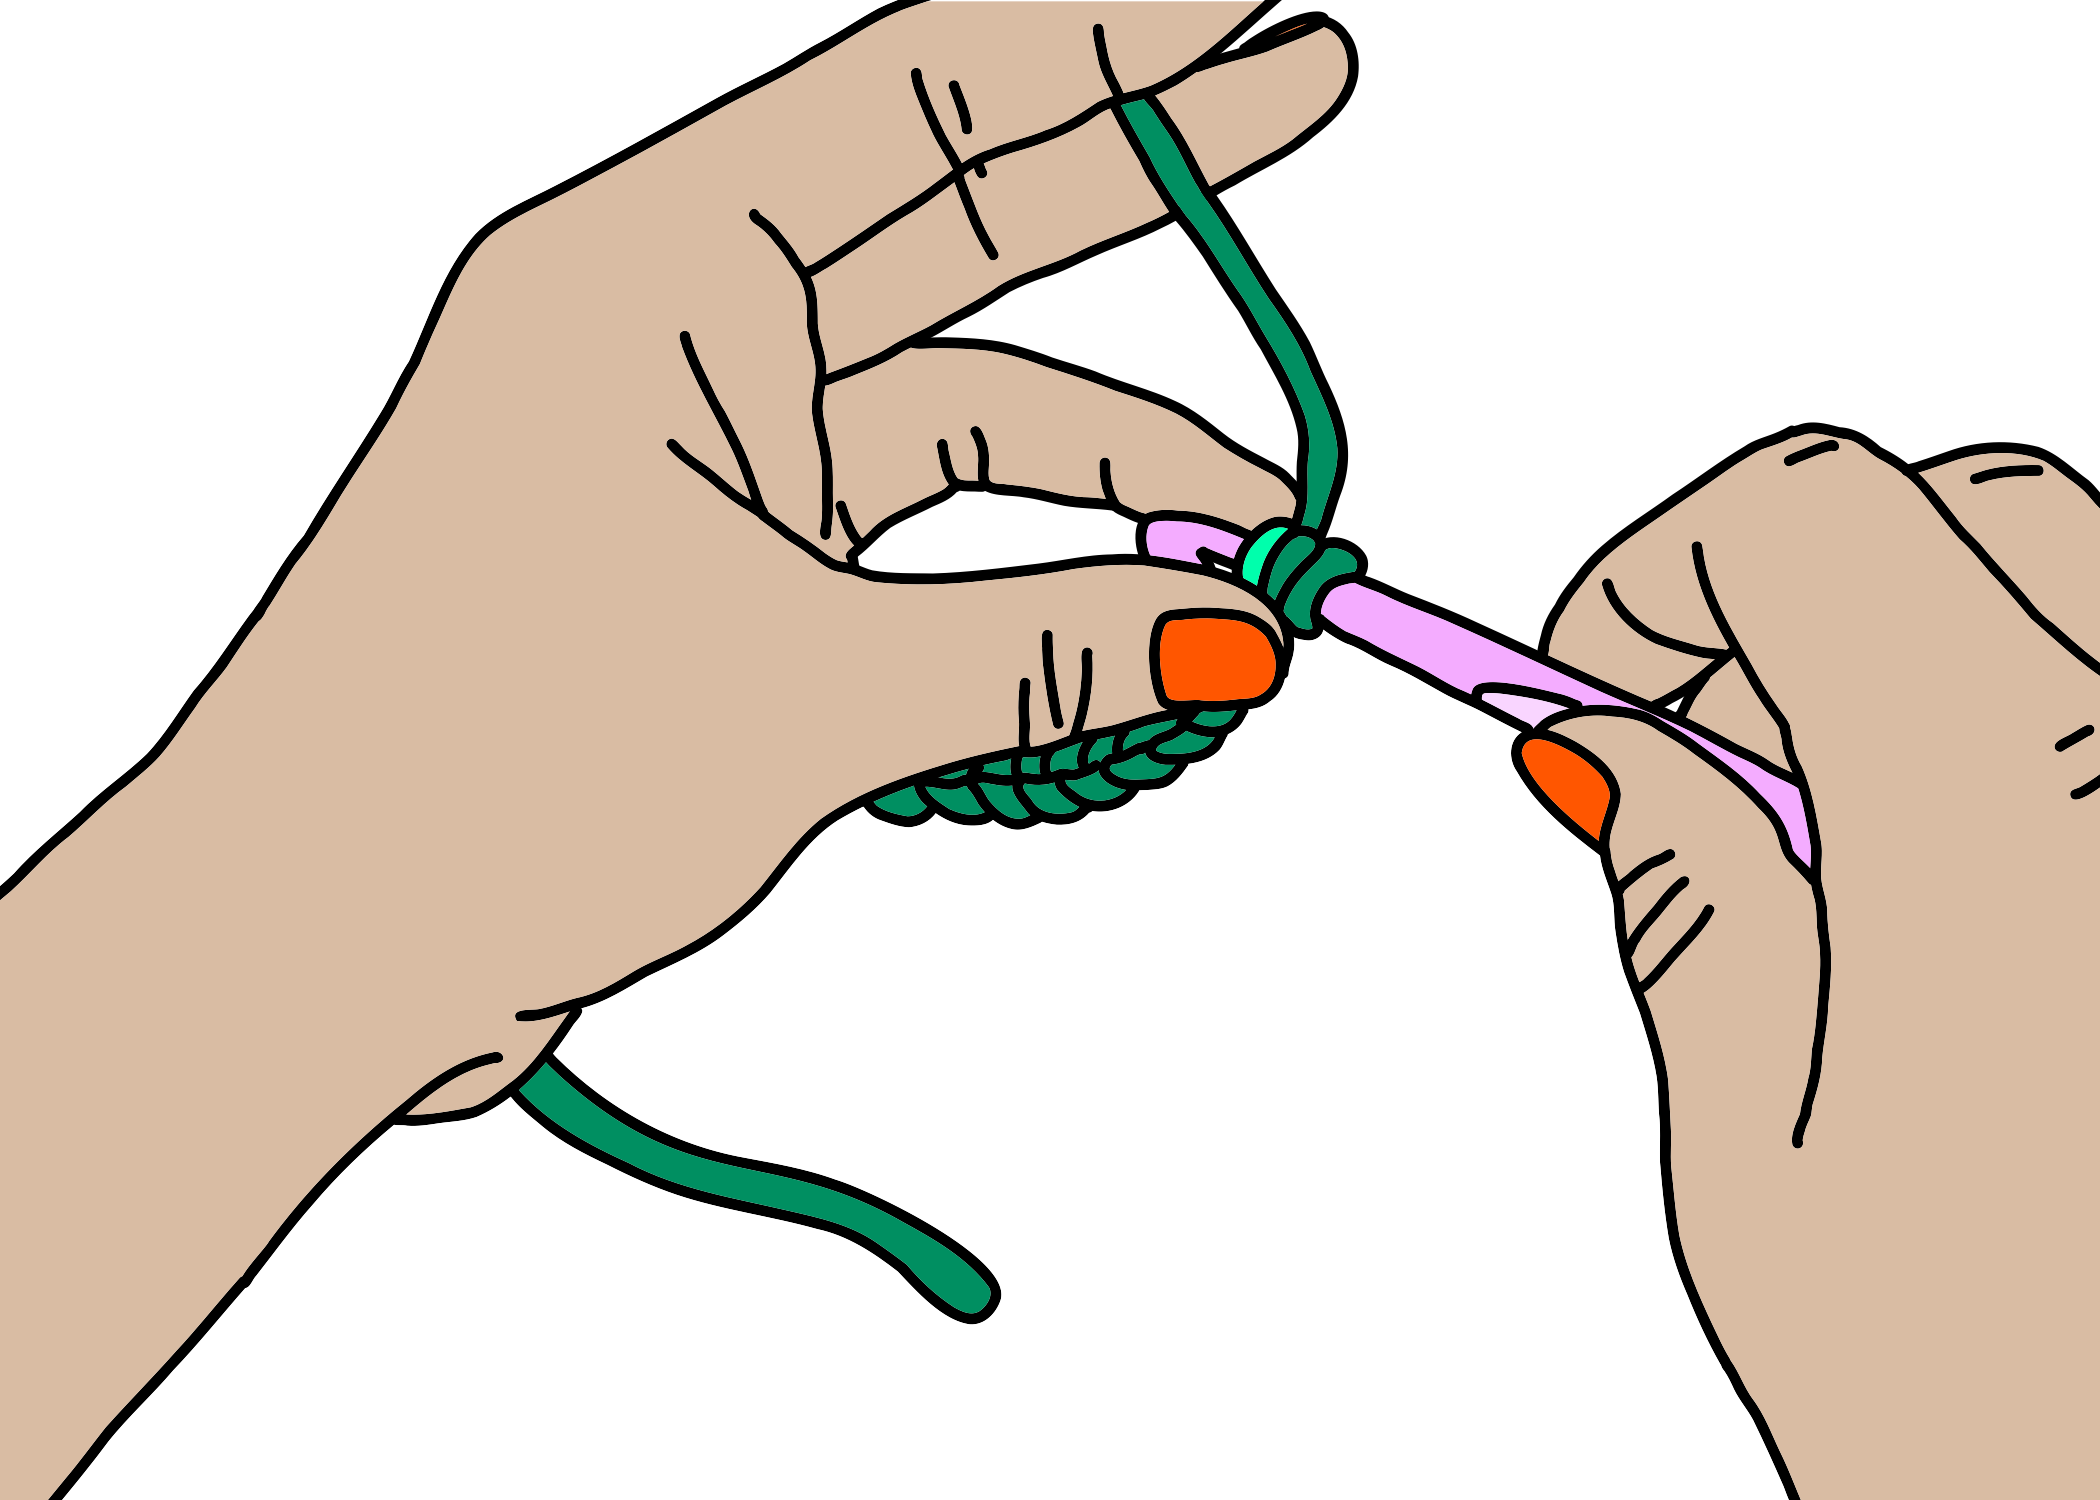
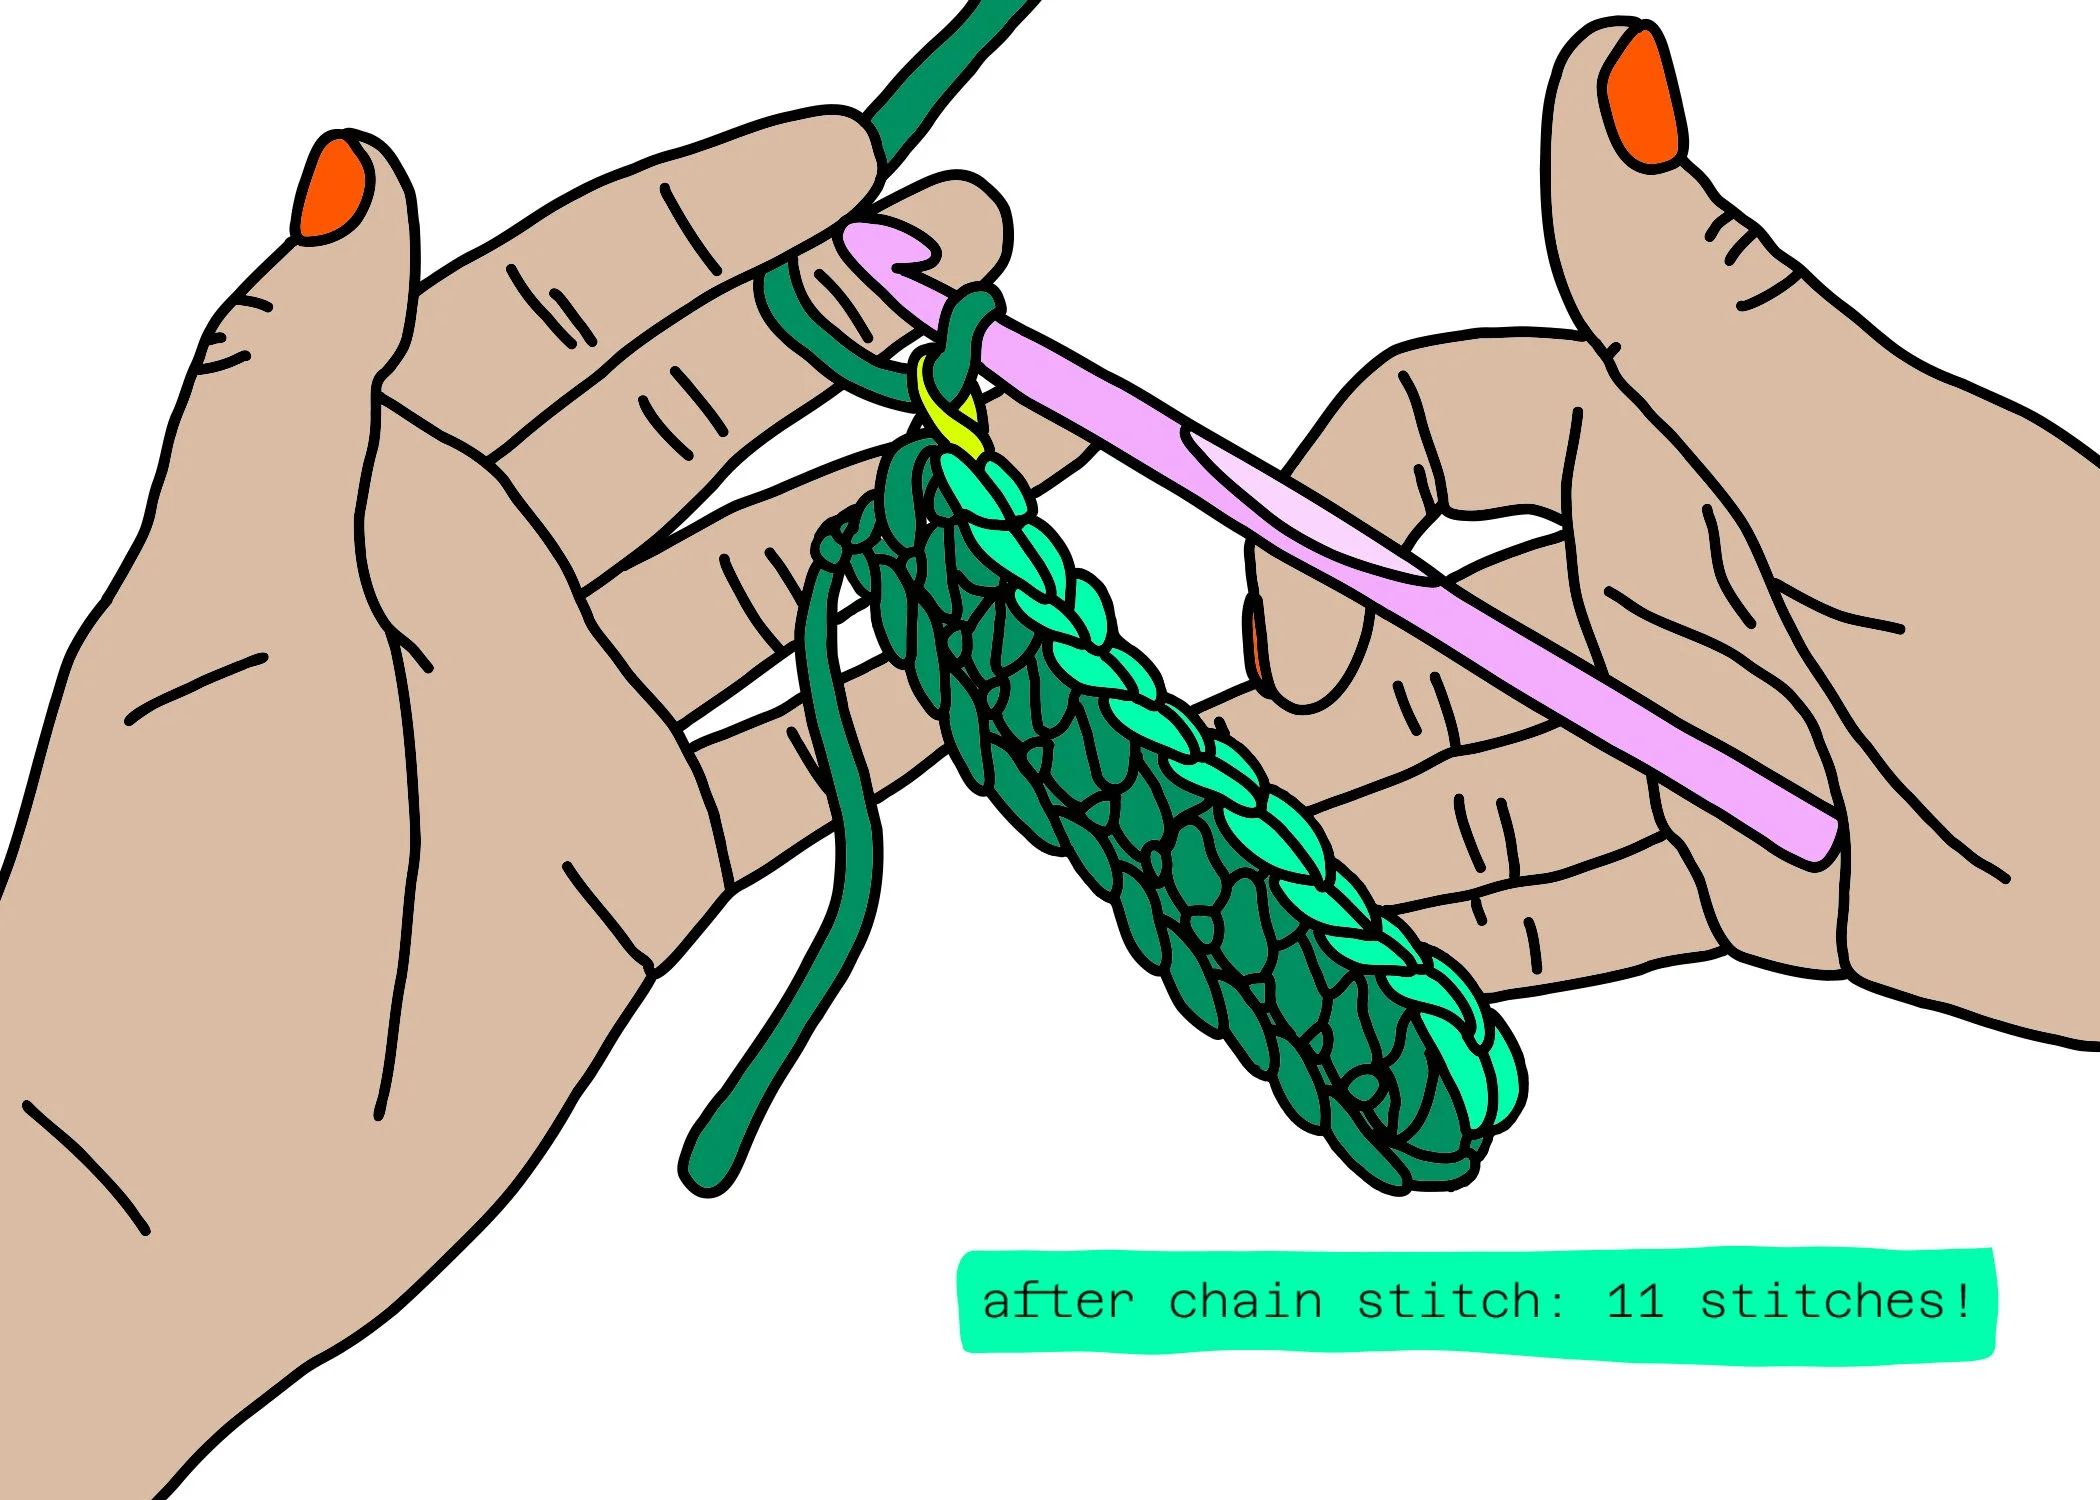
Step four: A row of chain stitches (ch)
Keep the tension light, with some slack; continue chain stitching until the row is as long as you’d like your scarf to be wide.
Go thin and thin and jaunty, or thick and blarf-y (blarf = blanket scarf)!
Spend some time with your row: identify (and count, if you’d like!) the stitches; you’ll work with these in the next step. Note that there’s a sneaky one — nearest to hook that your loop and working yarn go through — that looks legit, but you’ll ignore it when you start to hdc.

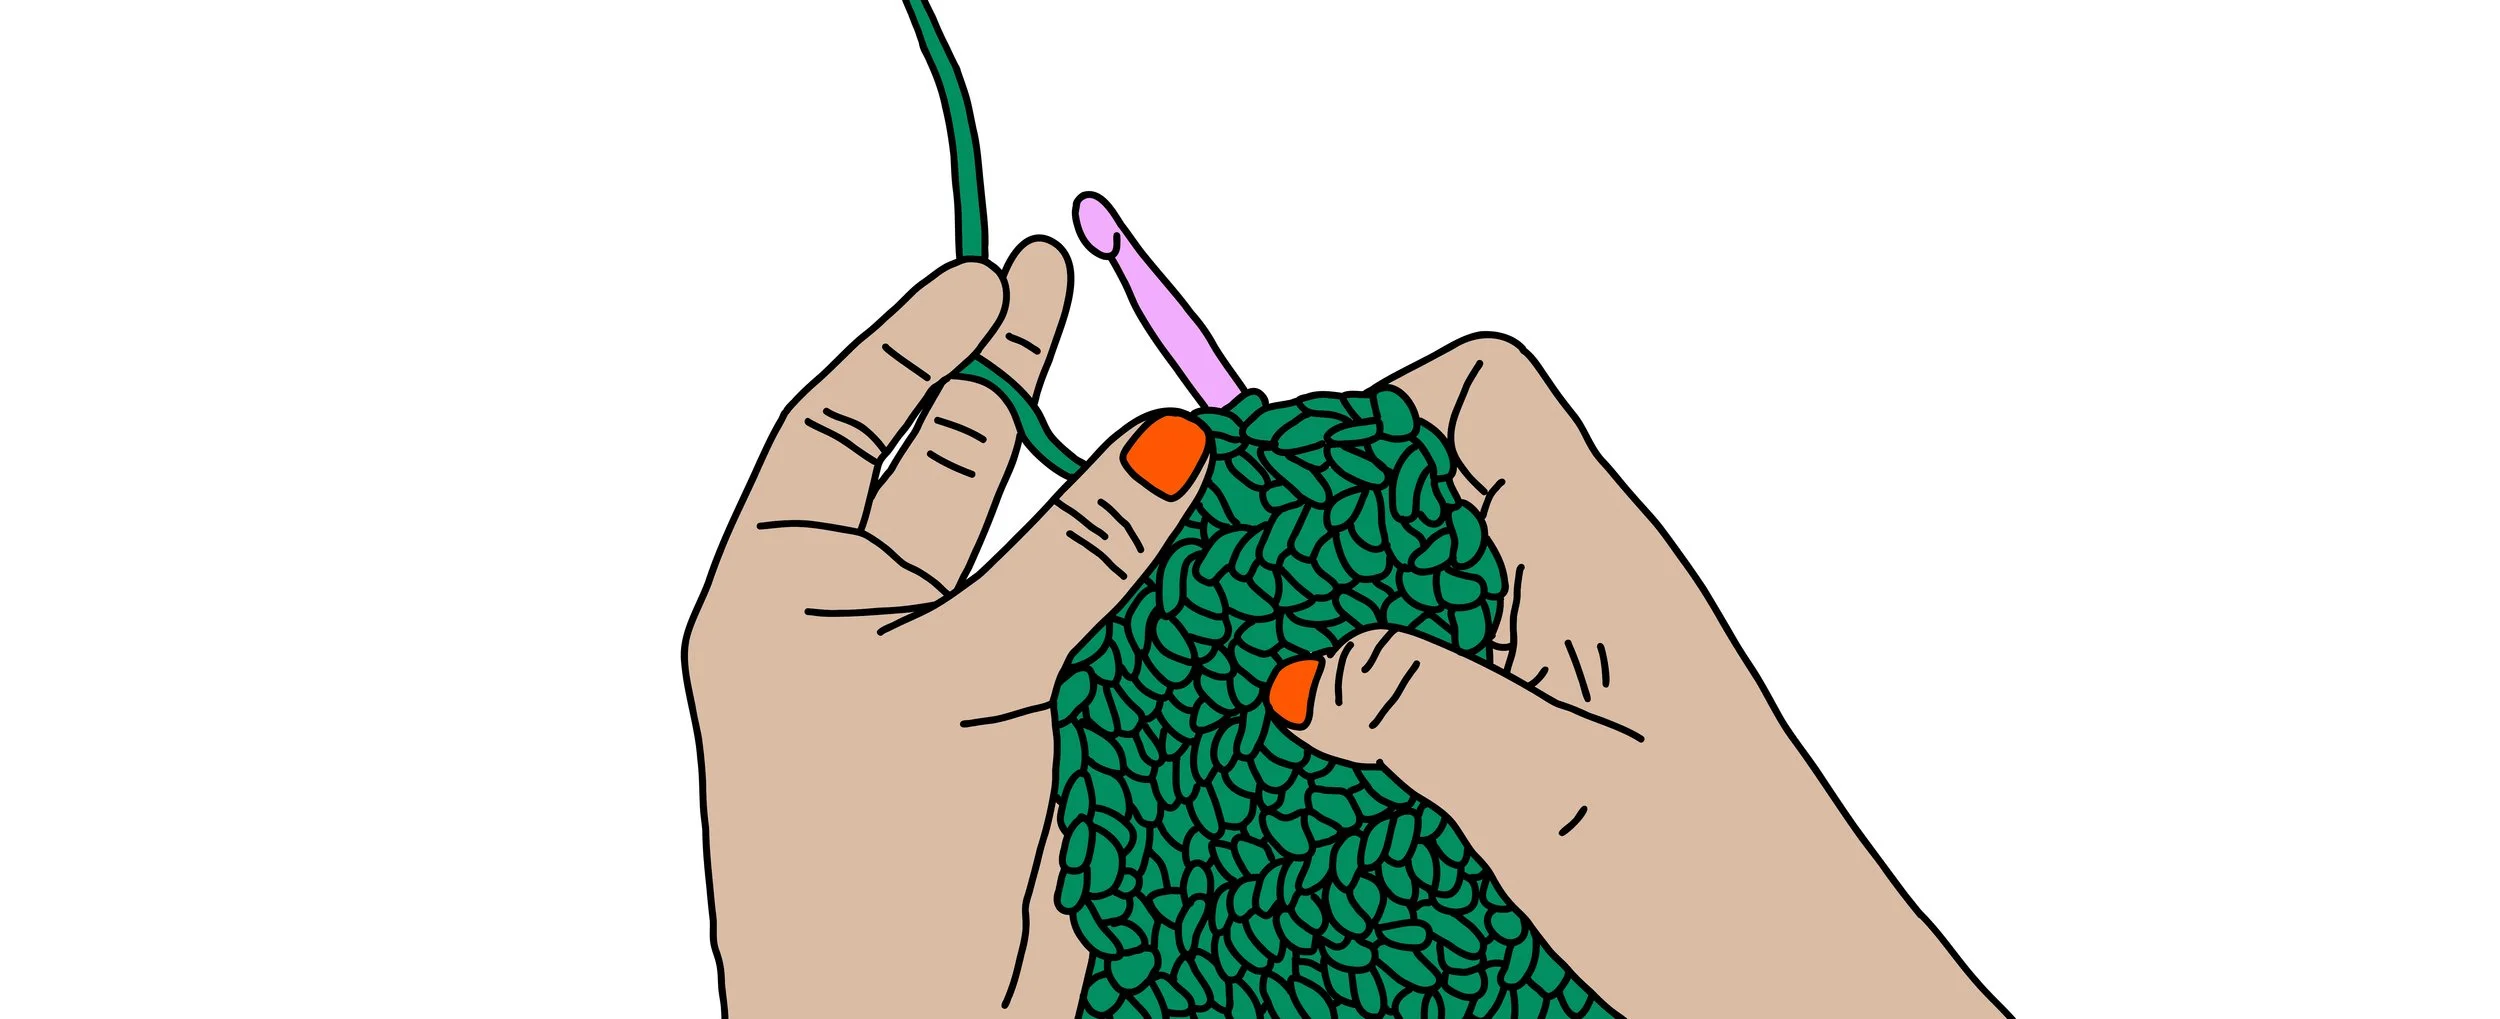
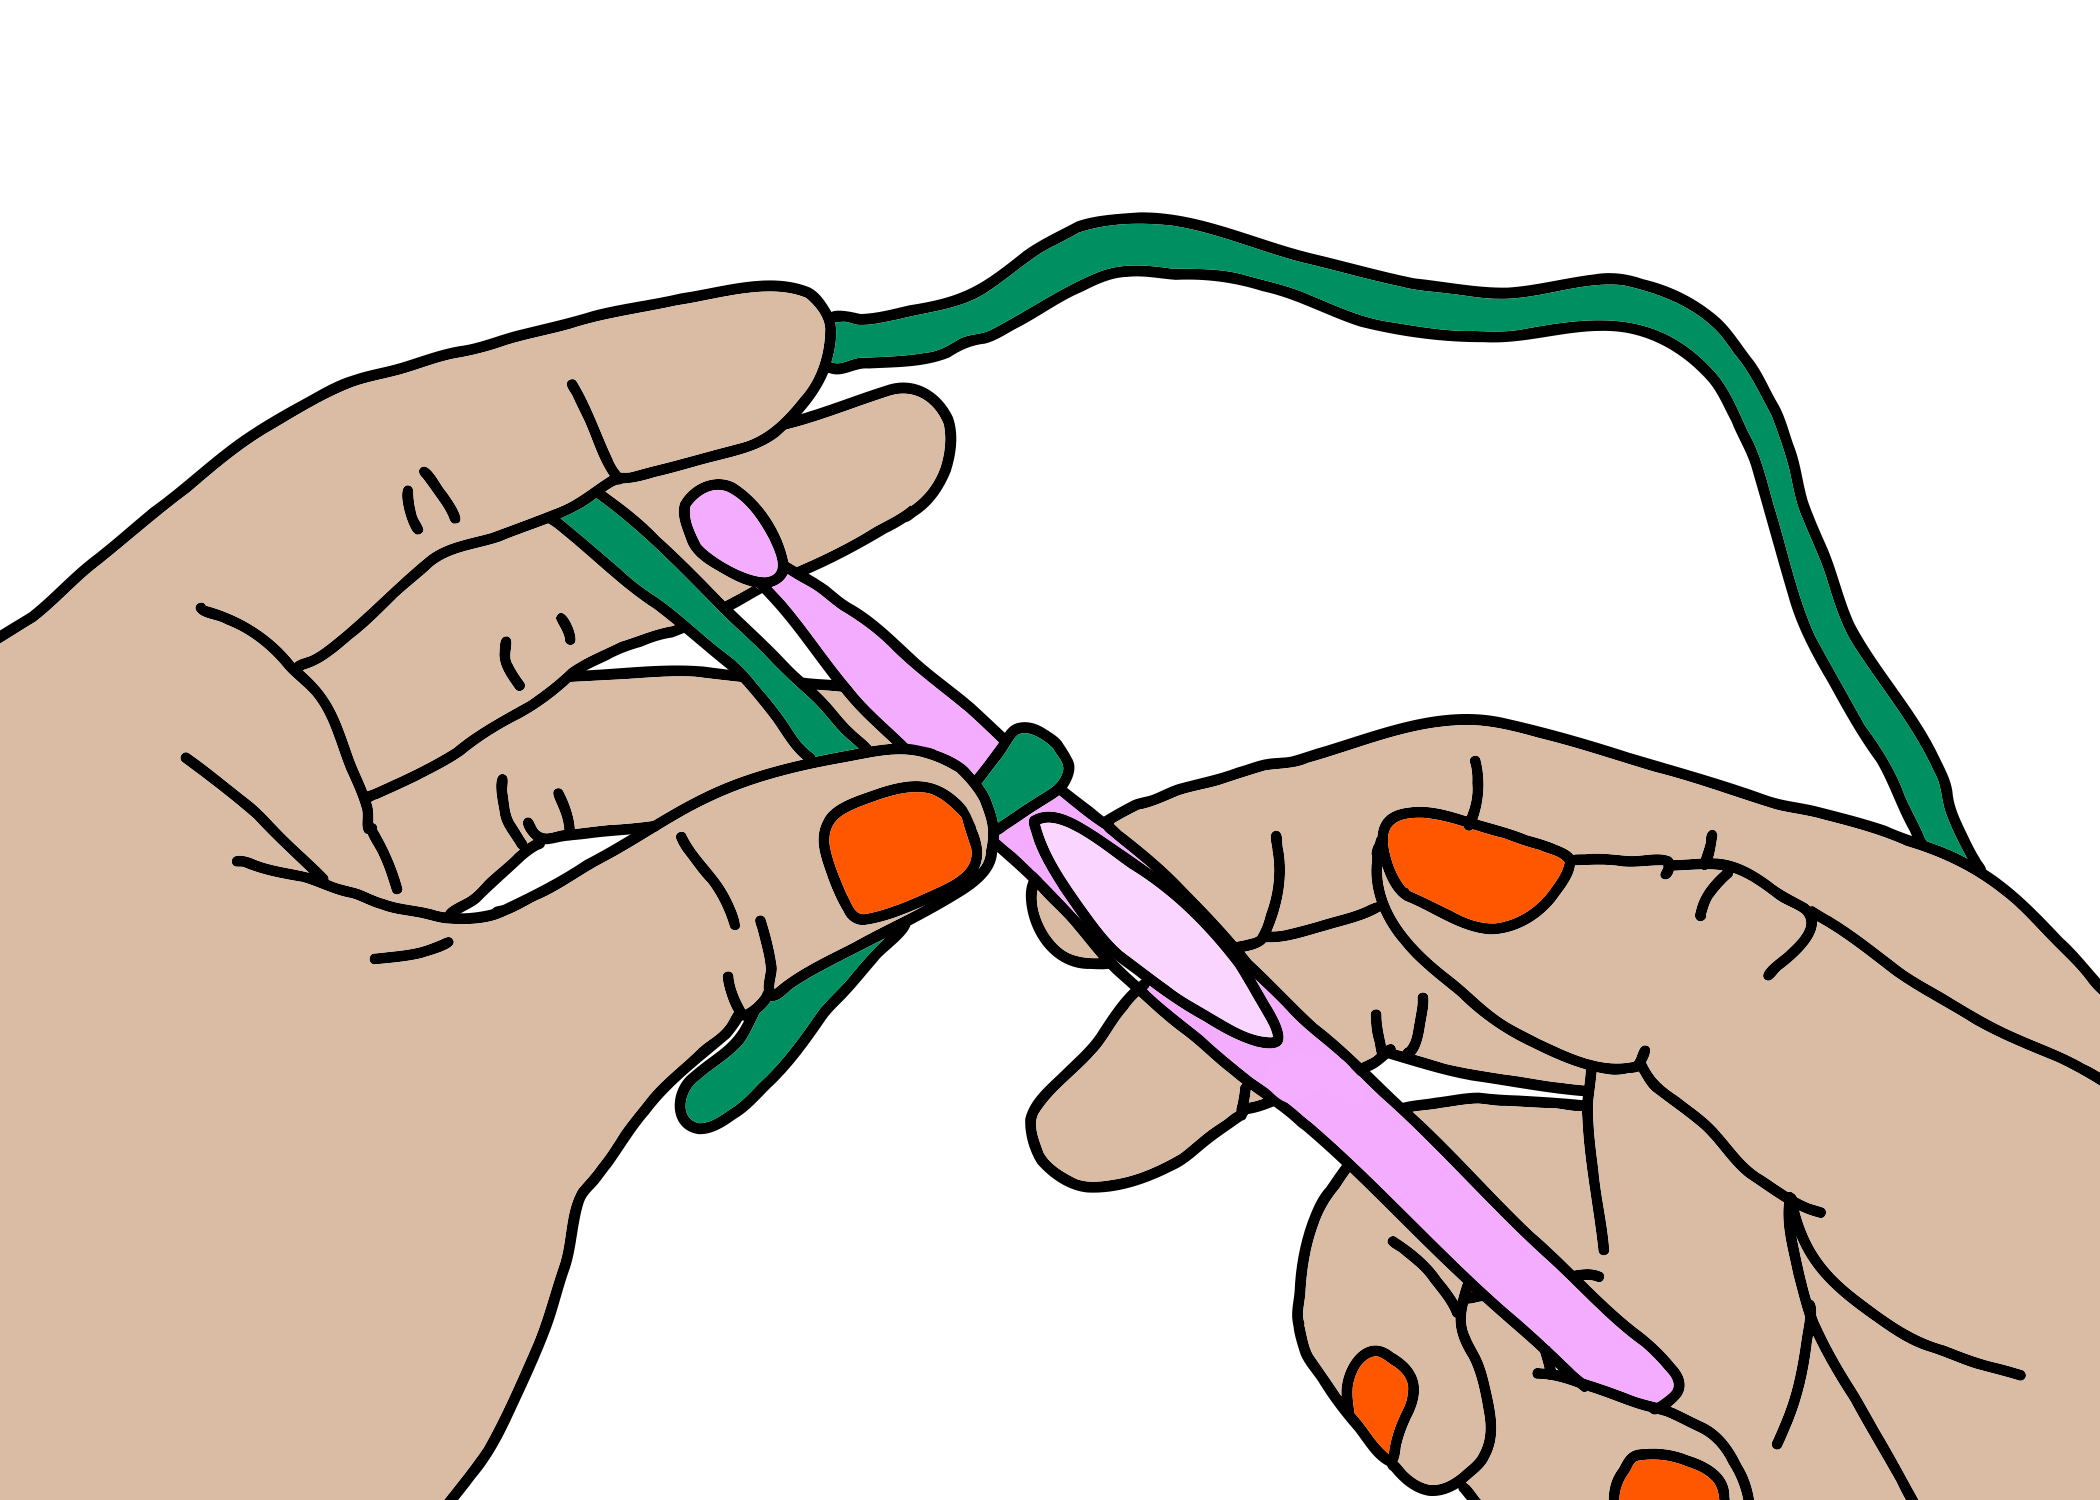
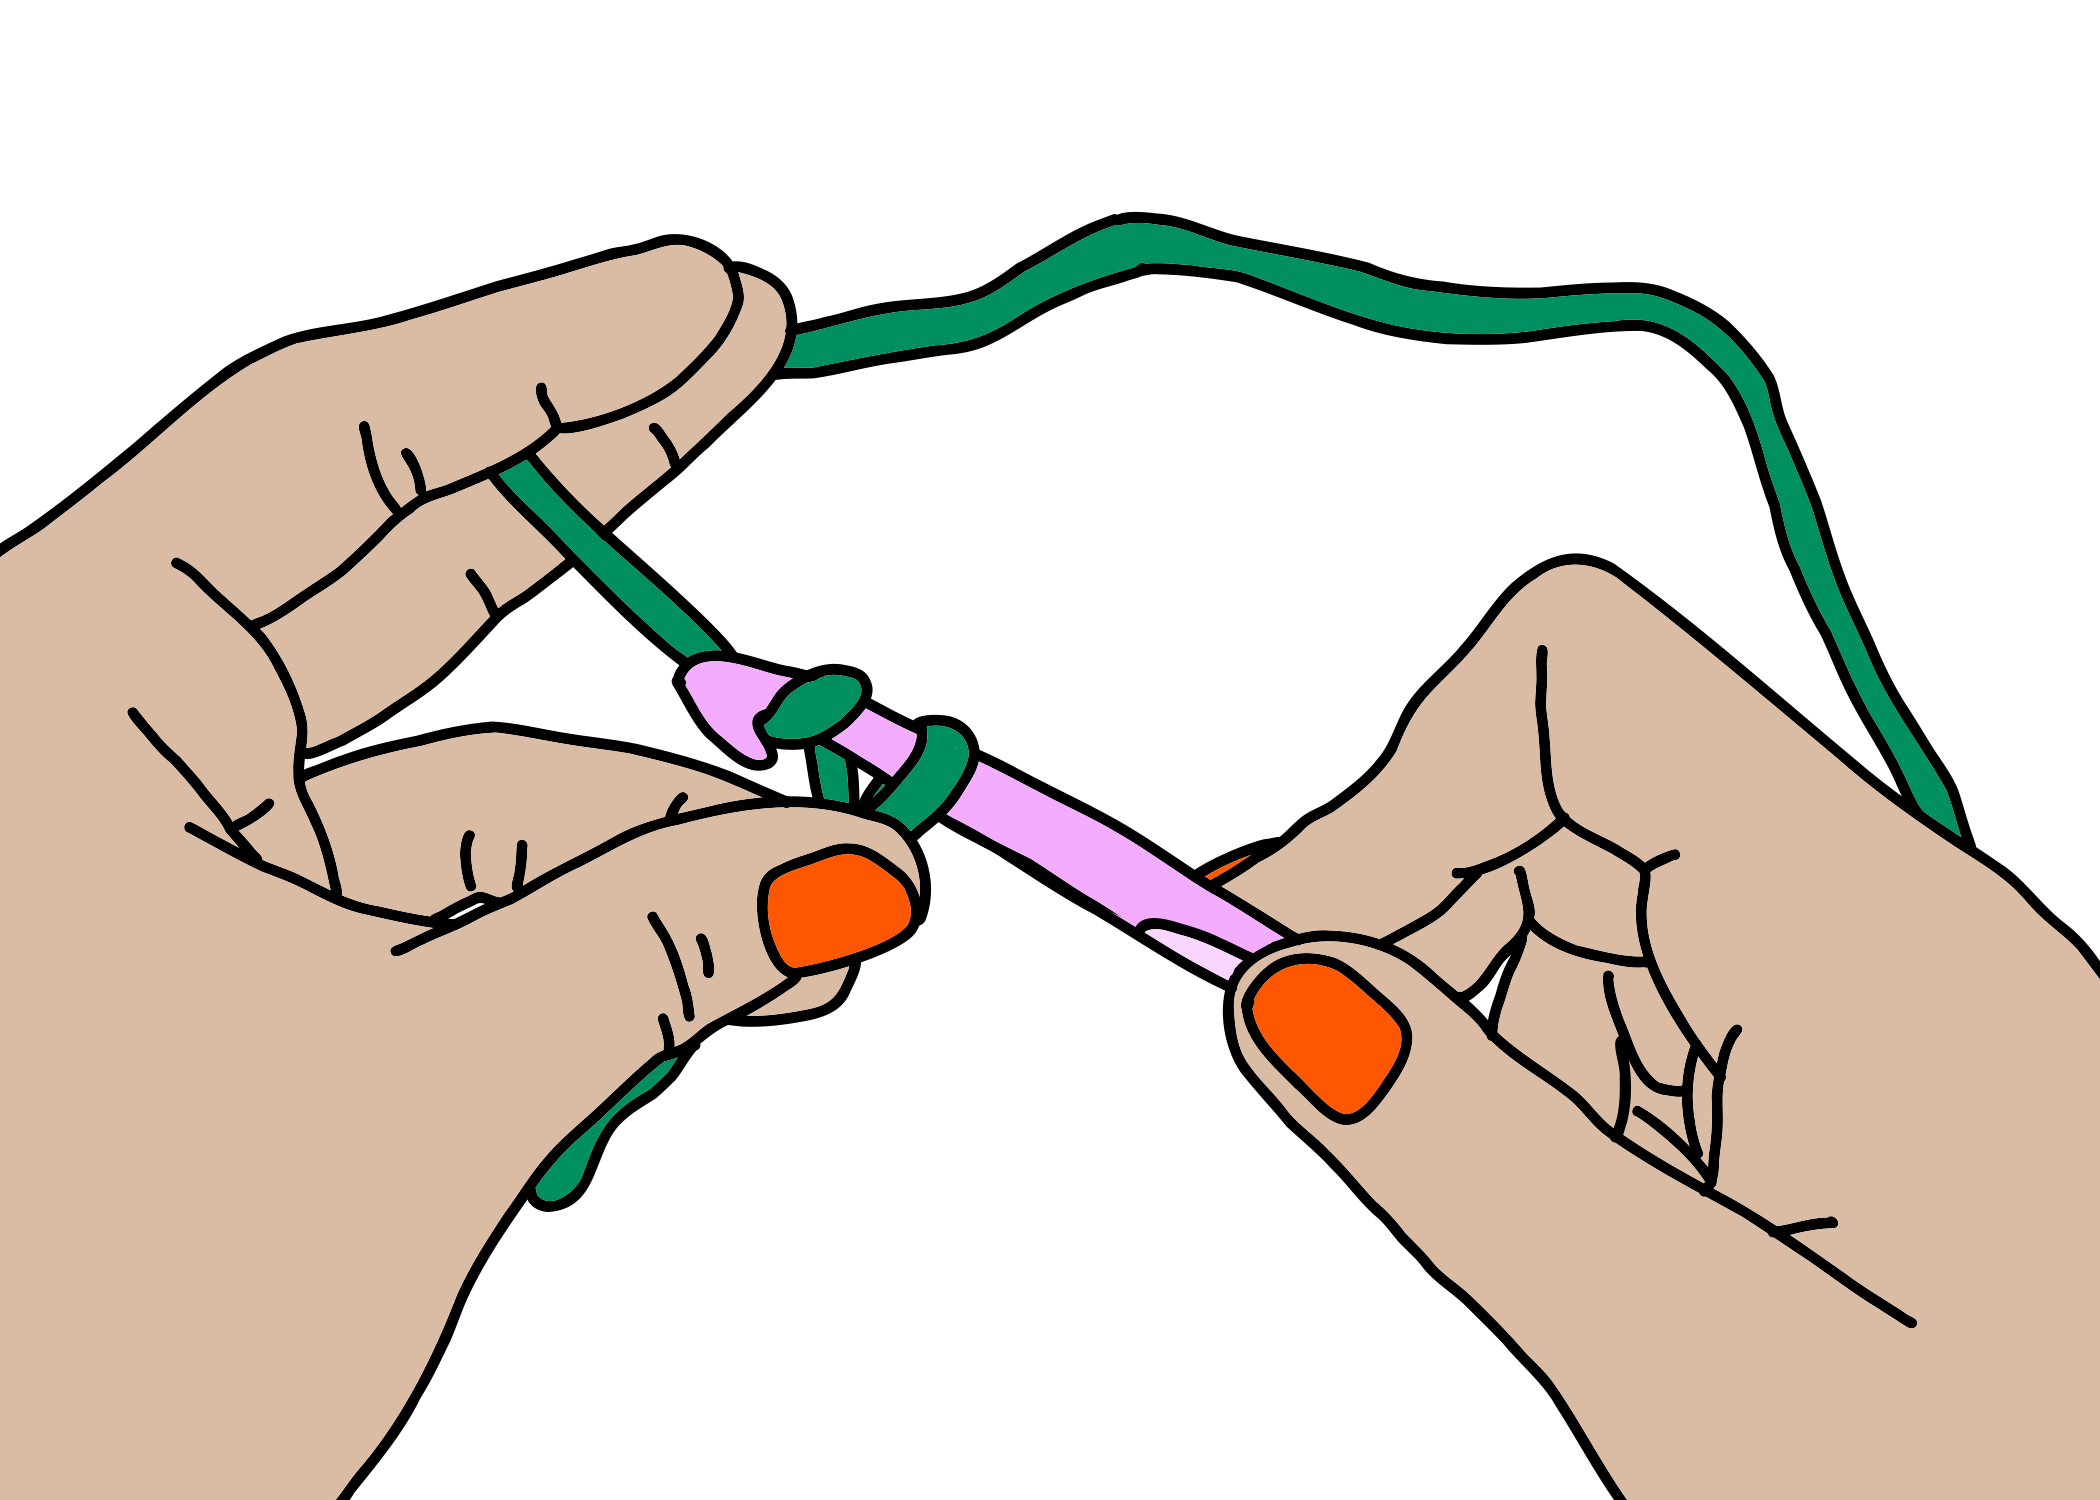
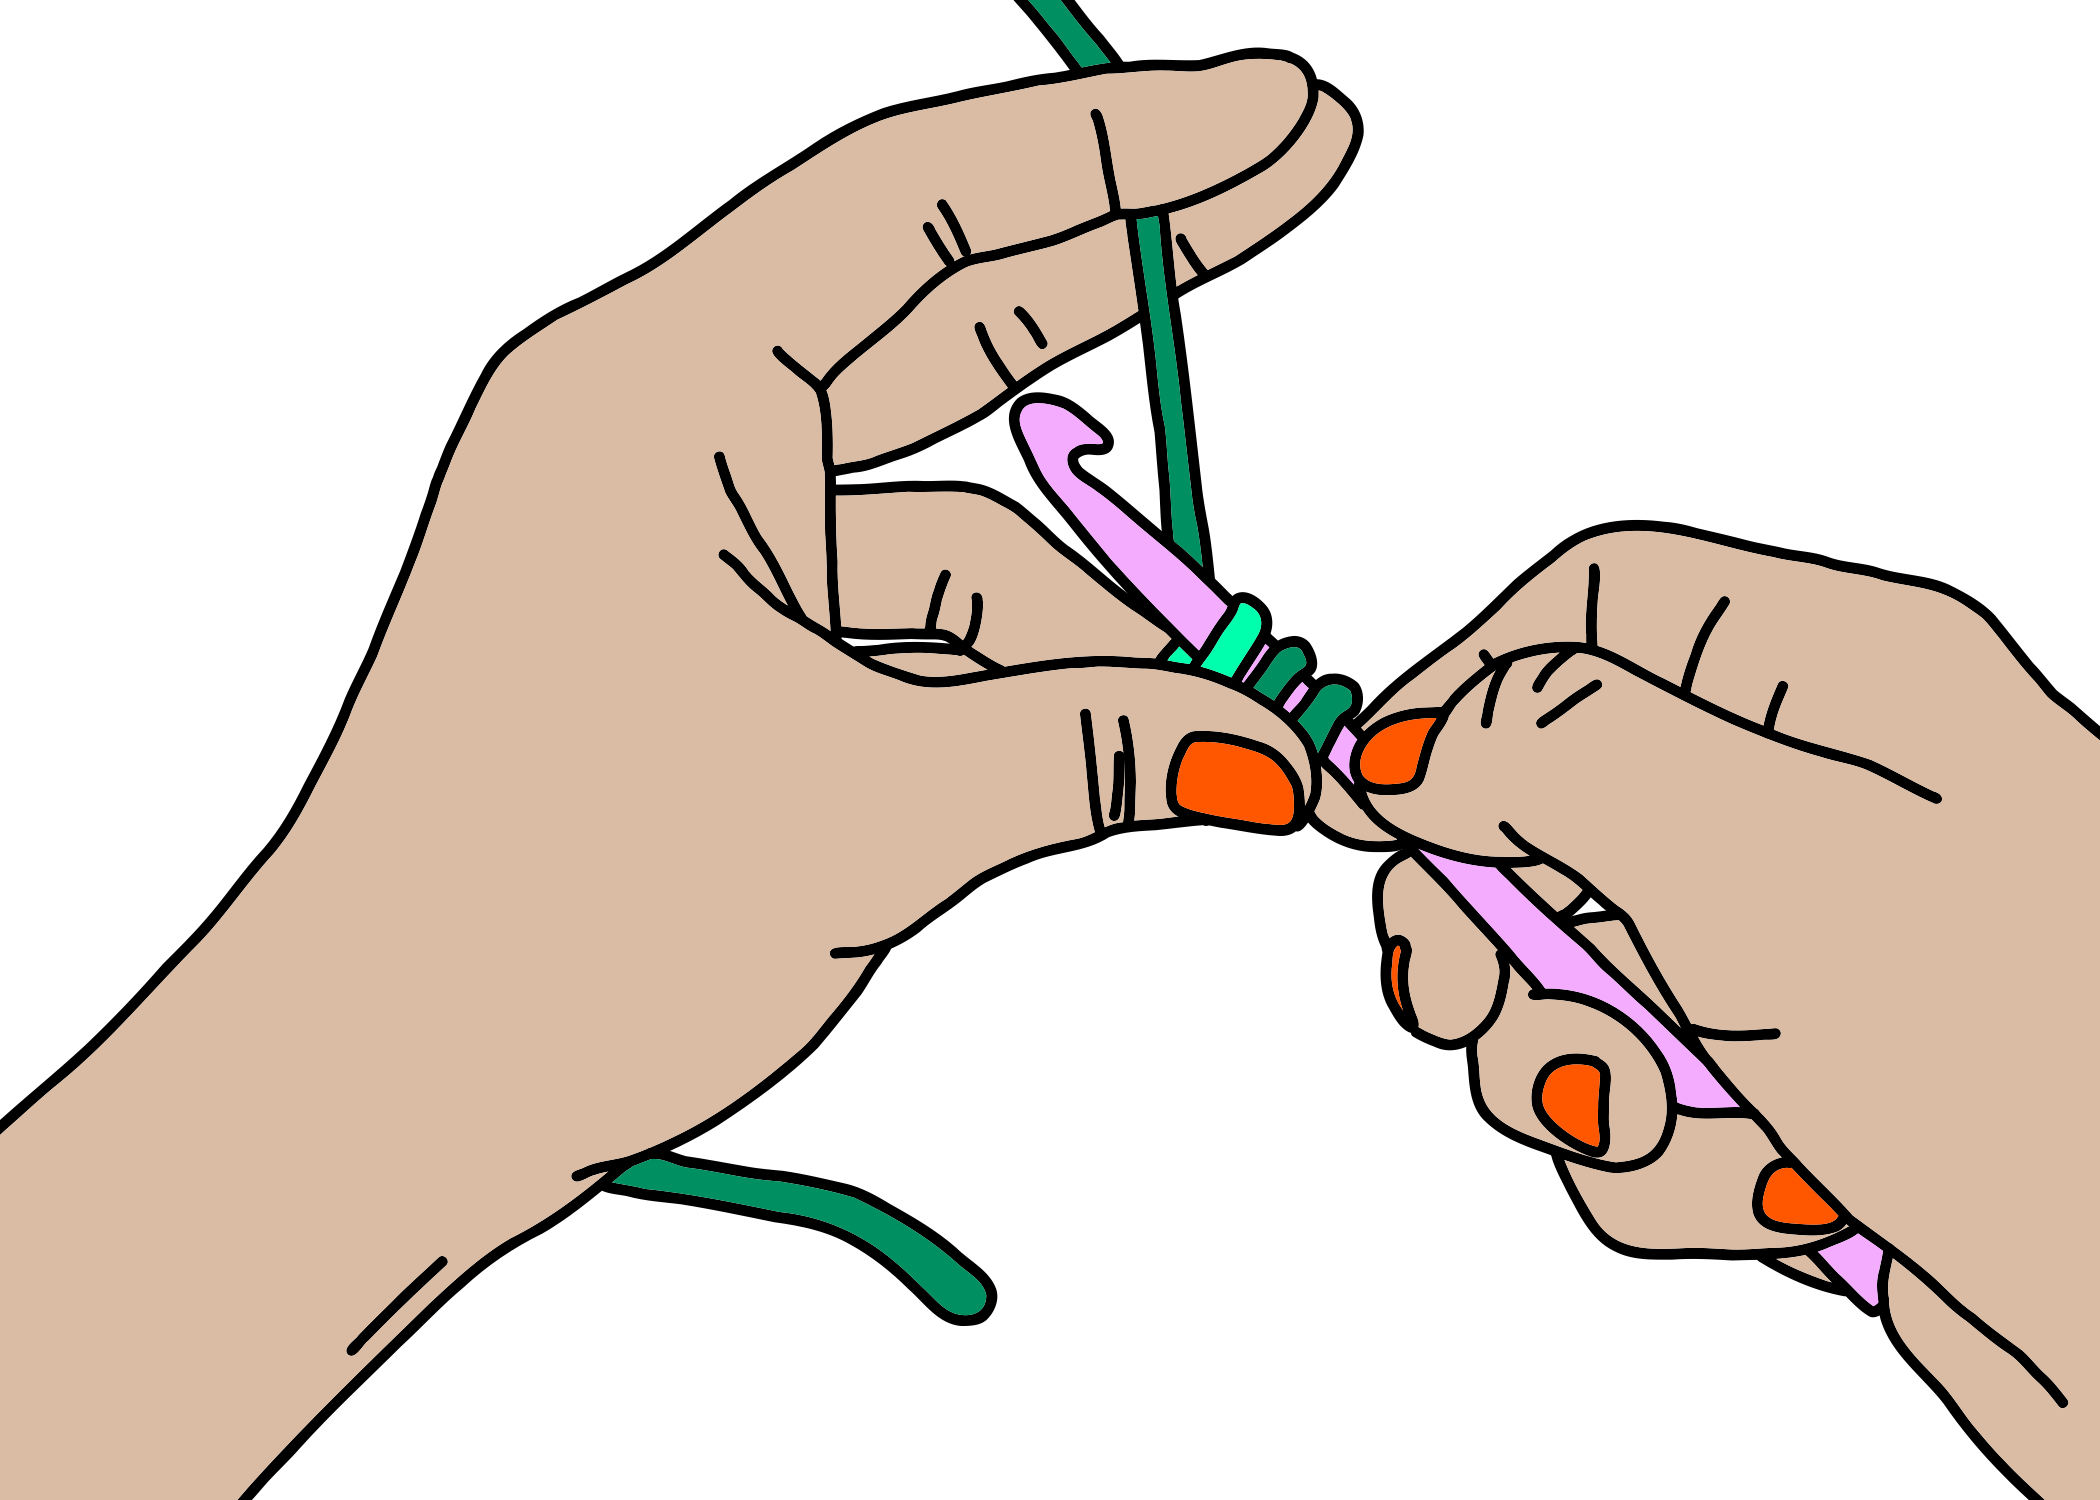
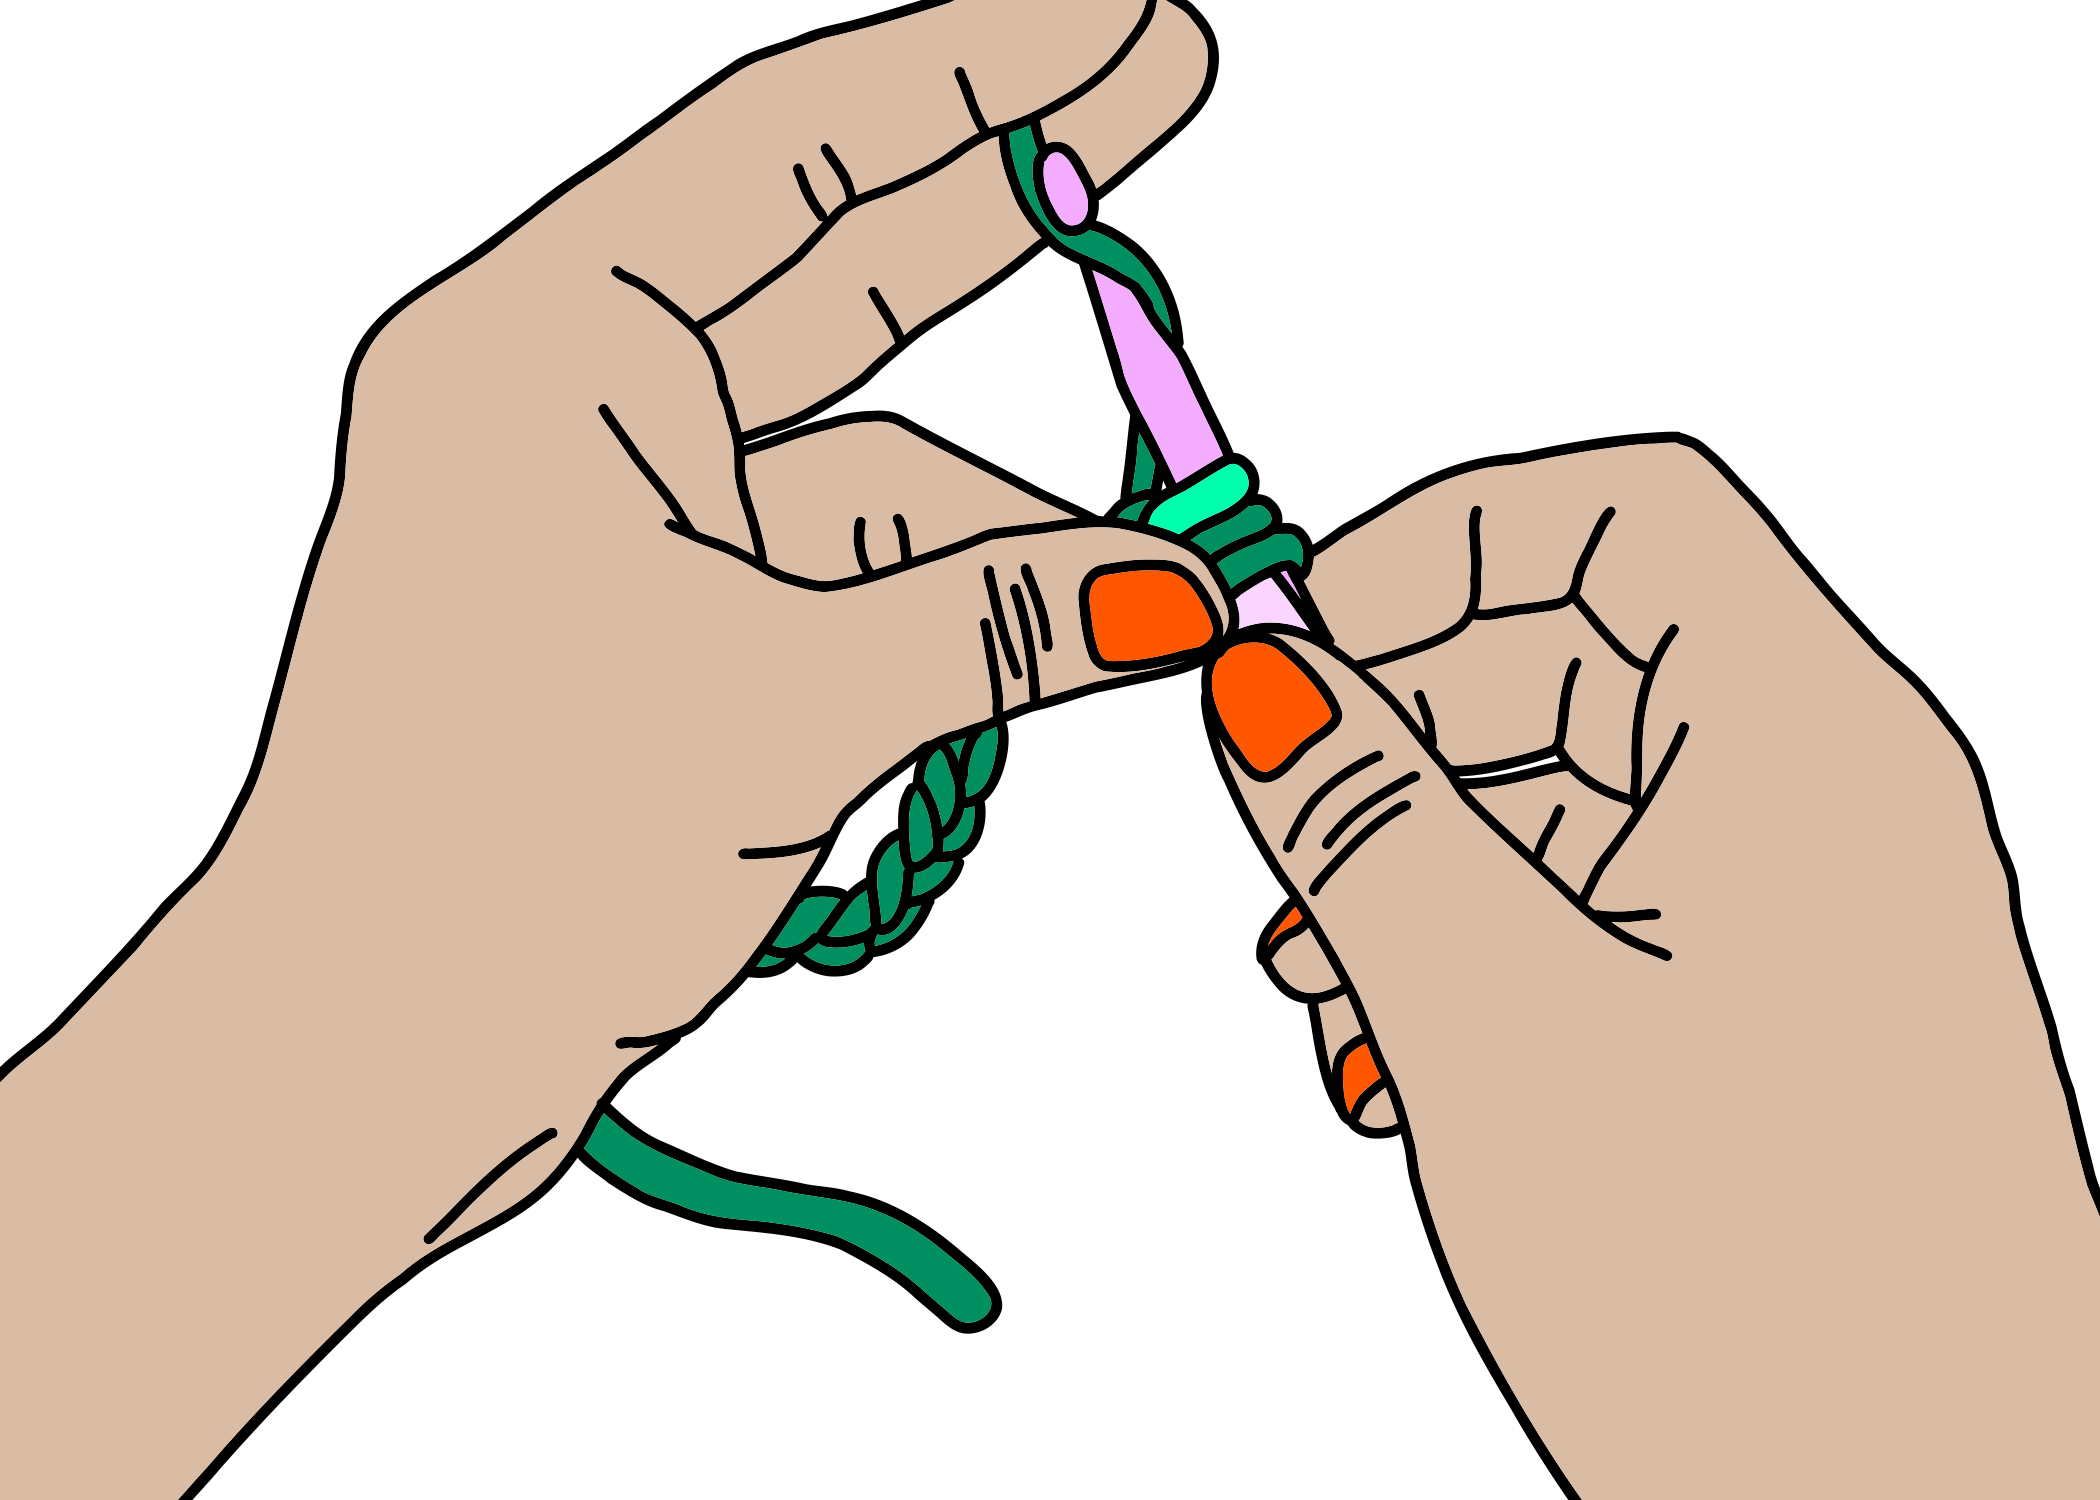
Step five: A half-double crochet (hdc)
This is where we really get going with a half-double crochet (hdc)! Another super stitch — and this one’s a three-parter, with what might feel like a million fiddly bits from start to finish. It takes a minute to make this one make sense, so be patient with yourself. Your brain and hands might learn what’s what at a different pace; give them time to catch up to each other, and you will find your flow.
In order to give you a sense of where we’re headed, here’s what the whoooole thing looks like.
Below are still illustrations for each of the fiddly bits in each of the three parts, and below those is a vid.
The first part of the hdc:
1:
Hold your row of chain stitches where it meets your crochet hook;
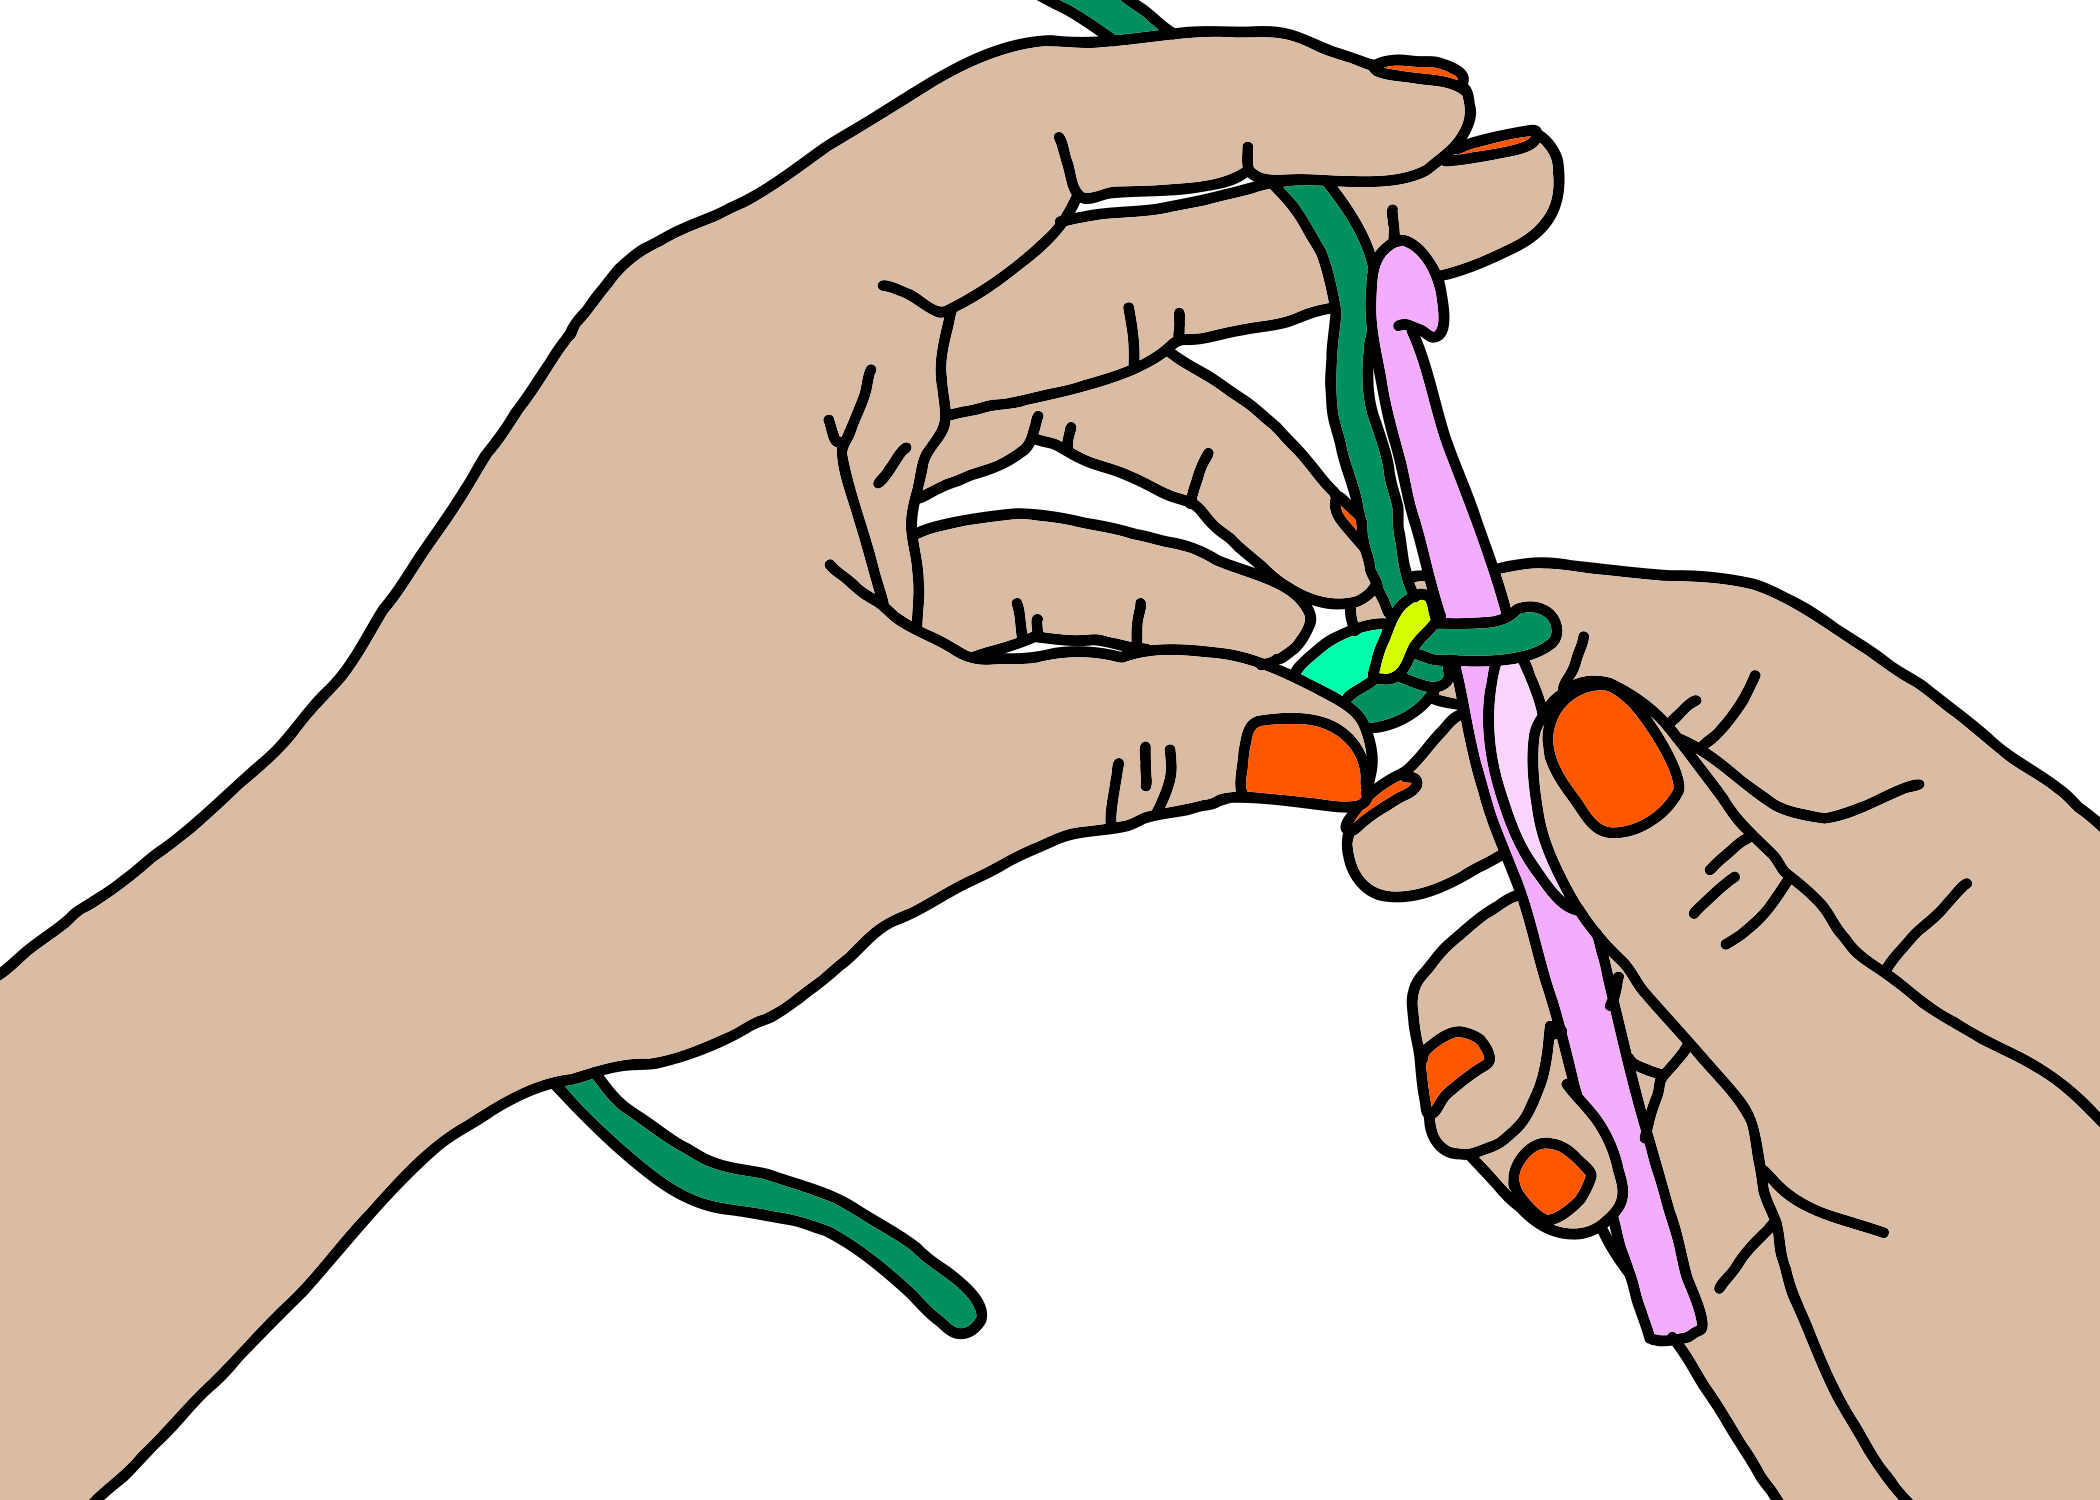
1
2:
swoop the hook to the left, in front of the working yarn;
2
3:
spin it back and to the right, behind the working yarn, which you’ll catch it with the hook;
3
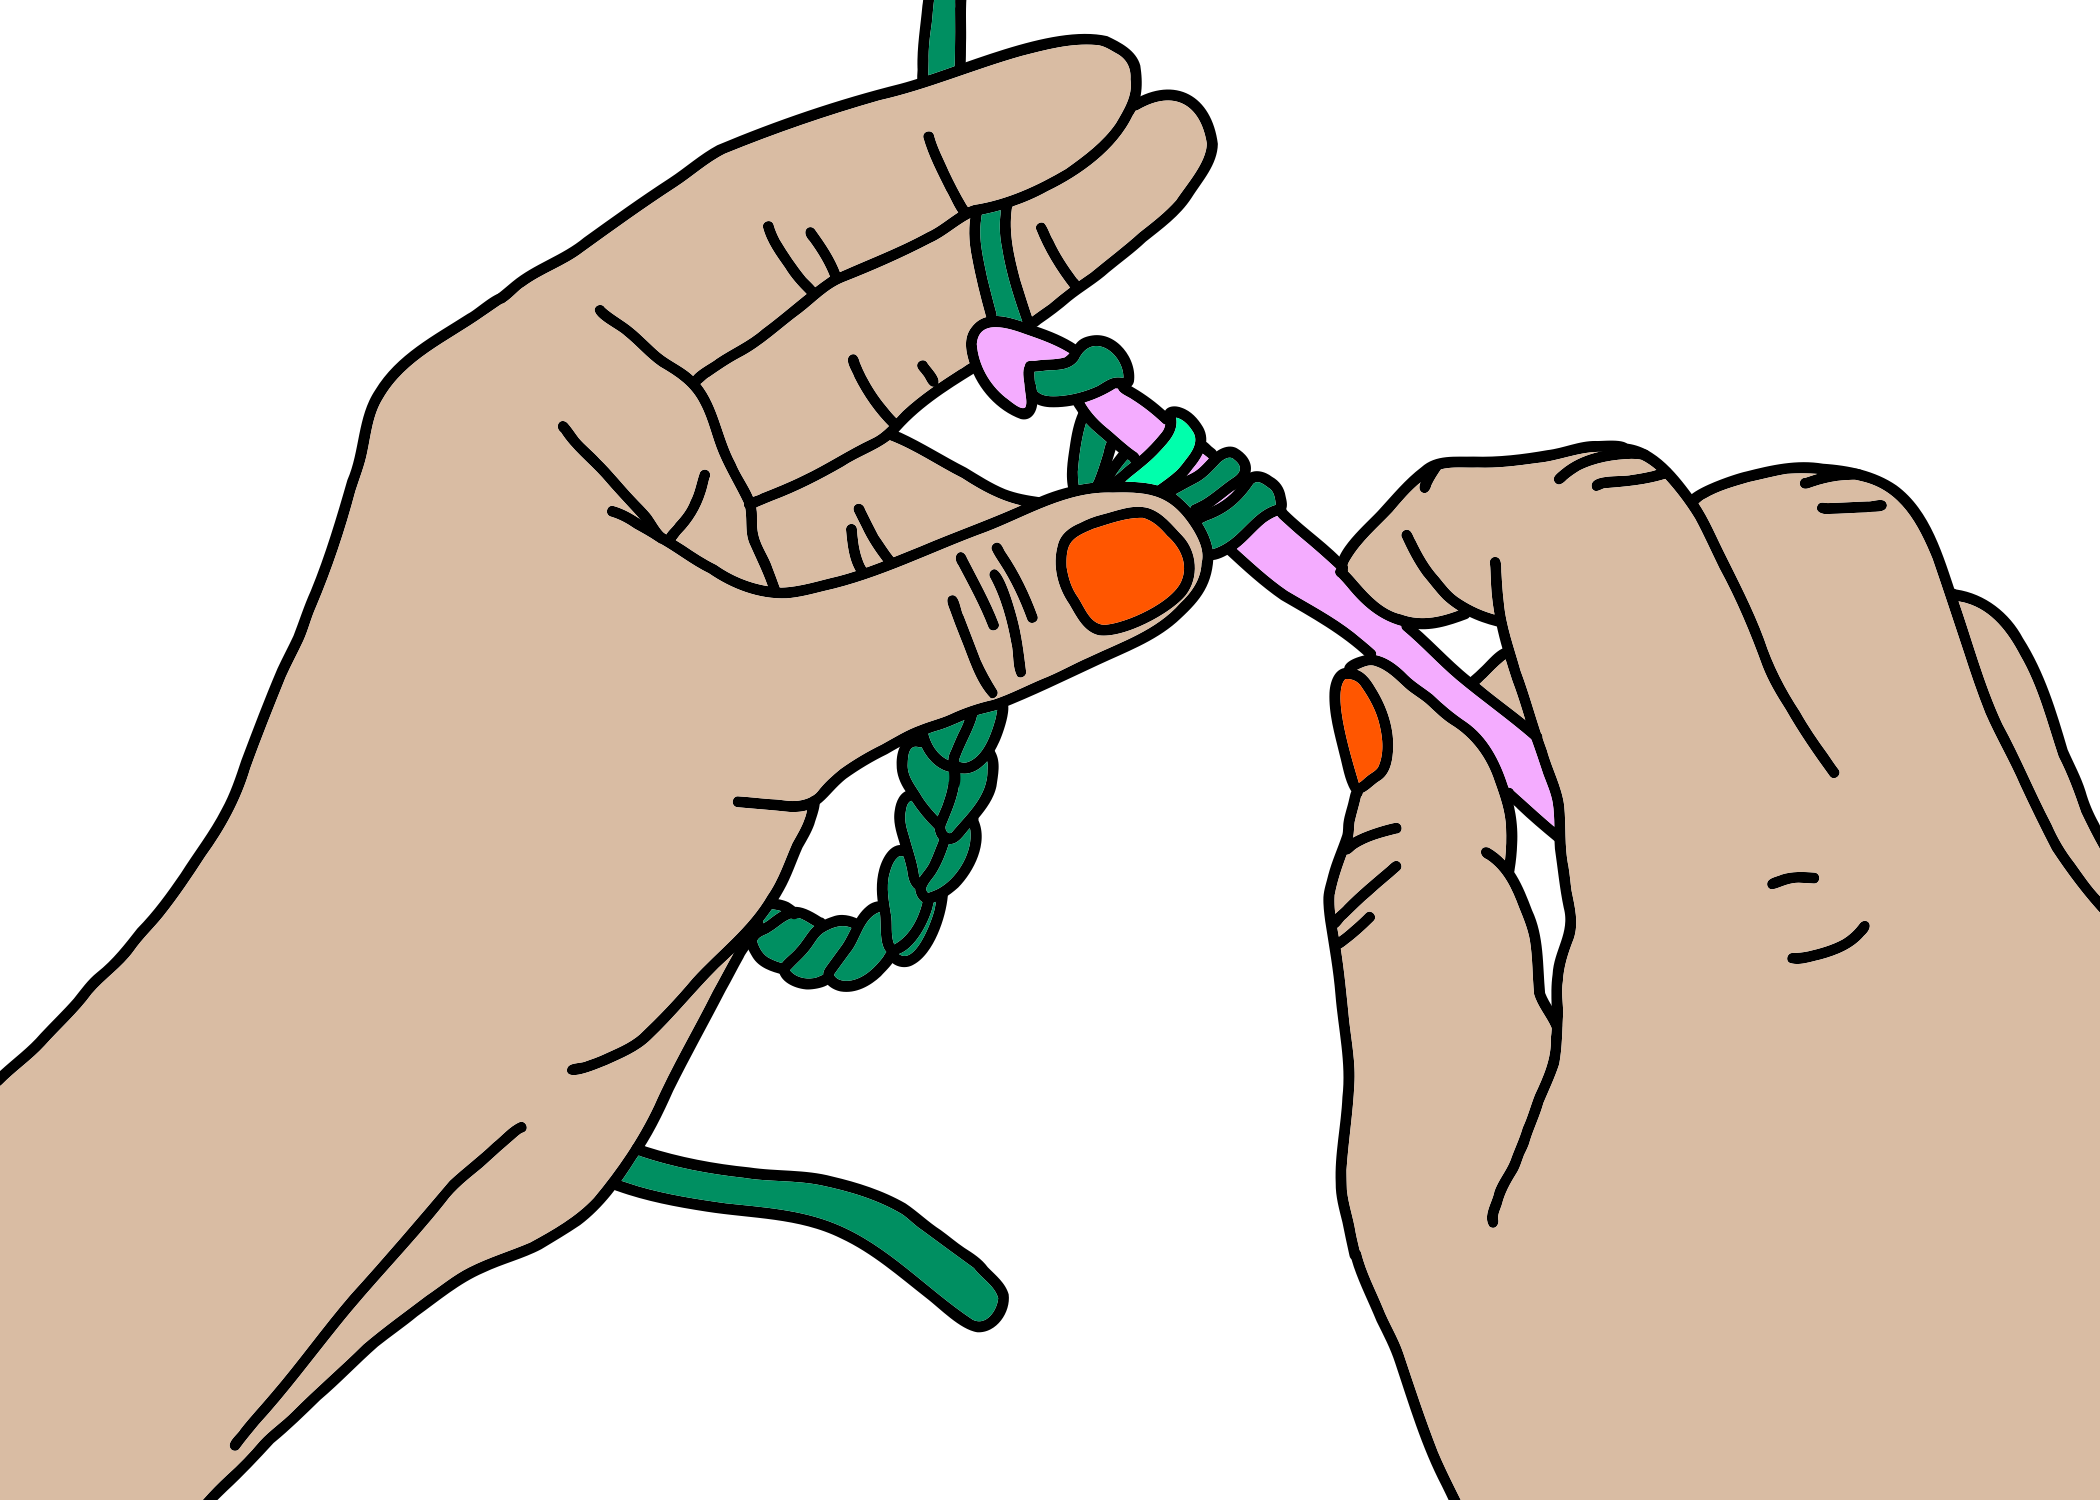
4:
bring the hook down in front of your row of stitches (but not through yet!);
at this point, you should have two loops on your hook;
4
5:
direct your hook back again, through that nearest chain stitch at end of the row;
5
6:
at this point, you should now have three loops on your hook.
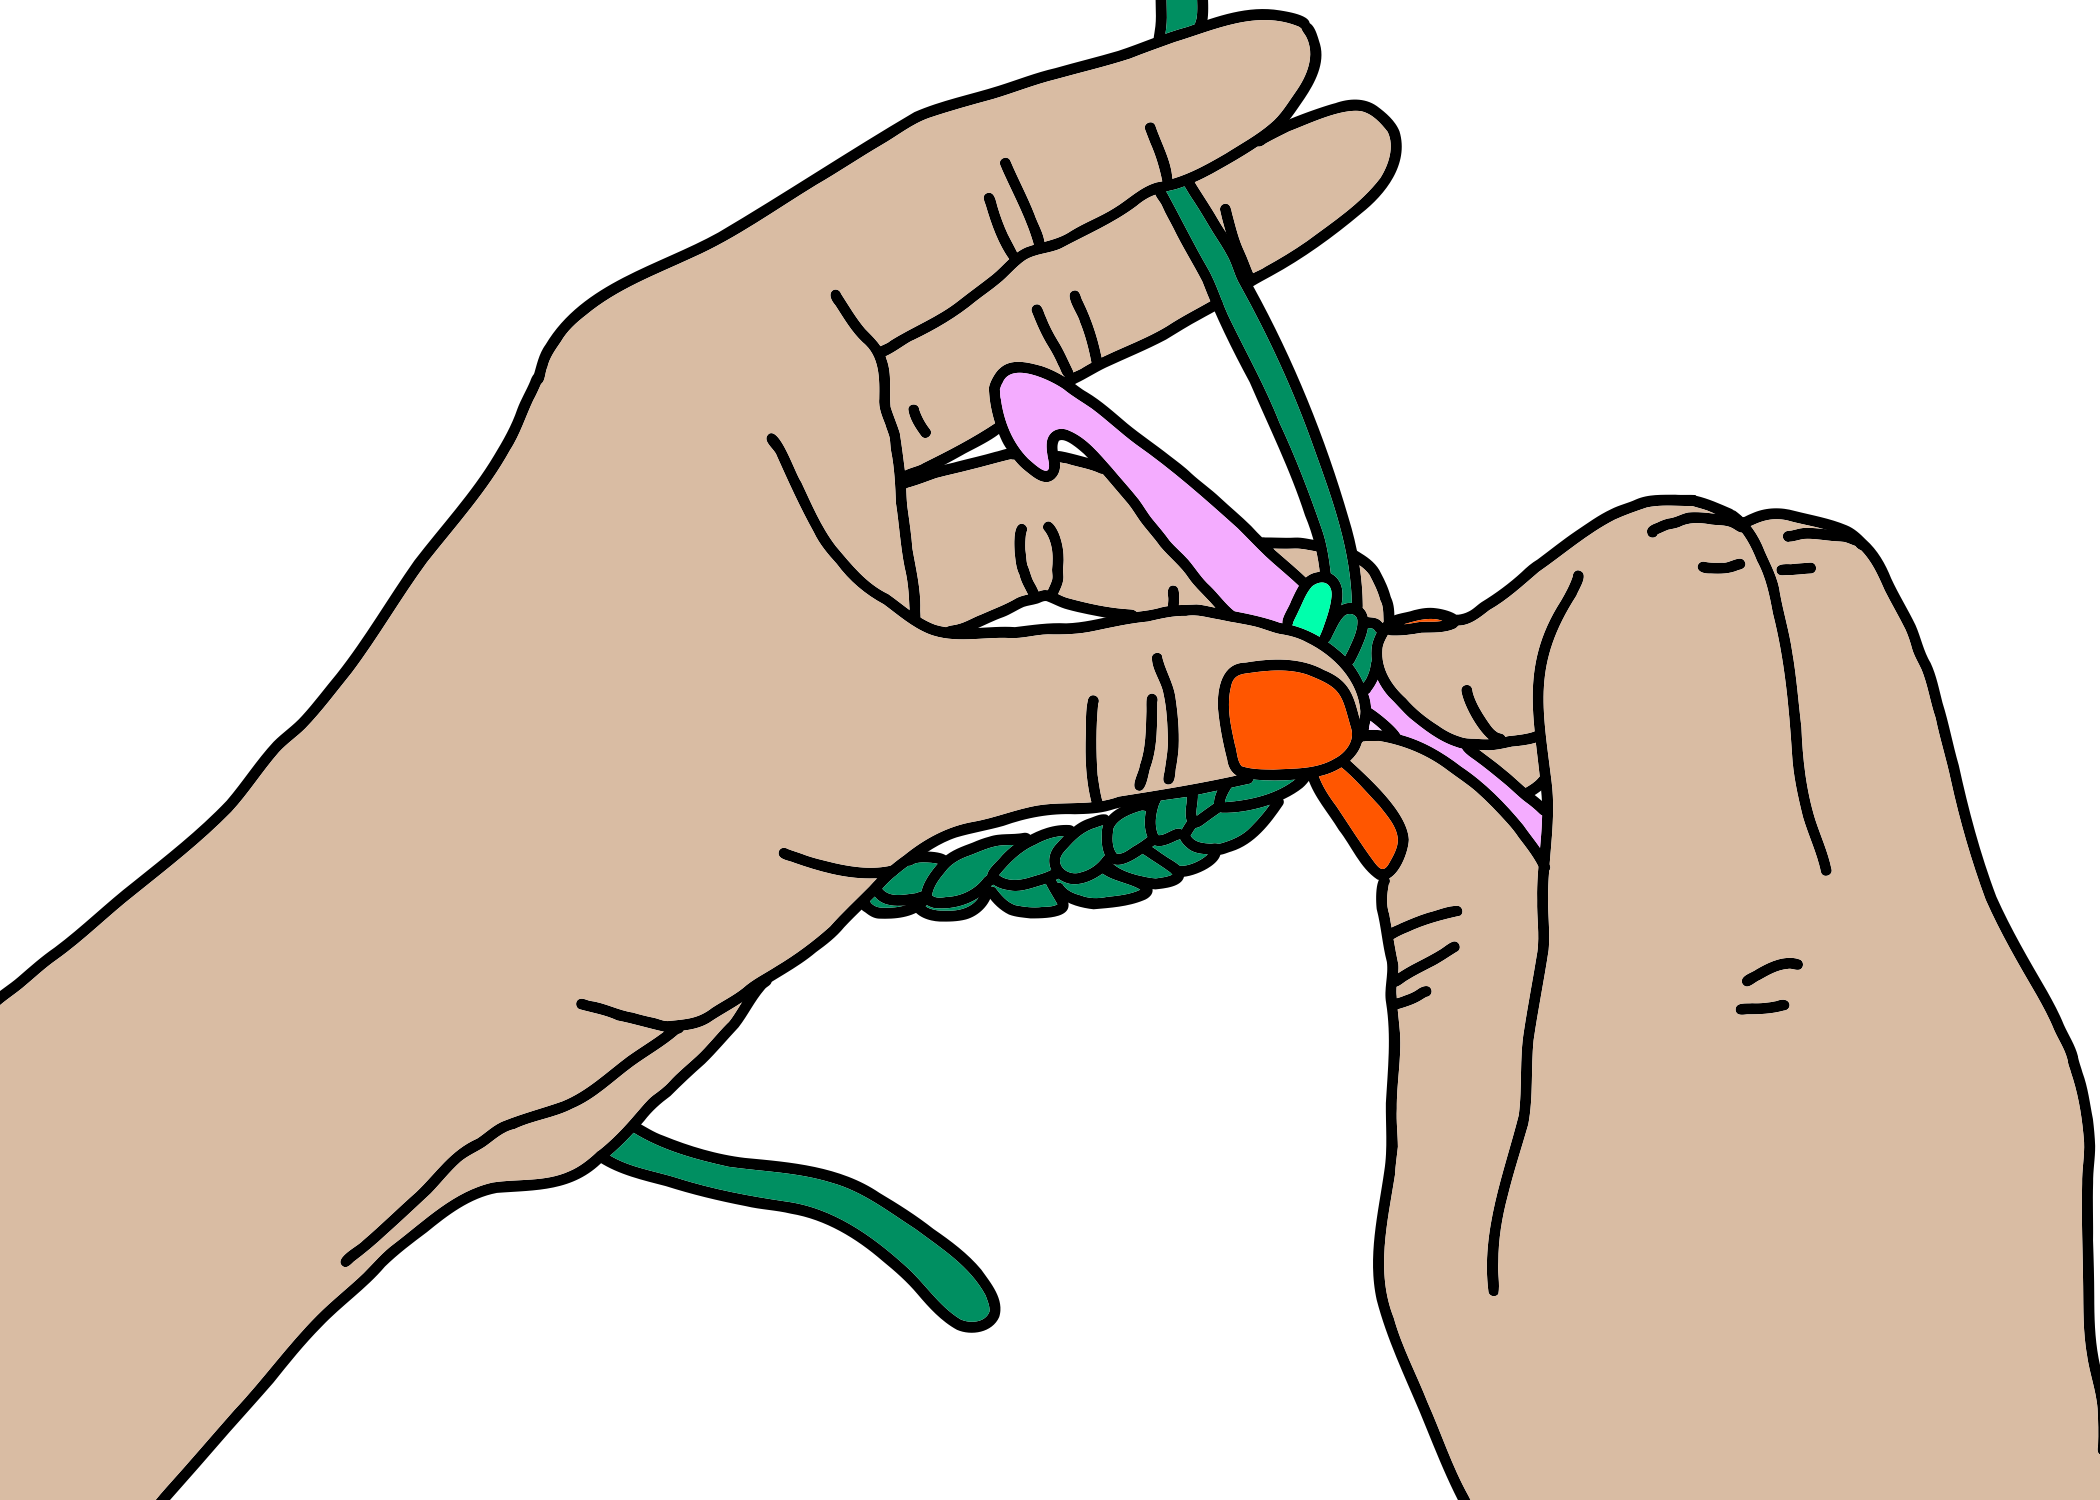
6
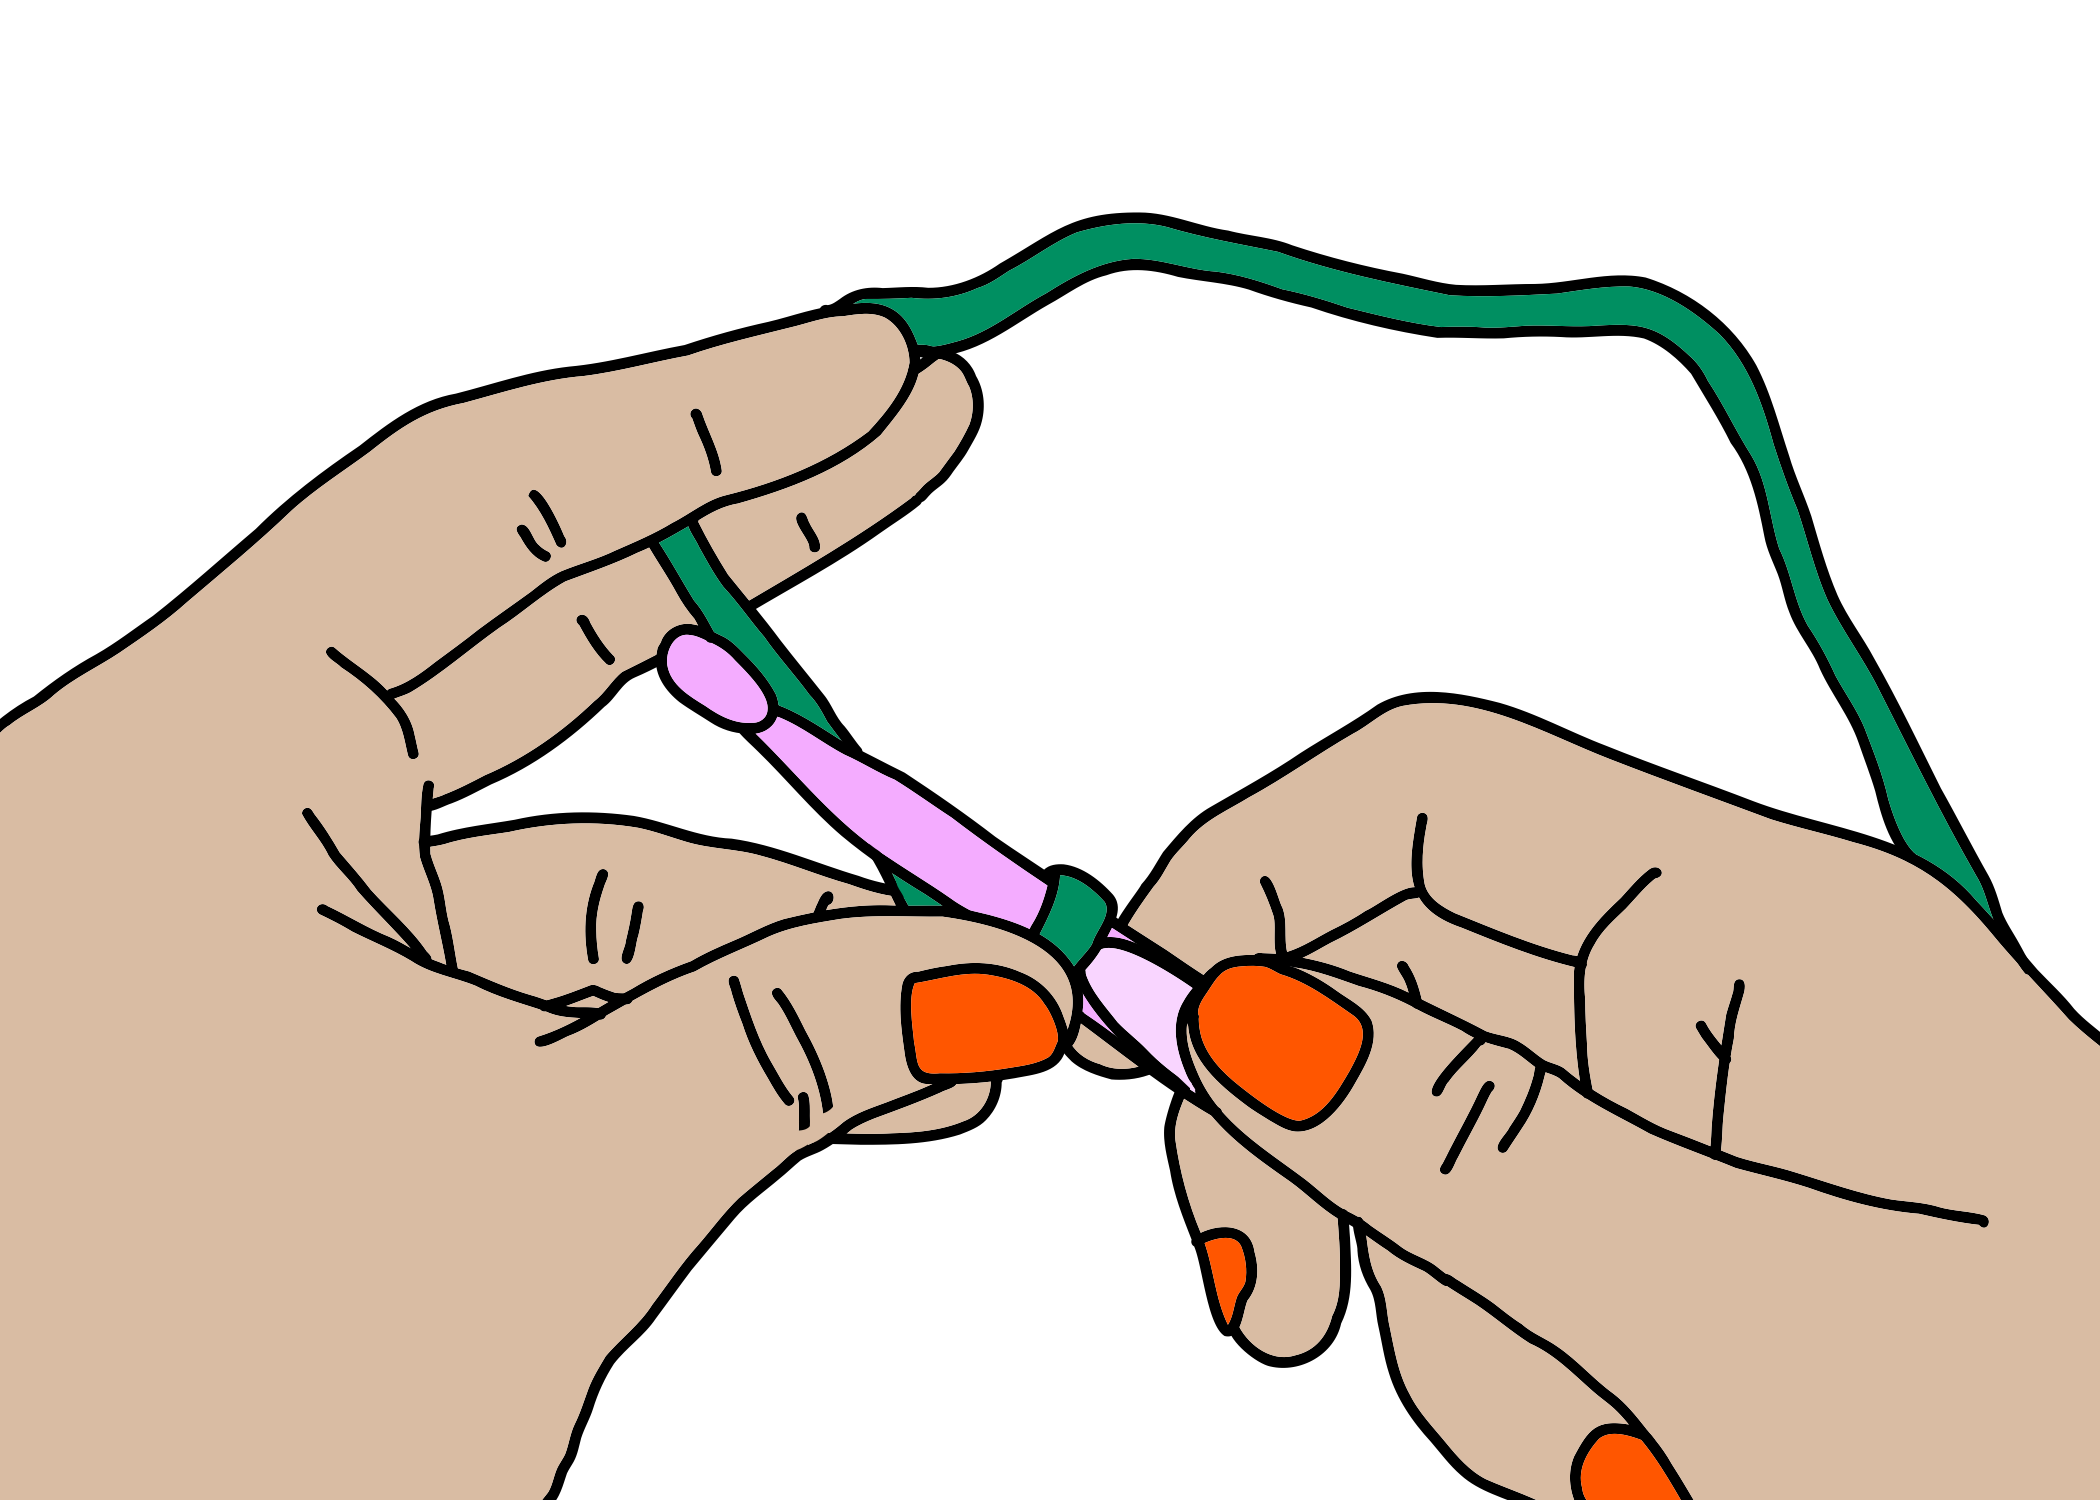
The second part of the hdc:
7:
Tilt the hook to catch the working yarn;

7
8:
pull the crochet hook (and the working yarn!) through that same chain stitch;
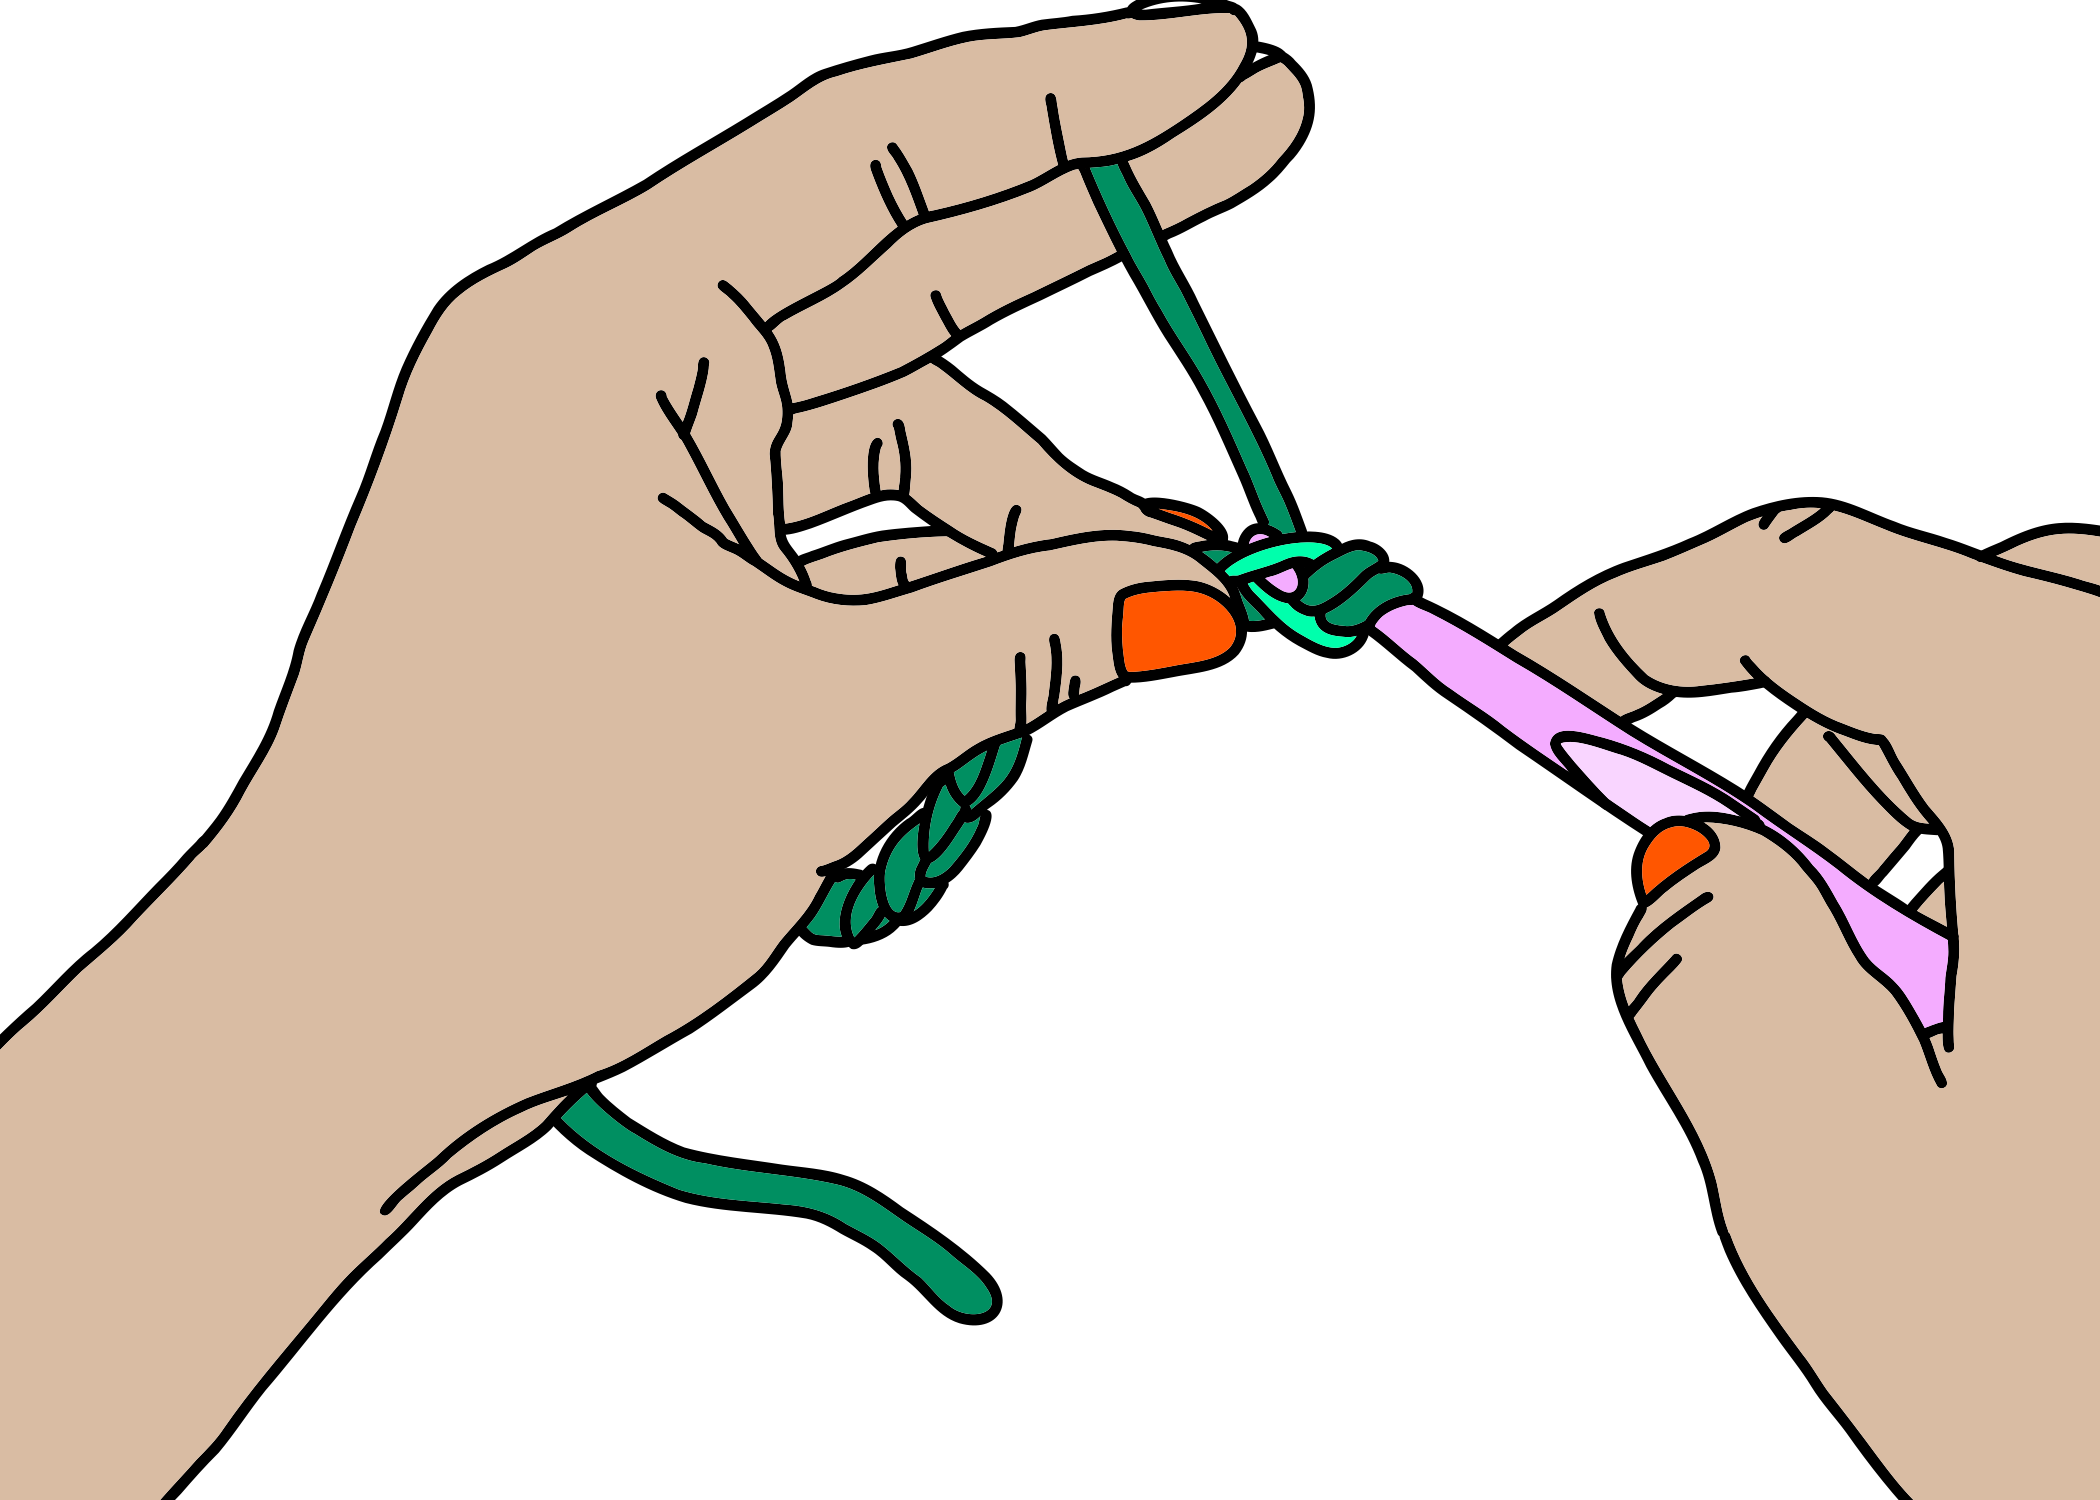
8
9:
keep pulling;

9
10:
then readjust your hook so it can slide easily through your three loops.
10
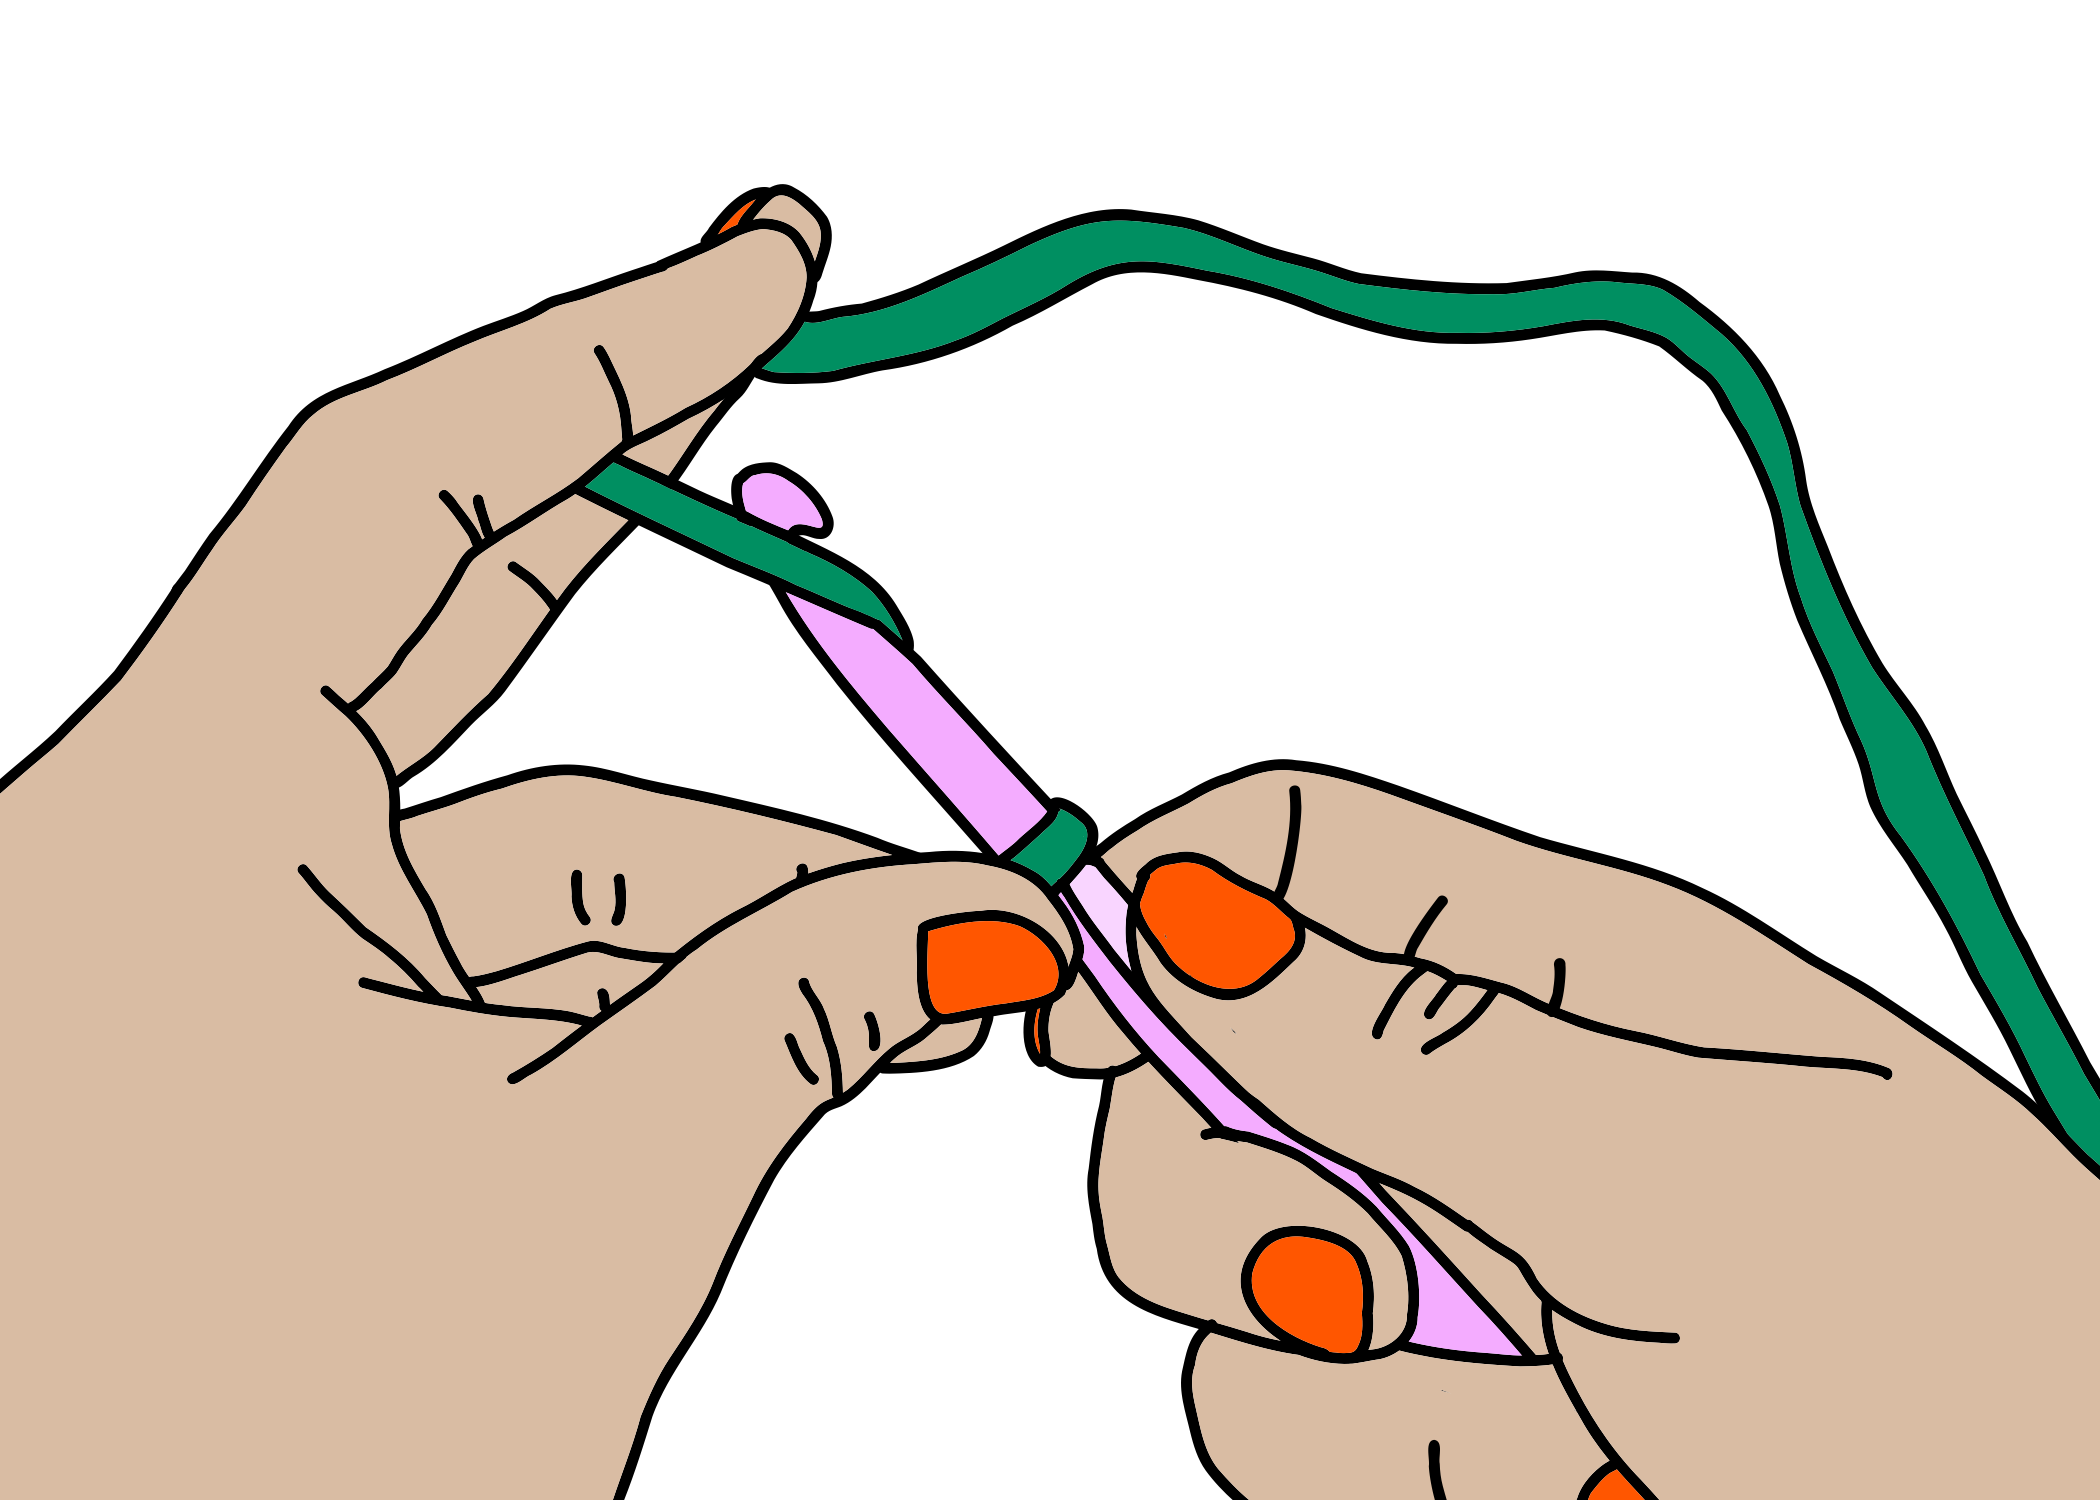
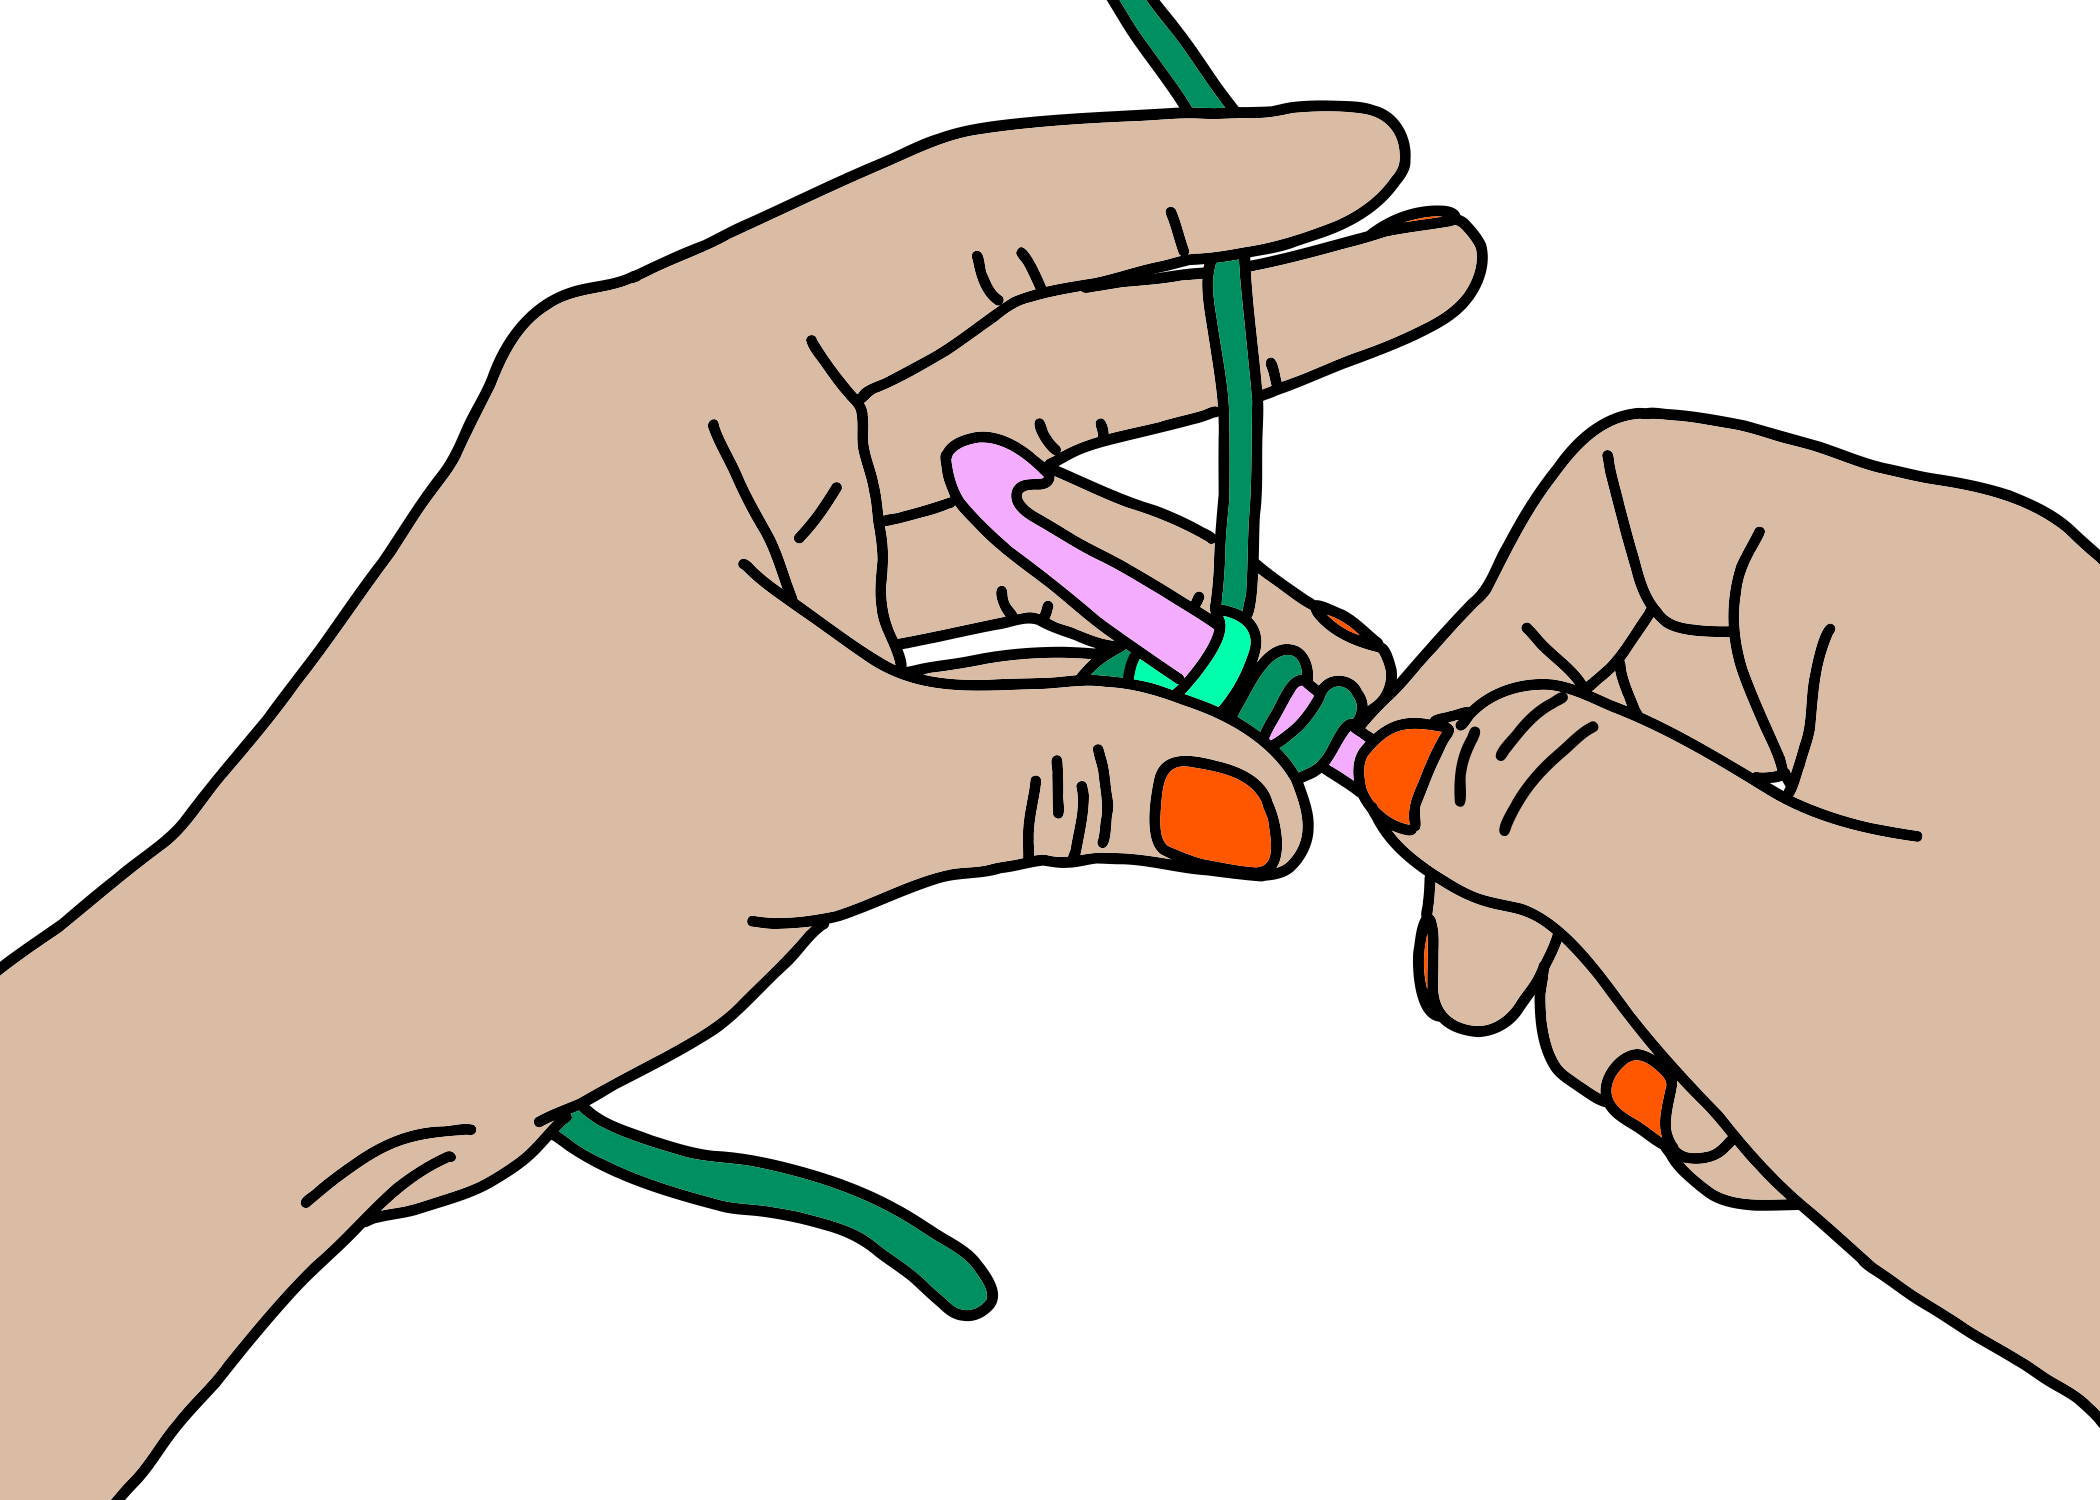
The third part of the hdc:
11:
Swoop the hook to the left, in front of the working yarn;
11
12:
spin it back and to the right, behind the working yarn, which you’ll catch it with the hook;
12
13:
slide the hook (and the working yarn!) down towards your loops;
13
14:
pull the crochet hook (and the working yarn!) through that same chain stitch;

14
15:
and THAT is a half double crochet!!

15
Here’s that vid of the full hdc.
Step six: hdc in the rest of the stitches in your row
Dropped, skipped, or extra stitches are okay! Keep going! Keep practicing!
If something feels wonky* enough that you want to start again, slip your hook out of the loop and pull the working end of the yarn. Your stitches will disappear, and you can give a tug to undo the slip knot as well.
* It’s so so so so normal for something to feel wonky, especially as you’re learning. Wonkiness is actually one of the best parts of a handmade project — a sign that the work is one of a kind.
Step seven: A single chain stitch
Once you’ve hdc-ed in the final stitch in the row, you’re going to do a single chain stitch; this will keep your border straight. If you forget to chain stitch here, you’ll see the long edge of your scarf start to angle in on the sides. (Which is also okay! Avant garde!)

Step eight: Swing the row around
We’re always going hdc from right to left, so we need to swing the row around before we can start hdc-ing again.

Step nine: Repeat (and repeat, and repeat…) until your scarf is long enough
This is where you get to enjoy the blissfully mindless and mindful repetition of crochet. You’re going to:
hdc in all the stitches in your row (from step five and step six);
once you’ve hdc-ed in the final stitch in the row, do a single chain stitch (from step seven);
then spin your row around (from step eight).
Keep going, and keep going, until your scarf is as long as you’d like. You’re soooo close!
Step ten: Snip and tuck your working yarn
Almost there! Crochet to the end of your final row, then;
snip the working yarn with a few inches to spare
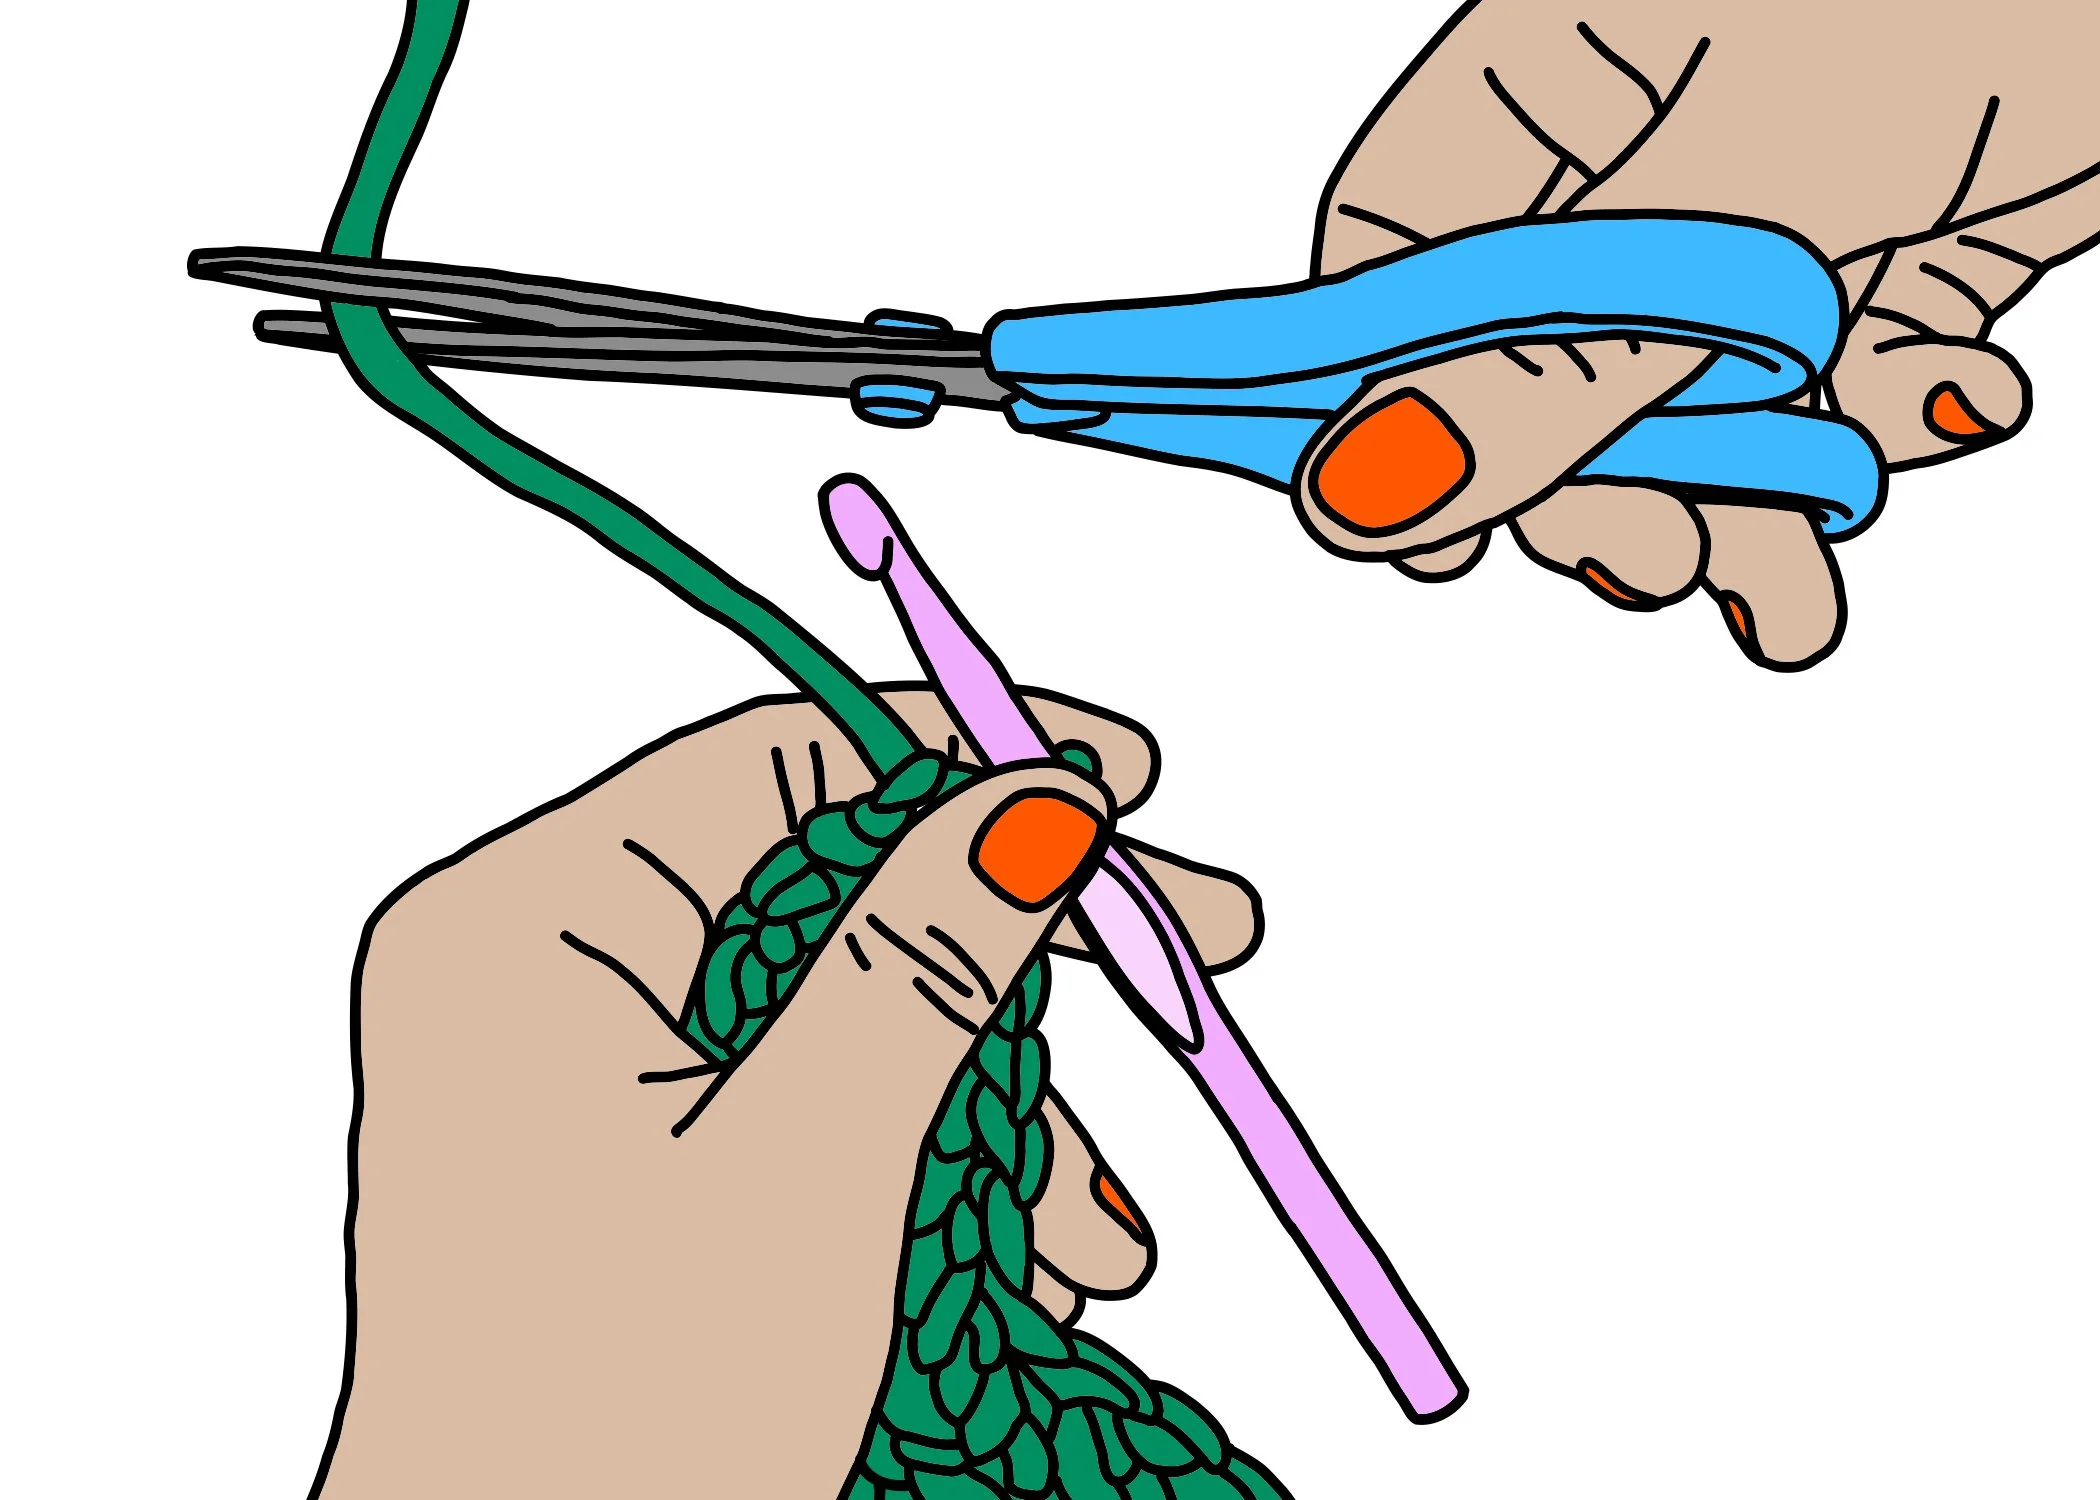
and zoot the end out of the loop.

Tuck that end — and the tail on the other end, when you started — in amongst the stitches.
Step eleven: Wear with pride!
Wrap yourself in your beautiful, one-of-a-kind scarf! Admire your handiwork. Take selfies and send to pals. Cross your fingers for cold weather.
Start planning your next crochet project!!
Big huge thank you to my lovely pal Ellen for testing out this DIY!
